Setting Up A Payment Schedule Template
This feature allows you to set up default payment schedules that can easily be added to events for clients to reference and have automatica emails sent to clients as reminders.
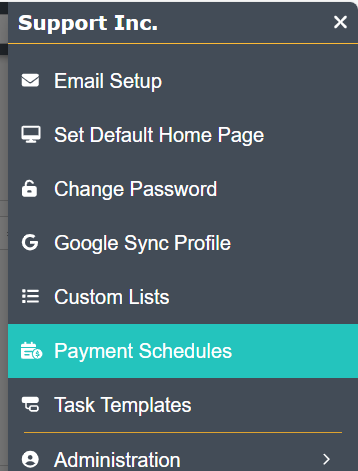
The Payment Schedules option is located in the drop down menu under the User Icon that is located in the top right corner of TPP.
NOTE: This feature is only available to assigned Admins on your TPP account.
Add New Payment Schedule
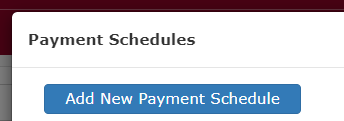
Once the Payment Schedules window pops up, select Add New Payment Schedule to begin.
This will prompt you to name the new payment schedule, so it can easily be saved and reused in the future to add to events.
Note: Multiple payment schedules templates can be created to use based on the event profile (i.e. Weddings vs Social vs Corporate)
All Settings are unique to each schedule and can be changed independently.
Adding Scheduled Payments/Deposits:
Next, you can adjust the first payment in the sequence:

- Type
- Deposit – The first payment marked as a Deposit in the sequence will override any standard default deposit (Profile & preferences > Event Financial Defaults) already applied to the event
- To keep your default deposit intact, do not mark any Scheduled Payments as Deposit
- You can set up multiple deposits in the sequence, but only the first listed deposit will override the default on the event
- Deposit – The first payment marked as a Deposit in the sequence will override any standard default deposit (Profile & preferences > Event Financial Defaults) already applied to the event
- Amount
- $: Enter a flat rate amount for the deposit/payment
- %: Enter a percentage to calculate against the overall event total
- When
- Days Before Event Date: Set the deposit/payment due date a specific number of days before the event
- Days After Event Date: Set the deposit/payment due date a specific number of days after the event
- Days After Event Booking Date: Set the deposit/payment due date a specific number of days after the event is originally created in TPP
NOTE: “Booking” in TPP is defined as the date the event was originally created, not the date it was confirmed by your team
- Notify Client: Your client can receive an automated email notification about their payment being due
- See Email Notification Message section for more information
- Final Payment: Assumes the Remaining Balance of the event, and subsequently grays out any financial selections.
- + New Payment: Click this to add more payments to the sequence for scheduling
NOTE: Make sure to hit SAVE after making any updates to retain changes made.
Email Notification Message
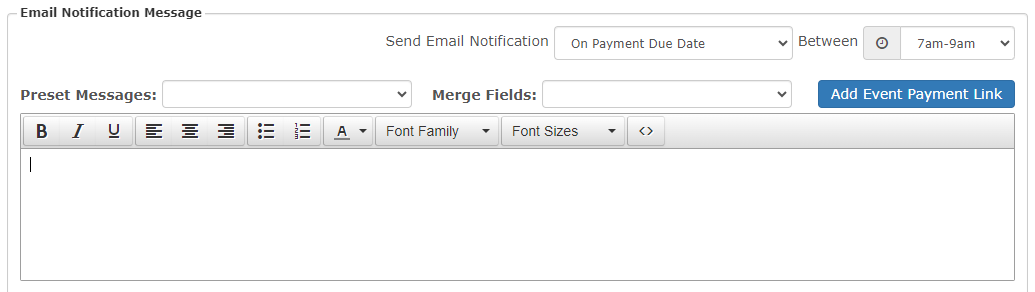
Create a custom email to automatically be sent to your client as a reminder to submit payment. You can use Merge Fields or your existing preset email templates to make things a bit more personal.
NOTE: Email reminders will be sent ONLY if Notify Client is checked for the deposits/payments you scheduled in the previous steps and the client assigned to the event has a valid email.
- Send Email Notification
- On Payment Due Date – Sends the notification on the exact date the payment is scheduled to be due
- Days Before Payment Due Date – Sends the notification a defined number of days before the payment is scheduled to be due
NOTE: You can quickly send the payment again from the event if it is not paid by the due date (covered more within the Event Financials section)
- Between
- Clock Icon: Allows you to set the time window when all notifications for the day will be sent
Why are there certain time windows? Because these payments are being sent automatically, our goal is to give you a degree of certainty as to when this task has been completed. As a result, we offer a couple of specific windows of time to provide you with a sense of clarity as to when these items will be sent.
Example: If you have the schedule set for 7am-9am, you can rest assured that all email notifications due today will be sent by 9am at the latest(and likely earlier, but does depend on the volume of automated payments being sent through the queue).
- Preset Messages
- Drop down list: Use any of your existing email templates from Customs Lists > Email Body Messages
- Merge Fields
- Drop down list: Choose from multiple data points pulled from your client’s event to customize the outgoing email
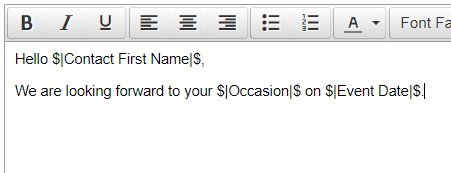
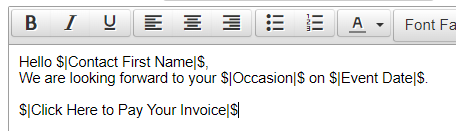
-
- In the example above, we have added merge fields to automatically add the related client’s first name, occasion, and event date from the event where the schedule is added
- Add Event Payment Link
- Blue Button: Clicking the button will add a code that will be converted to a clickable link once emailed to your client
- Just click to put your cursor in the body of the message wherever you want the payment link to appear.
- This is the same message from above with the payment link added
- Just click to put your cursor in the body of the message wherever you want the payment link to appear.
- Blue Button: Clicking the button will add a code that will be converted to a clickable link once emailed to your client
Click Save to complete your new payment schedule template.