You can easily email payment links to your clients for them to pay online!
Sending The Link
When you generate a Proposal, Invoice, or Contract to send to your client, there are two options on the Email Report screen:
- Send payment link (this event): Send a payment for the specific event you are currently working in
- Send payment link (all published events): Send a payment link for all events for the current Contact that are published
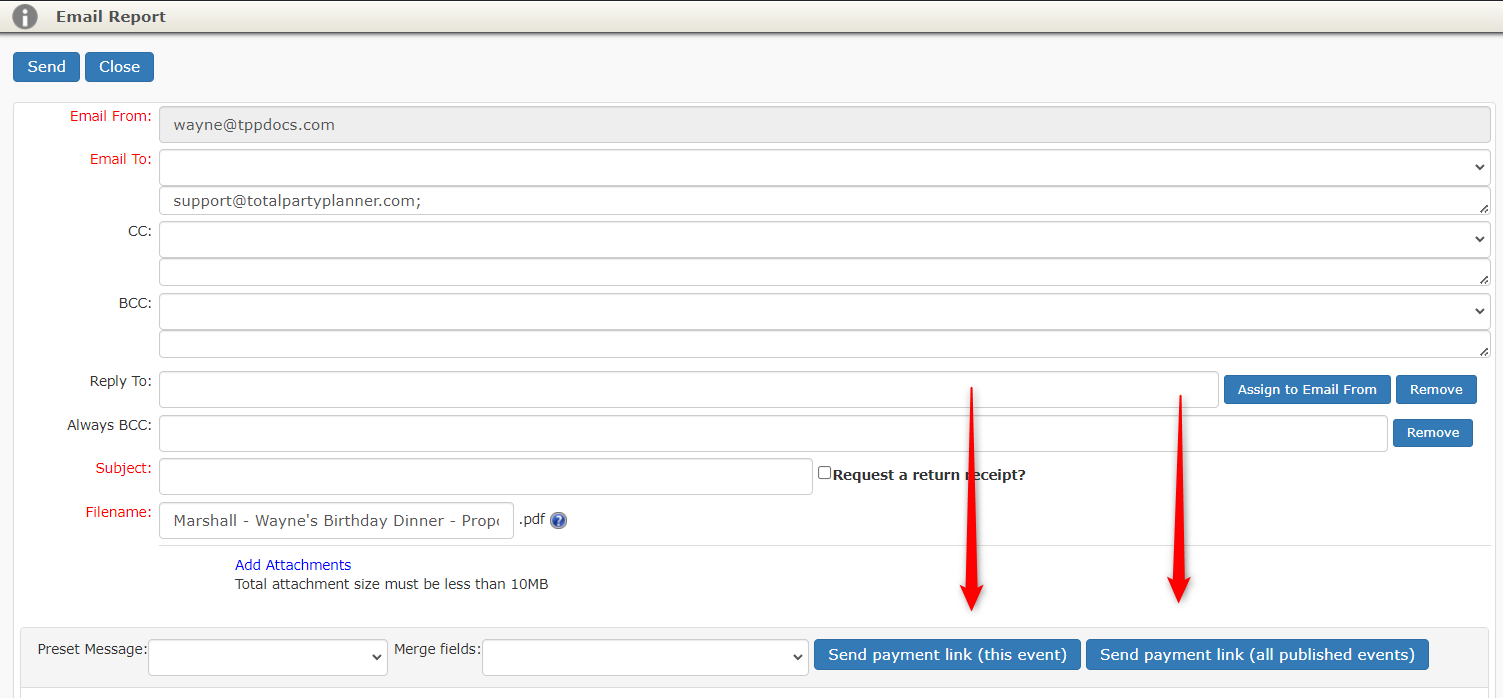
This will insert a line of code into your email that appears to you like this:
Send payment link (this event) : $|Click Here to Pay Your Invoice|$
or
Send payment link (all published events) : $|Click Here to Pay Your Invoices|$
When received by your client it will have been converted into a clickable link and will appear like this:

NOTE: Any event where you email with the option of Send payment link (this event) will automatically be published when the payment link is sent. Alternatively, For Send payment link (all published events) you will want to ensure all events you want to appear in the portal are manually published.
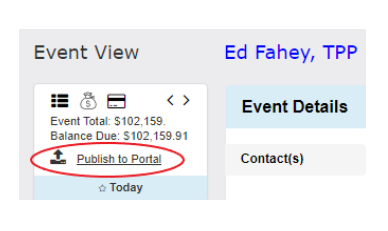
Publishing an Event
You can pick and choose what events you want to send to the client for payment. Sending a payment link that allows your client to pay for multiple payments at once simply requires you to publish them so they are seen in the payment portal.
To publish an event simply open the event(s) you want to appear in the payment portal and click Publish to Portal in the upper left corner:
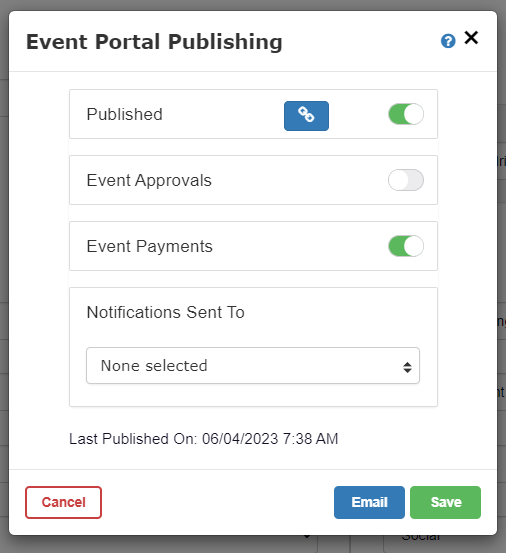
This will open the Event Portal Publishing window. Click the Event Payments toggle to on, click Save, and now the event will appear when you email the Send payment link (all published events) link.
Client Payment Portal
Once your client clicks the link you emailed, it will open the Payment Portal:
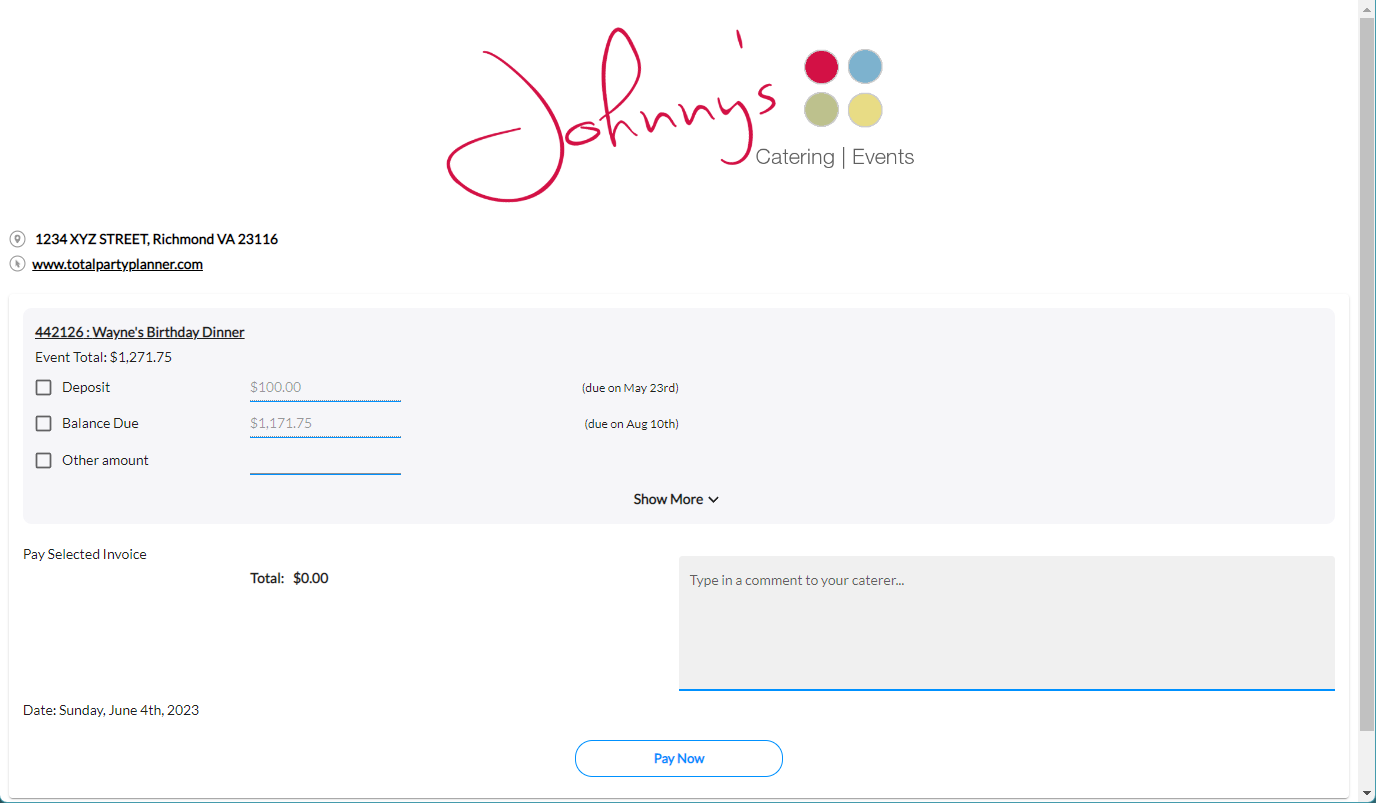
Payment Amount
Depending on your TPP Pay settings, the client can pay:
- The full event balance by checking the first box
- Partial Payment* towards balance of the event by checking the second box and editing the amount they want to pay
Once they have chosen the amount to pay, they would click Pay Now to proceed
TPPpay Hosted Payment Window
The same window your team uses to add payment in TPP will pop up for your client.
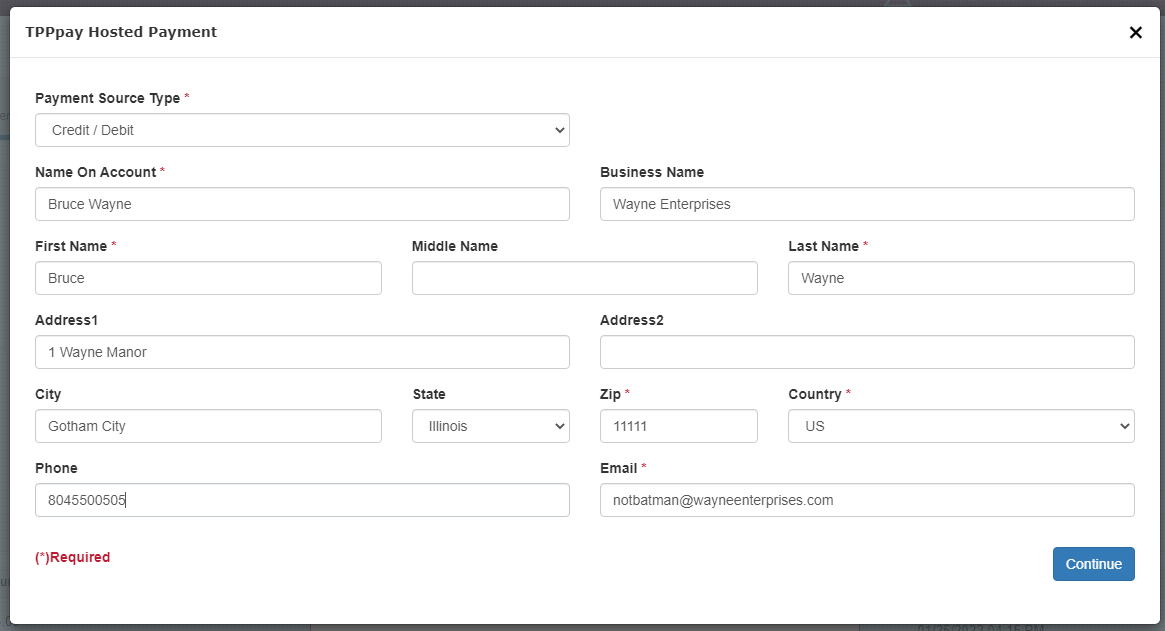 They will choose Credit/Debit or ACH/eCheck in the Payment Source Type drop down

- They will enter their billing information for payment method
- Note: Required fields are marked with an asterisk:
- Name On Account: Automatically populates as the contact name from the event
- First Name: First name on the payment method being used
- Last Name: Last name on the payment method being used
- Zip: Payment method billing zip code on file with issuing bank
- Country: Payment method billing country on file with issuing bank
- Email: Email address for receipt
- Note: Required fields are marked with an asterisk:
- Click Continue to add the credit/debit/ACH/eCheck information
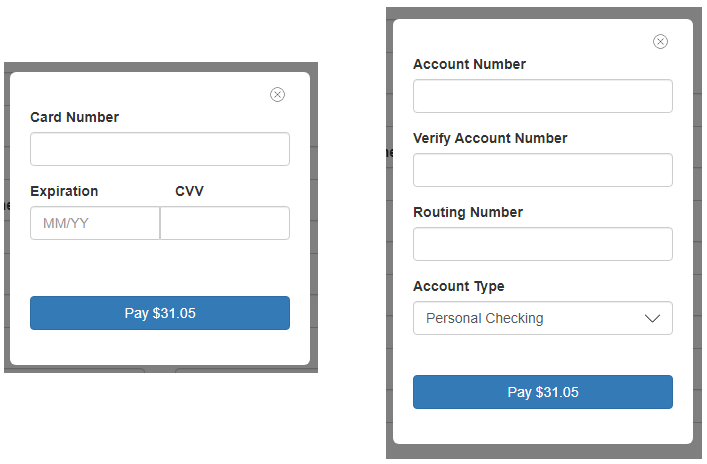
Once they have entered this information, they will click the Pay button and the payment will be submitted.
Your client will receive a receipt for the payment to the email address entered on the TPPpay Hosted Payment screen.
Based on your TPP Pay settings, specific members of your team will also receive a notification of the payment via email.
The payment will be automatically added to the correct event and deducted from the event balance.
