Creating an Event
- Select Event | Add New Event from the main toolbar.
- Alternatively, you can go to the calendar view and click New Event on the day you want to create the event
Creating an Event Pop-up Window
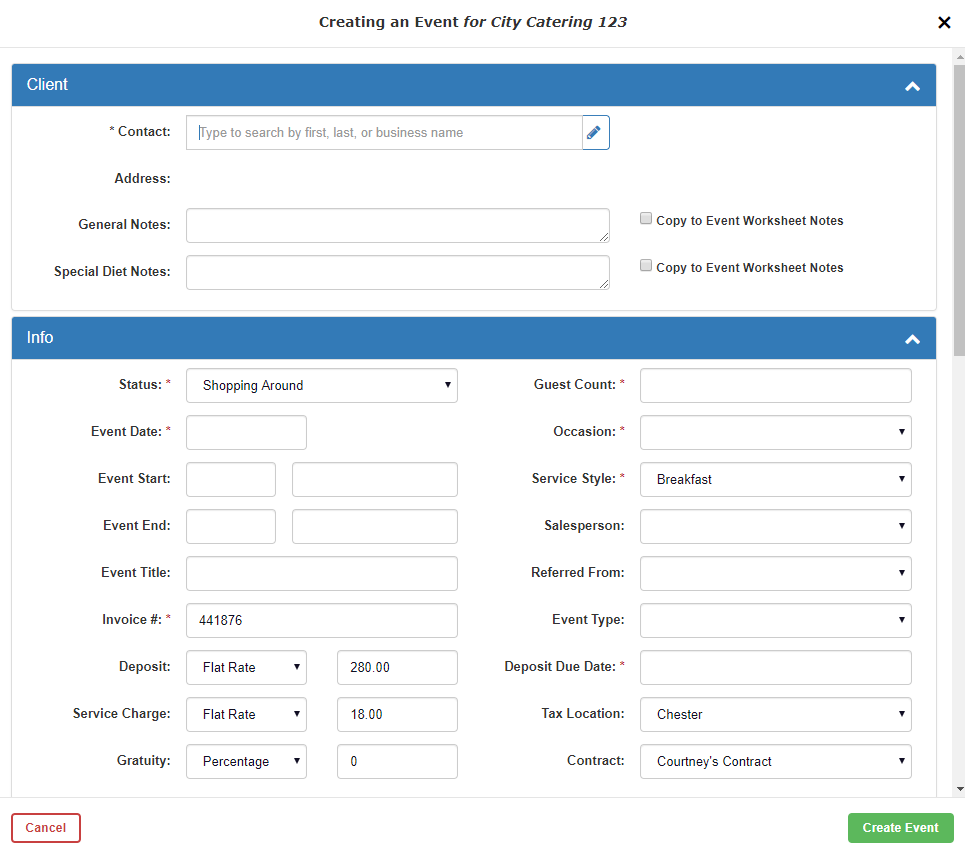
Client
Also referred to as Contact/Lead
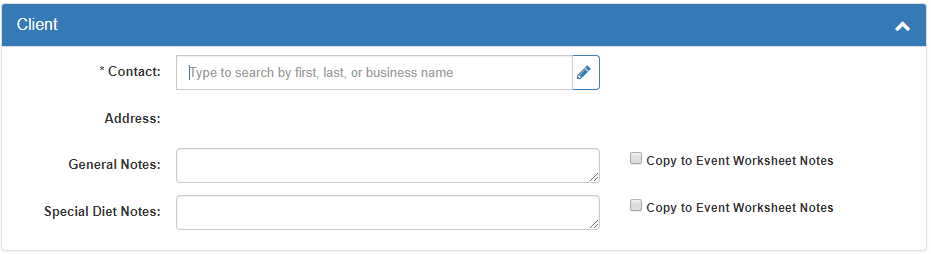
- Begin typing the name of the contact or company you would like to add to this event into the Contact text box.
- Choose from a dropdown list of the contacts already in your company database or add a new Contact, as needed.
- You can add notes to this contact by typing into the General Notes or Special Diet Notes fields.
- If there are already notes saved to the Contact View then they can be copied to the event notes here
Info
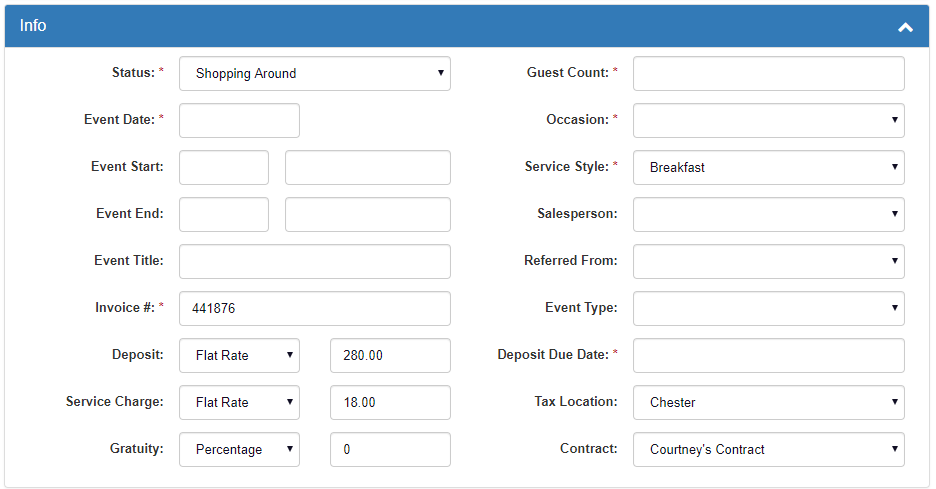
- Change the event Status in the dropdown list if necessary.
- Select a Date using the dropdown control.
- Event Start/Event End can be used to indicate the times an event begins and ends. This will also automatically add these times to your event timeline.
- The Invoice number generated for a new event is the next sequential invoice number available in the . You may edit this number, however, duplicate invoice numbers are not allowed.
- Enter the Guest Count.
- Select an Occasion and Service Style from the drop-down list. Use the Quick Add… button options to add any new items to the list. Note: This list is fully customizable later to match your business requirements.
- Select the tax from the Tax Location dropdown list that was setup in Step #1. If the contact is tax exempt, check the Tax Exempt checkbox on the Event Main window once saved.
- Optionally, enter the Event Type, Referred From, Sales Person, and Event Title.
- Optionally, enter the event start and end times. A full timeline of event details can be added in a later step.
- Optionally, enter an Event Contract, Payment Terms, Net Payment Due, Deposit Detail, Service Charge, Gratuity, PO#, and.
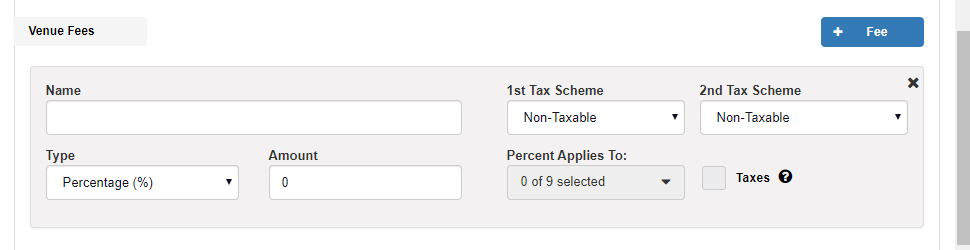
Venue
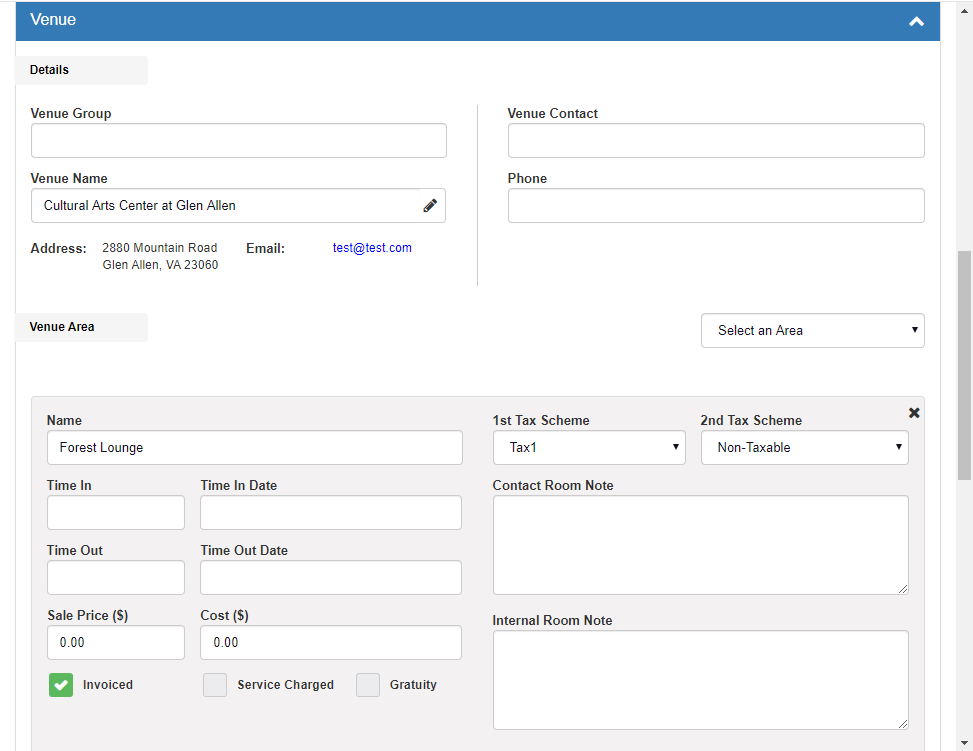
- Under Venue Details, begin typing the name of the venue you would like to add to this event into the Venue Name text box.
- This will default as Same as Contact unless you set up a default venue in Step 1.
- You may optionally enter venue details such as venue contact, contact phone number, areas within the venue, and additional Venue Fees.
Other Fees

- You may enter a customized Other Fee percentage applied to whichever sections of the event you wish, if needed.
Create Event

- Lastly, click the Create Event button and the Event Info Tab window is displayed.