Searching for an Event
- Select the Event > Full Search option on the Navigation Bar.
Note: To quickly load the last event that you viewed, use the Event > Previously Selected option from the Navigation Bar or simply click the word Event in the red toolbar.
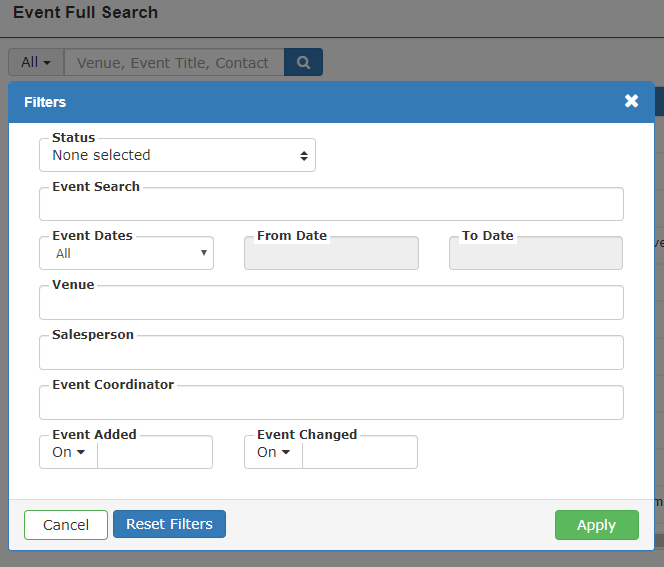
- Either search for All under the Event Dates drop-down or change to Custom Date and enter the date range for the event(s) in the From Date and To Date boxes.
Note: TPP also provides a date picker for entering the Event date. Double click anywhere in the Event Date text box to view a mini Calendar screen. Scroll through the calendar months and years, and click a day. The selected date will appear on the Event.

- Select a category from the ‘Search’ dropdown.
- The dropdown applies to the text box AND to how the results will sort. The Ascending/Descending selection dropdown specifies the sort direction of the search. For example, if you selected Last Name, enter any character combination of the last name in the textbox and it will display your results, automatically sorted.Click the ‘Search’ button.
- ‘Sales Person:’ allows you to filter by Sales Person.Select value(s) for
- ‘Status:’ by clicking the link. The default statuses are as follows:
- Canceled: Even though an Event has been canceled you can still view it. You may want to use it as a template for other events, or you may want to reinstate it as a planned Event. When changing an Event to a status of Cancelled, you will be prompted to enter a cancel reason code.
- Closed: Any past event where FULL payment has been made is considered closed. You can still view these events by selecting this status.
- Confirmed: Confirmed Events are the events which have been booked.
- Proposal: Proposal Events are those Events sent to the Contact for review. Perhaps you are waiting for a deposit before moving them to a Confirmed status.
- Inquiry: A general inquiry by a prospective contact. Not quite to the Proposal stage yet.
- Hold: Put a date on hold.
- (Other): Your own custom statuses with a user-defined name. For more information refer to the Custom Statuses topic.Select an Event by clicking the ‘Invoice #’ or ‘Event Date’ link, or selecting ‘Action’ > ‘View’.
Changing an Event Status
- Select the Event > Full Search option from the Navigation Bar. Optionally, click Previously Selected to bring up the last selected Event.
- Click on the invoice number for the desired event, then select the Info tab from the left menu.
- In the Event Details section of the Info tab, find the drop down labeled Status on the right side of the screen.
- Select the new event status from the available options in the Status drop down menu.
- Be sure to hit the Save button!
Bulk Update an Event status
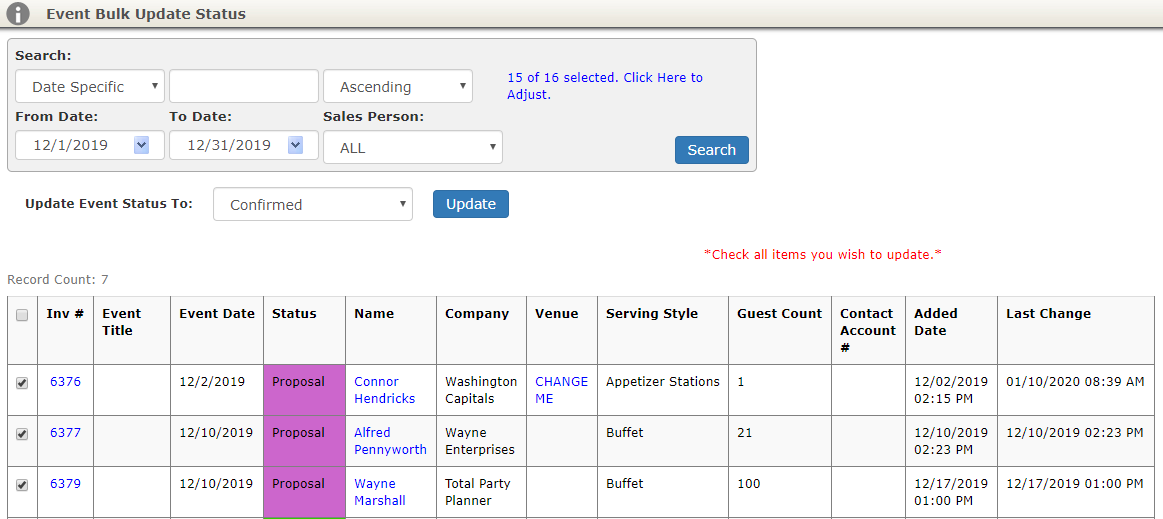
A selected Event’s status may be changed from one status to another without loading the full Event history. Party Planner also allows you to bulk update Events. Ex., perhaps you want to close all Events from the previous day. You may update the status of these Events all at one time.
1. Select the ‘Event > Full Search’ option from the Navigation Bar.
2. Click on the ‘Bulk Update Event Status’ button.

3. Enter in appropriate search criteria for the Events you wish to change and click the ‘Go!’ button.

4. Click the ‘Check All’ hyperlink to select all searched Events or individually check the boxes of the Events that you wish to change the status of.
5. Choose a status from the ‘Update Event Status To:’ drop down list that you wish to change the Events to.
6. Click the ‘Update’ button. The statuses for those Events are now updated.
Creating a New Event
- Select the ‘Event > Add New Event’ option from the Navigation Bar. Optionally, select ‘Full Search’ from the drop down list, and then click on the ‘New Event’ button.
- The New Event page appears in Add mode.
- Enter the following information about the event:
- Contact Detail:
- Company and Name: If this is a new Event or when editing, click the ‘Assign’ button. The Contact name list can be sorted by Last name or by Company. Select the Contact or Company from the drop-down list (If the Contact does not yet exist in the database, click the ‘Quick Add New Contact ’ button to add a contact on the fly. Refer to the topic Updating Contact Data for more details on adding Contacts.
Helpful Hint: Use the ‘Quick Edit Contact’ button to load the Contact module with the contact selected for this Event. There you can view more information such as address, phone numbers, etc.
- Company and Name: If this is a new Event or when editing, click the ‘Assign’ button. The Contact name list can be sorted by Last name or by Company. Select the Contact or Company from the drop-down list (If the Contact does not yet exist in the database, click the ‘Quick Add New Contact ’ button to add a contact on the fly. Refer to the topic Updating Contact Data for more details on adding Contacts.
- Event Detail:
- Date: Enter a date for the event. Total Party Planner is Year 2000 compliant; enter all dates in the mm/dd/yyyy format.
Helpful Hint: Total Party Planner also provides a shortcut to entering the Event date. Double click anywhere in the Event Date text box to view a mini Calendar screen. Scroll through the calendar months and years, and click a day. The selected date will appear on the Event.
- Occasion: Select an occasion for this event from the drop-down list. Click the ‘Quick Add New Occasion’ button to add an occasion on the fly. Refer to the topic Occasions for information on editing this list.
- Service Style: Select a service style from the drop-down list. Click the ‘Quick Add New Service Style’ to add a service style on the fly. Refer to the topic Service Styles for information on editing this list.
- Sales Person: Select a name from of the pull-down list. This is the person responsible for entering this Events information. New salespeople are entered through the staff module. Click the ‘Quick Add New Sales Person’ button to quick add a sales person on the fly. This field is optional.
Note: Salesperson staff members can have any title, however, the ‘Salesperson’ indicator must be checked for them to be available at the Event level. Refer to the Updating Staff Data topic for more detail on adding staff members.
- Referred From: Select a referral from the drop down box, or click the ‘Quick Add New Referral’ button to quick add a new referral on the fly. This field is optional.
- Event Title: Specify an event title if appropriate. This field is optional.
- Status: Select a Status for the Event from the drop down box. The default statuses that Total Party Planner provides are Inquiry, Proposal, Confirmed, Closed, or Canceled. When changing an Event to a status of Cancelled, you will be prompted to enter a cancel reason code. Select a cancellation reason from the drop down box, or click ‘Add New Cancel Reason’ to add a cancel reason on the fly. Click the ‘Save’ button.
- Guest Count: Enter the planned number of guests for the Event.
- Date: Enter a date for the event. Total Party Planner is Year 2000 compliant; enter all dates in the mm/dd/yyyy format.
- Venue Detail: Each event must be assigned a Venue (Location).
- Name: Select a Venue for the event by clicking the ‘Assign’ button. Select a Venue by clicking ‘Select’. As an option, you may check the ‘Venue is Same as Contact Address’ check box. Checking this option tells Total Party Planner that the Event will be held at the same address on file for the selected Contact. This feature will save you data entry time by not having to duplicate address information.
- Room/Area(s): If the selected Venue has Room or Area associations (ex banquet rooms, floors, building wings), then one or more of those Rooms/Areas may be assigned to the Event. To add an Area, click the ‘Add/Remove Rooms’ button under the Main tab. Select an area from the list by checking the appropriate box(s) and clicking the ‘Assign Selected’ button. When finished adding Venue areas, click the ‘Back to Event’ button. To remove an Area, select the assigned area from the ‘Areas Assigned to Event’ tab and click the ‘Remove Selected’ button.
Helpful Hint: If there are other Events on the same day with the same Venue assignment, Total Party Planner will prompt you with a warning message.
- Times: Enter the relative times for an Event. By default the date associated to the time will be entered as the Event date. Change the date if appropriate. Ex., perhaps the Setup time is the day before the Event. In this case you would want to manually update the date. You may enter more detailed times under the Timeline Tab. Refer to the topic Event Timeline for more detail on adding detailed times.
- Financial Detail:
- Tax Location: Choose the tax scale locality for the event from the drop down list.
Helpful Hint: Total Party Planner will remember the last tax scale you used when creating an Event and use that scale as the new default.
- Tax Exempt : If the Event is tax exempt, check this box. Tax exempt values will be applied as setup in the Taxes module or the Miscellaneous module. When selecting a contact for a new event, if that contact has a tax exempt number, Total Party Planner will prompt you to check the box.
- Terms: Select the terms of payment from the drop down box that you require for the Event. This information appears on the invoice only. Actual payments received are recorded through the Financial module.
- Net Due: Select the appropriate ‘Day of event’, ‘Day(s) prior to event’, or ‘Day(s) post event’ Event option from the drop down box. Enter the terms (in days) when payment will be due. Term days can be pre or post the actual Event date. The Accounts receivable report will only reflect the invoices which are actually due for Events based on the terms setup in this section.
- Svc Charge: Select the appropriate ‘Percent’, or ‘Flat Rate’ Event option from the drop down box to apply to the Event. Enter a number for the amount of the charge. Enter zero if this is not applicable. The field is flexible as to what it actually applies to. The name ‘Service Charge’ can be updated to be whatever you would like your contact to see. Refer to the topic Service Charge, Gratuity, Other Fees for more information on changing the default name.
- Gratuity: Select the appropriate ‘Percent’, or ‘Flat Rate’ Event option from the drop down box to apply to the Event. Enter zero if this is not applicable. The field is flexible as to what it actually applies to. Check the appropriate boxes (Menu, Bev., Staff) to apply the percentage appropriately.
- Other Fee %: Enter another miscellaneous charge percentage (without the percent sign) to apply to the Event. It can be named, or apply, to anything! For example, apply a 2% ‘damage waiver fee’ to any rentals assigned to the event. The field is flexible as to what it actually applies to. Check the appropriate boxes (Menus, Beverages, Rentals, Miscellaneous, or Staff) to apply the percentage appropriately. The name of this fee is initially set in the business section. At the event level, however, it is updateable to anything desired. Ex. Instead of ‘damage waiver fee’, we could display ‘food handling charge’ – just for this event.
- Deposit: Deposits can be specified as a percentage of the entire bill or a flat rate. Put the amount (percent or dollar) in the text box. Specify the type by choosing the appropriate ‘Percent’ or ‘Flat Rate’ option. Deposit requirements are listed on the Proposal and Contract reports. Enter in a deposit date or
- Deposit Due Date: Enter a date for the event. Total Party Planner is Year 2000 compliant; enter all dates in the mm/dd/yyyy format.
Helpful Hint: Total Party Planner also provides a shortcut to entering the Event date. Double click anywhere in the Event Date text box to view a mini Calendar screen. Scroll through the calendar months and years, and click a day. The selected date will appear on the Event.
- BEO: Optionally add a Banquet Event Order number.
- PO Number: Optionally add a Purchase Order number.
- Invoice #: The invoice number generated for a new Event is the next sequential invoice number available in the database. You may edit this number to a different number (perhaps to start your invoice numbers at a certain range), however, duplicate invoice numbers are not allowed.
- Last Changed: The Last Changed date and time is generated when changes are made to the Event.
- Final Review: Check this box if the all the Event information has been confirmed either internally or with your Contact . The Event will no longer be listed in the initial startup warning screen as requiring final review.
- Tax Location: Choose the tax scale locality for the event from the drop down list.
- Contact Detail:
- Click the ‘Save’ button.
Copying an Event
Total Party Planner allows you to leverage any work you have done on an event that might apply to another event by allowing you to copy any existing event to a new date.

- Select the ‘Event > Full Search’ option from the Navigation Bar. Refer to ‘Searching for an Event’ section above for more detailed information on searching for an Event.
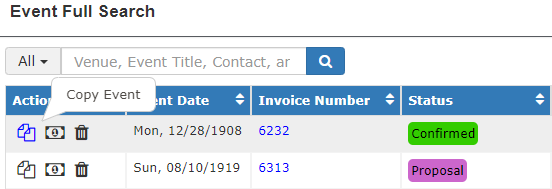
- Click the ‘Copy’ link next to the desired Event in the Event grid. Optionally, click the ‘View’ link for the appropriate Event and then click the ‘Copy Event’ button.
- Enter values into the following fields for the copied event: ‘Date to:’, ‘Status to:’ (You may use the drop down calendar), and ‘Guest Count:’.
- By default all Event details under ‘Copy Event Details:’ are selected. Deselect from the check boxes any details that you do not wish to copy.
- Click the ‘Copy’ button to copy the Event. (Click the ‘Cancel’ button if you do not wish copy the event.) The new event will be added to the Total Party Planner database with all the proposal related information like header, Menu, and Contact Miscellaneous Costs of the original event.
- If the Guest Count has been changed, you will be prompted to update Event quantities for menu items or leave the quantities unchanged.
- After the Event is copied you will be returned to the screen where you may edit the copied Event by clicking on the ‘Edit Event’ button.
Deleting an Event

- Select the ‘Event > Full Search’ option from the Navigation Bar.
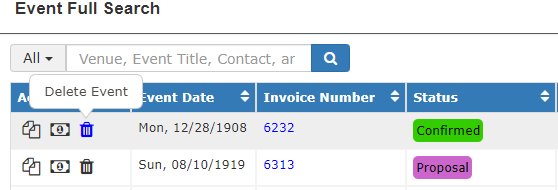
- Select ‘Delete’ next to the desired Event’s row. Optionally, select ‘Actions > View’ and click the ‘Delete Event’ button on the Event’s information page.
Caution: Once an Event is deleted, it may not be restored.
- Click the ‘Yes’ button to confirm the deletion.
