Express Order is a feature that allows you to quickly book delivery and pick-up events on a single form.
- Click Add Express Order in the Events drop down menu
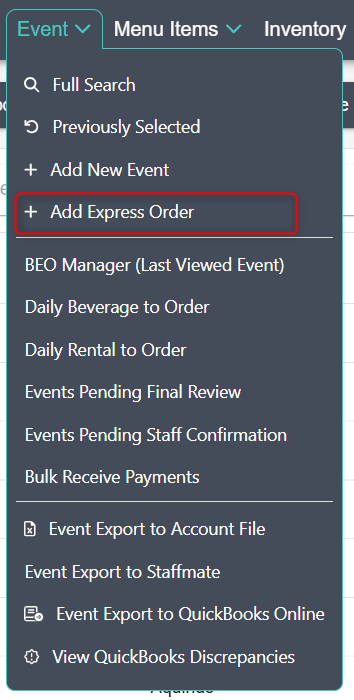
- This will bring you to the Express Order screen.
- The fields on the Express Order screen work the same way as in the main Event View!
- Note: Only fields marked with a red asterisk are required to create the event.
Contact
The Contact section is where you can enter the Contact and Tax Location for your Express Order.
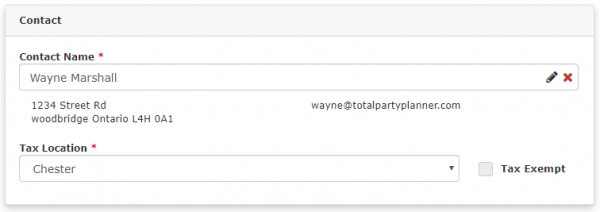
- Begin by typing the Contact Name to search your contacts database or quickly add a new contact by clicking the pencil icon.
- Select your Tax Location from the drop down menu and check the Tax Exempt box if the order is tax exempt.
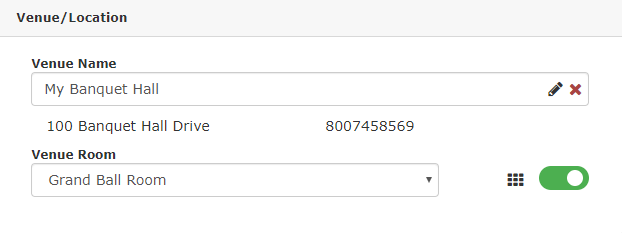
Venue/Location
The Venue/Location section is where you can enter where the order is going.
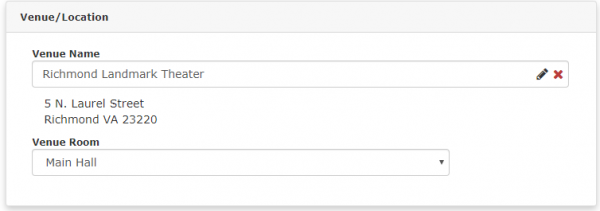
- Begin by typing the Venue Name to search your venue database or quickly add a new venue by clicking the pencil icon.
- The Venue Room section allows you to assign a room in the venue, especially useful if a venue has multiple event spaces.
Date
The Date section allows you to select the date for the order.
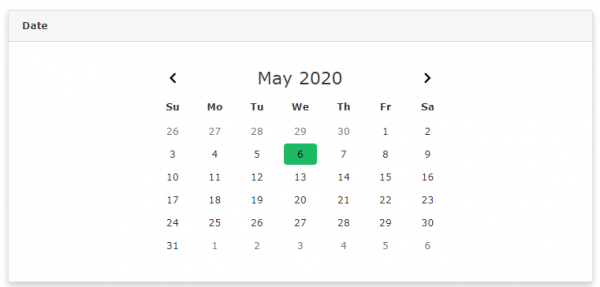
- The calendar will default to today’s date unless one is selected.
- To select a specific date, click on the date you’d like so that it is highlighted green.
Details
The Details section has fields to further categorize your order.
Note: Only the fields marked with a red asterisk are required to create an Express Order.
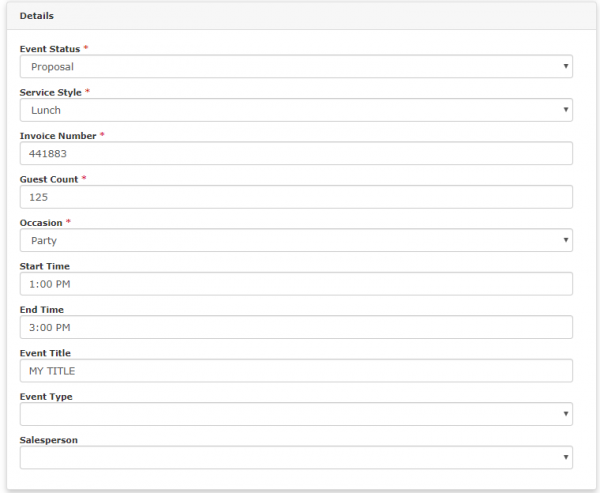
- Select an Event Status, Service Style, Occasion, Event Type, and Salesperson from the drop down menus.
- Enter an Event Title, and set a Start Time and End Time.
- The Invoice Number is automatically generated based on your most recent invoice.
- Note: Manually changing the Invoice Number at this step will change the sequence used to assign invoice numbers to future events!
- The Invoice Number is automatically generated based on your most recent invoice.
Technically this is all the info you really need to create this event!
However the Express Order form also has a number of helpful features that allow you to quickly add more details to your event!
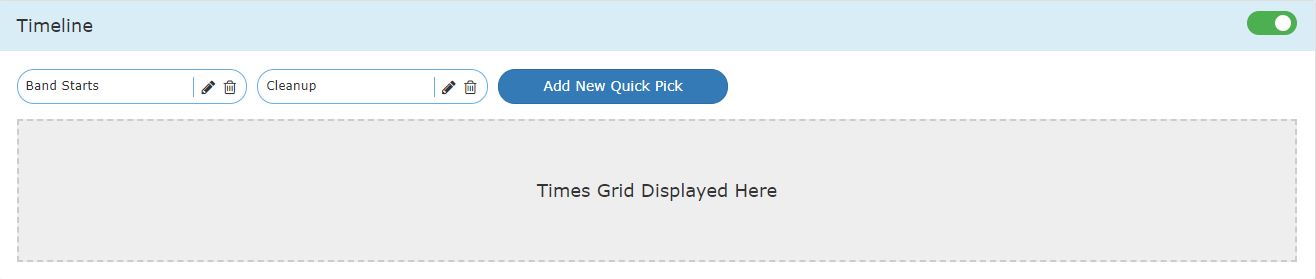
Timeline
- The Timeline section works similarly to the timeline section on the main Event View.
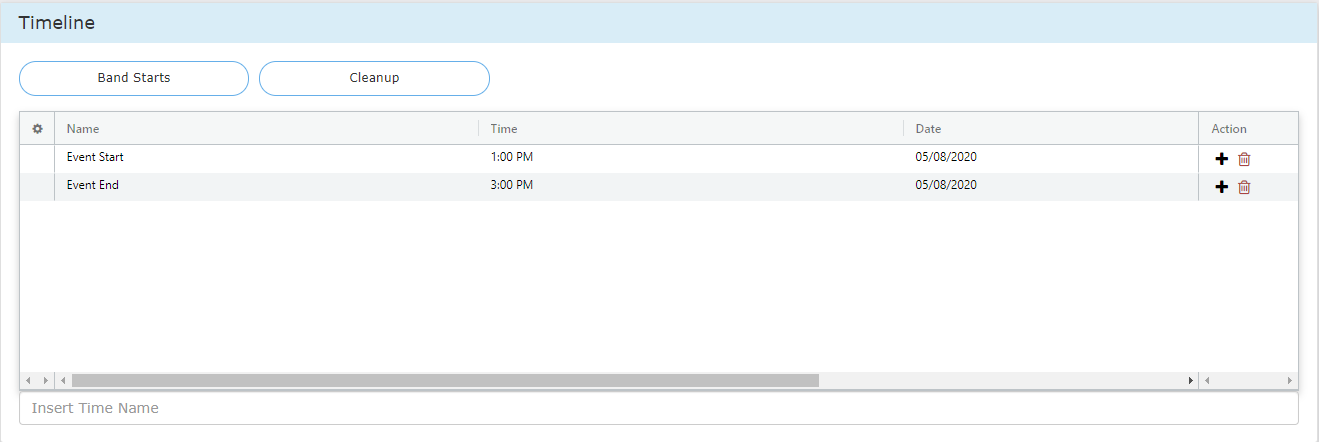
- To enter a time, begin typing in the field at the bottom.
- You can select saved timeline names or add a new one by clicking the Quick Add button.
Quick Pick Feature
At the top of the Timeline section you’ll notice 2 buttons that say “Band Start” and “Cleanup”. These are Quick Pick buttons where an Admin can assign your team’s most used timeline labels. Clicking them will add that label to the timeline so you don’t have to search for your most used time labels.
Quick Pick buttons have also been added to all the additional sections.
Customer Order
Menu
The Menu section works very similarly to the menu section of the regular Event View!
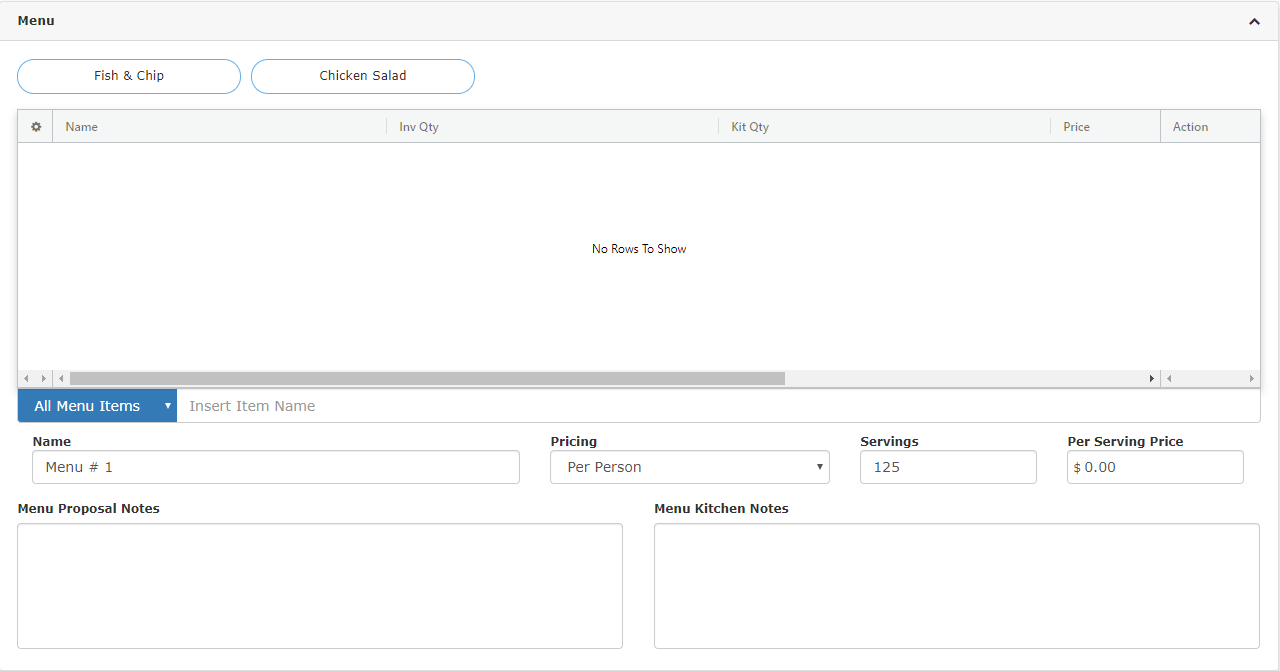
- To begin, start typing in the Insert Item Name field.
- This will bring up a list of suggested items from your database or you can quickly add the item to your database by clicking the Quick Add button.
- You can set the item quantity and prices by double clicking those values in the grid.
- Name your menu in the Name field
- Define Pricing as Itemized or Per Person
- Add Menu Proposal Notes and/or Menu Kitchen Notes.
Beverages/Rentals/Miscellaneous
The Beverages, Rentals, and Miscellaneous sections all work the same way.
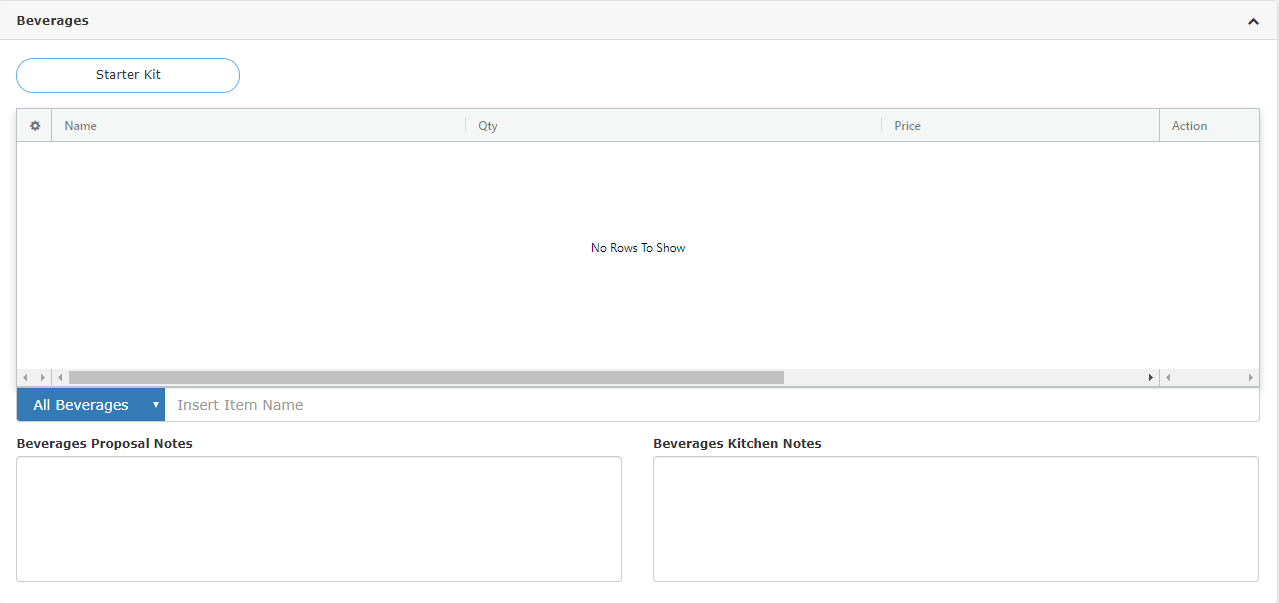
- Start typing in the Insert Item Name field.
- This will bring up a list of suggested items from your database or you can quickly add the item to your database by clicking the Quick Add button.
- You can set the item quantity and prices by double clicking those values in the grid.
- Add Beverages Proposal Notes and/or Beverages Kitchen Notes.
Financials

- Here you can define Service Charge, Gratuity, Discount, Payment Terms and assign a Contract.
- Note: These will automatically generate to your business defaults, but can be edited for a specific event by clicking into each section and selecting $ or % and entering a value.
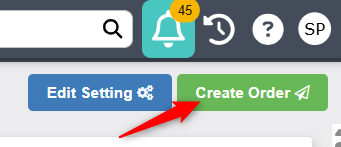
Final Step
Once you’ve completed filling out your Express Order form, click the Create Order button to create the event.
You will then be brought to the main Event View page for the order you just created!
Express Order Settings (Admin Only)
Finally, we’ll look at some of the settings your account Admin(s) can change on the Express Order entry form.

- Click the Edit Settings button in the top right corner.
- This will bring you to the Settings page for the Express Order form.
Required Fields
- For many sections you have the option to toggle the green switches for fields that you don’t want to require.
- You can drag and drop many fields to rearrange the order they appear in on the form or you can also toggle these fields off to streamline the Express Order process!
Quick Pick Settings
The Timeline and Customer Order sections all allow for the Quick Pick feature!
- To set Quick Pick items:
- Click the Add New Quick Pick button
- Search for your item
- Select a Display Name
- Click Save
- To edit existing Quick Pick items, click on the pencil icon to the right!
- The Timeline, Menu, Beverages, Rentals, Miscellaneous, and Financial sections can also be toggled on or off using the green toggle switches.
- You may toggle these sections off if you’d prefer to skip those parts when entering an Express Order.
- Be sure to click Save after you’ve made changes to your settings!
*Note: that this is a beta version which is still undergoing final testing before its official release. The website, its software and all content found on it are provided on an “as is” and “as available” basis. Should you encounter any bugs, glitches, lack of functionality or other problems on the website, please let us know immediately so we can rectify these accordingly.
Please feel free to email Client Care at support@totalpartyplanner.com with any questions you may have regarding TPP.
We will be glad to assist you.