Inventory View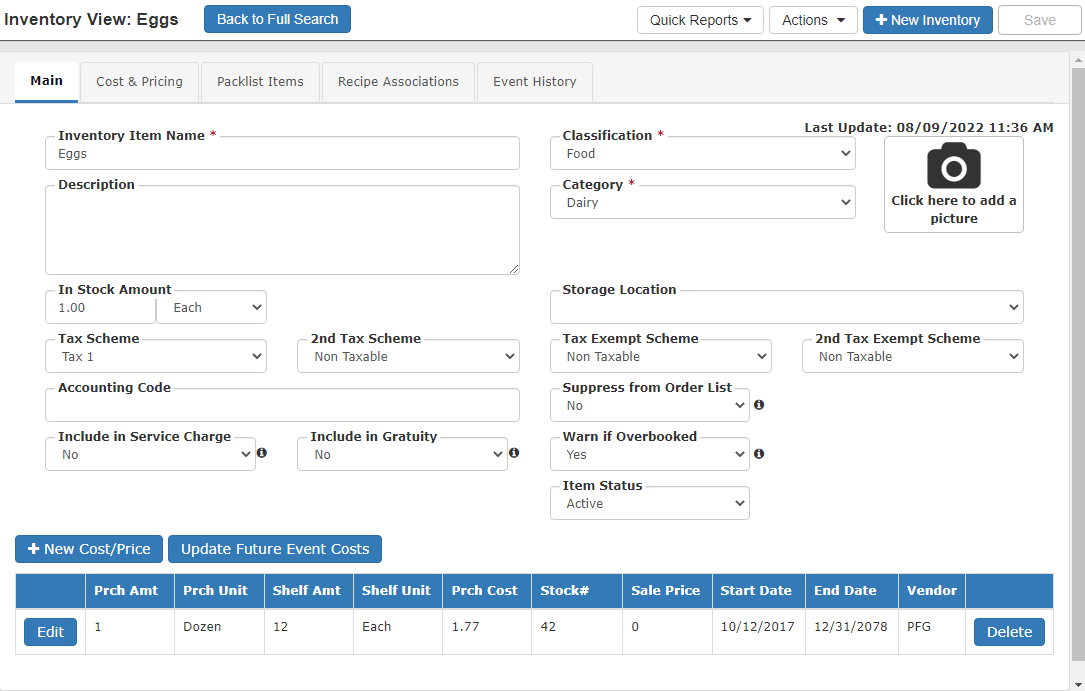
The Inventory View is the default version of an item in your Inventory database. If you make changes on this view, you will change it for everyone who uses your TPP account.
Main Tab
- Inventory Item Name: Enter the name for this item as you want it to appear internally and to clients (when sold as a line item on an event)
- Classification: Select whether this item is classified as:
- Food – Everything you use to create your menu items (example: sugar, butter, flour)
- Beverage – Anything you serve that someone can drink (example: beer, wine, soda)
- Equipment – Can be items you rent to your clients for a fee (example: chafer, chair, table) or items you use for service during an event (example: trash cans, sternos, frill picks)
- Other – Extra classification that can be used to separate equipment you own vs equipment rented from 3rd parties
- Description: Enter an optional description to show on client facing reports when sold
- Category: Assign a category for the item from the drop-down list
- Categories are used to organize your items on reports (i.e. Pack lists, order lists)
- If a category you want does not appear, click the Quick Add New Category button to add a custom category
- Custom categories will be available to assign to future inventory items.
- NOTE: Custom created categories are able to be edited in the Custom Lists area
- Custom categories will be available to assign to future inventory items.
- If a category you want does not appear, click the Quick Add New Category button to add a custom category
- Categories are used to organize your items on reports (i.e. Pack lists, order lists)
- Click here to add a picture: Add an image of the item to appear on Proposals
- This can be turned on/off at the event level
- Max image size is 300kb
- In Stock Amount: Enter the amount of the item you have on hand to use
- NOTE: This is not a dynamic inventory tracker as it will reset back to the original number each day
- With this in mind, it is more useful for items that are reusable (Cambros, chafers, tables, coolers) instead of consumable items (Food items, Sternos, Paper Products)
- Storage Location: Update where you keep this item in your kitchen/warehouse
- This can be used to organize your pack list by storage location to make finding items easier
- Tax Scheme and/or 2nd Tax Scheme: Update how any tax(es) from the Taxing Rules that will be applied if sold as a line item on an event
- Tax Exempt Scheme and/or 2nd Exempt Tax Scheme: Update how any tax(es) from the Taxing Rules are handled if the event is marked as Tax Exempt
- Accounting Code: This will automatically populate if you connect with Quickbooks
- In general you would not edit this field
- Suppress from Order List: Click this for items you do not need to appear on an order list when needed for events
- Include in Service Charge: Update whether a percentage Service Charge assigned to an event will calculate against the price if sold as a line item on an event
- Include in Gratuity: Update whether a percentage Gratuity assigned to an event will calculate against the price if sold as a line item on an event
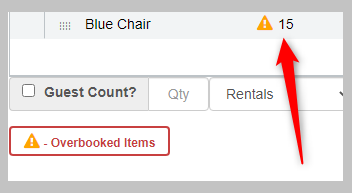
- Warn if Overbooked: This works in conjunction with the In Stock Amount to warn you if you have sold too many on an event for a specific day
- Example: If you say that you have 10 Blue Chairs in stock and you try to sell 15 on an event, a warning indicator will appear to advise you that the item is overbooked
- Item Status: Toggle this to change access to the item
- Active: Will appear in search results when adding items to an event
- Discontinued: will no longer appear in search results to be added to events moving forward
- If it is already on a future event, it will not be removed since you have probably already sold it
- On any future events it will be marked with a Discontinued tag for your reference

- This will not show Discontinued to the client on the Proposal or Invoice
- NOTE: Any inventory item that has been added to an event, recipe, or pack list is not able to be deleted from your database
- Marking it as Discontinued is the only way to prevent it from being used in the future
- You can remove the item from all events, recipes, or pack lists that it as been added to and then you would be able to delete the item
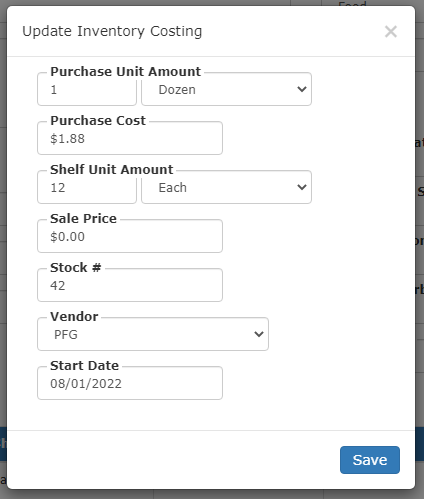
+ New Cost/Price Button: If the price changes for an inventory item and you want to update it, click + New Cost/Price and the Update Inventory Costing window will pop-up to enter the details:
![]()
Click here for more details about this window
-
Update Future Event Costs: Update the cost you have listed on future events to the newly entered cost.
![]()
Click here for more details about this feature
- Edit: Click the Edit button to correct any errors.
Click here for more details about this feature