Video
Watch the video above or scroll down for the written instructions.
NOTE: Taxing Rules were updated in April 2021
Add/Edit Taxes
The Taxing Rules section under the Administration menu is where you define how taxes are applied to your event sales by default.
New Tax Location
To add a new tax location there are two steps.
First, click the New Tax Location button.
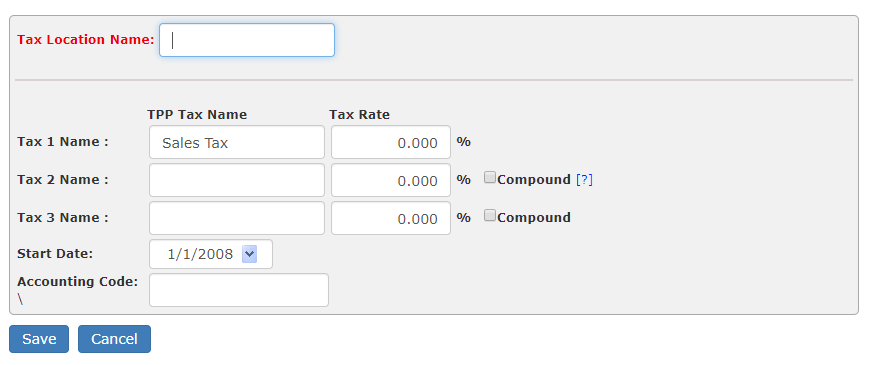
On the Edit Tax Location screen:
- Enter the name of the location in the Tax Location Name field.
- Enter the name and rate for the first tax required in the Tax 1 Name field.
- Most client use this field for their state sales tax amount.
- Enter names and rates in the Tax 2 and Tax 3 Name field, if needed for your location.
- Many clients use these for local meals tax or any other separate taxes from their normal state tax.
- A Compound tax is a tax that is calculated on top of Tax 1.
- Enter a start date for this new tax area.
- Accounting code is assigned if you use Quickbooks with TPP.
- Click Save and your new tax location is created.
The second step for creating a New Tax Location make sure the newly added tax location is showing in the drop down (if you have multiple locations to choose from).
![]()
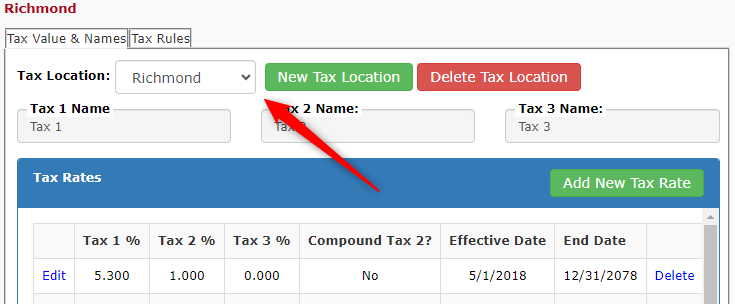
Next, click the Tax Rules tab at the top.
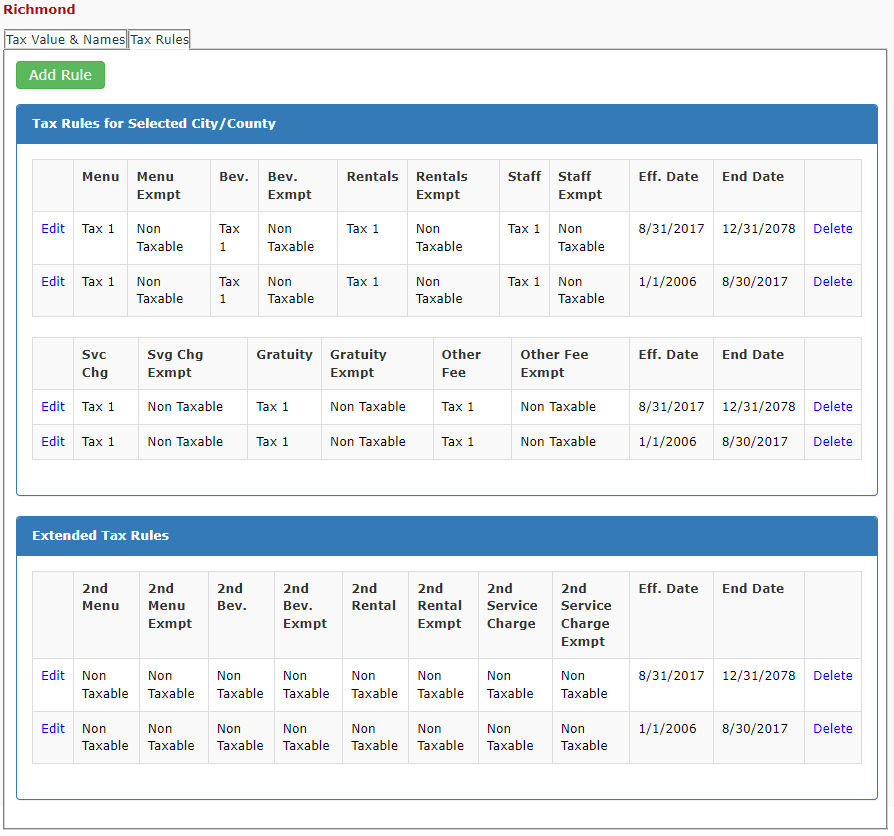
Tax Rules
Tax Rules define how the three different taxes are applied to your invoices with that tax location assigned.
Examples below:
- Menu – Defining it as shown above will apply Tax 1 by default to all Menu Items added to an event, unless the entire event is marked as Tax Exempt.
- You can mark an event as Tax Exempt on the Info tab of an event in the Financial Details section.
- Bev. – This is now defined at the individual Item level.
- Rentals – This is now defined at the individual Item level.
- Staff – This is now defined at the individual Item level.
- Svc Chg – Defining it as shown above will apply Tax 1 by default to a service charge added to an event, unless the entire event is marked as Tax Exempt.
- Gratuity – Defining it as shown above will not apply any taxes by default to gratuity added to an event.
- Other Fee – Defining it as shown above will apply Tax 1 by default to any Other Fees added to an event, unless the entire event is marked as Tax Exempt.
- Extended (or Canadian) Tax Rules
- 2nd Menu – Defining it as shown above will add a second tax rate (Tax 2) to Menu Items added to an event, unless the entire event is marked as Tax Exempt.
- 2nd Bev. – This is now defined at the individual Item level.
- 2nd Rental – This is now defined at the individual Item level.
- 2nd Service Charge – Defining it as shown above will add a second tax rate (Tax 1) to Service Charges added to an event, unless the entire event is marked as Tax Exempt.
- Once all the Tax Rates and Rules have been defined you can assign those taxes to an event on the Info tab of the event in the Financial Details section. Simply click the drop down in the Tax Location field and choose the appropriate location.
Updating a Tax Location
One of the most important things to remember is to never edit an existing tax location unless you are correcting a mistake. If taxes have been changed for your location and you need to update the tax rate to reflect on a certain date, please follow these rules:
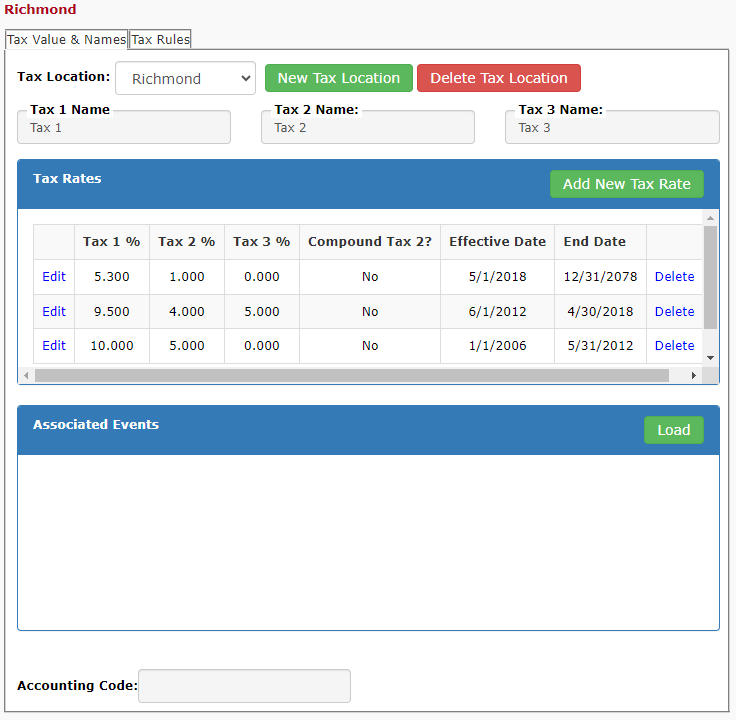
- Go to Administration > Taxing Rules and choose the location you need to update from the Tax Location drop-down.
- Choose Add New Tax Rate.
- Type in the new tax rate(s)
- Enter a start date for the new rate(s)
- Click Save.
You will now see that the old tax rates are still in your history, with the new tax rates showing at the top.
PLEASE NOTE: Failure to follow these steps will may result in older events losing the assigned tax rates originally applied. As a result, you may suddenly have older invoices with outstanding negative balances.