
Getting Started Guide: Part One
We recommend having details for an upcoming event in front of you as you start this guide.
Use it as a reference to setup one of YOUR events.
For best results, follow the guides step-by-step.
These guides will walk through setting up that event, including printing the Proposal of Service, Invoice, and Event Worksheet.
These are just examples of the many reports available in your TPP account
TPP has numerous features not covered in this guide. This document is only meant to serve as a condensed guide to get started. Although concise, it is very detailed.
As you’re working through Steps #1-7, know that it all comes together in part two.
The data entry of Steps #1-7 only needs to be done ONCE.
When you add contacts, venues, menu items, inventory etc., they will be available for any future event so you will not need to add them again.
Setting Up Your Account
Step 1: Edit Business Information, Profile & Preferences, and Taxes
Entering Your Business Information
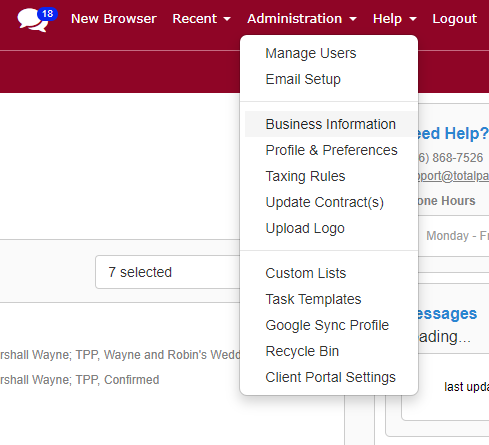
From the upper right-hand corner menu bar, select Administration | Business Information.
The Main tab is already active, so you would update the information in the most common fields (name, address, phones, etc.) for your business specific data.
Note: Owner information, Tax ID, and Fax number are rarely filled out by users.
Click the Save button.
Profile & Preferences
Profile & Preferences is where you set up different company defaults.
From the upper right-hand corner menu bar, select Administration | Profile and Preferences.

The Event Main Defaults tab allows you to pre-populate common event items. This serves to save data entry time for NEW events. Click the Save button to save your changes.
To pre-populate some notes for all events, click the Event Notes Defaults tab. Here, you can enter a default proposal header and footer note as well as an invoice note. Click the Save button to save your changes.
The Event Menu Defaults lets you default menu related settings including the name, type, and financials. Click the Save button to save your changes.
We have implemented a warning flag to alert you if you have overbooked any rental or beverage items on a single event. To turn this setting on or off, navigate to the Event Beverage & Rentals Defaults tab. Click the Save button to save your changes.
To default fees and other financial details, click the Event Financial Defaults Tab. Click the Save button to save your changes.
Click the Report Preferences tab. The label fields listed allow you to optionally change the terminology your contacts will see displayed on the Proposal & Invoice. Update to any other terms preferred by your business. Click the Save button to save your changes.
The Application Preferences tab allows you to set up additional default values for the application itself, having to do with time zone, regional settings and interfaces with outside programs.
Taxing Rules
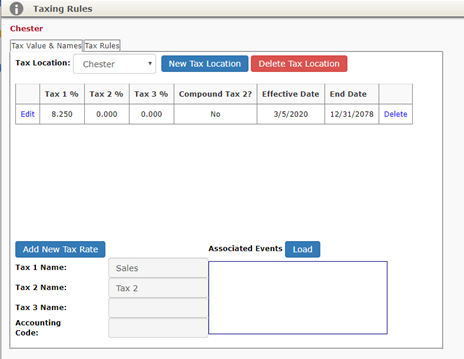
- From the upper right-hand corner menu bar, select Administration | Taxing Rules.
- The Tax Value & Names tab is active.
- Click the New Tax Location button.
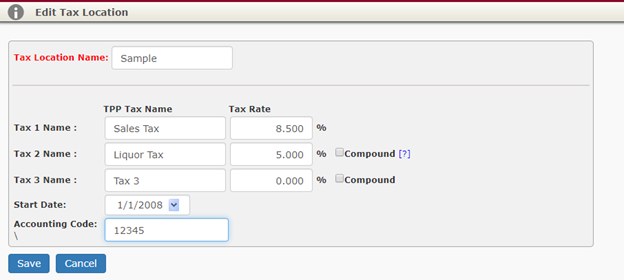
- Type in a Tax Location Name you would like to identify your tax with (typically this would be a county or locality name).
- Type in the appropriate tax rate for Tax 1.
- If you have more than 1 tax rate to charge items to, enter those values for Tax 2 and Tax 3.
- Leave the default Start Date.
- This date should always be sometime in the PAST to accommodate any earlier event bookings you may want to enter.
- Click the Save button. The entered data is displayed.
- Click the Tax Rules tab.
- Simply stated, your events will follow the taxation rules listed in the grid.
- For example, by default your food (menu) will tax at the rate setup under Tax 1.
- Other tax rules apply to beverages, rentals, staff, and service charges.
- Click the Edit hyperlink.
- Leave the default Effective Date.
- This date should always be sometime in the PAST to accommodate any earlier event bookings you may want to enter.
- Update the appropriate tax rates from each drop-down list for menu, beverage, rentals, staff, and service charge.
- You may also define SECOND tax options.
- Click the Save button.
- You may setup multiple Tax Locations to use if your tax changes depending on where your events are taking place.
Step 2: Add a Contact
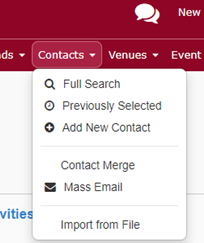

- From the main toolbar select the Contact | Add New Contact option.
- Enter the appropriate Contact information (name, company, city, state, phone numbers, email, etc.) in the text boxes.
- Leave the Company field blank if it does not apply to the Contact.
- Please note: Contact notes added to the record will be optionally copied to your internal reports.
- Leave the Company field blank if it does not apply to the Contact.
- Click the Save button.
- To search for existing contacts, use the Contact | Full Search option on the main toolbar.
Step 3: Add the Event Venue

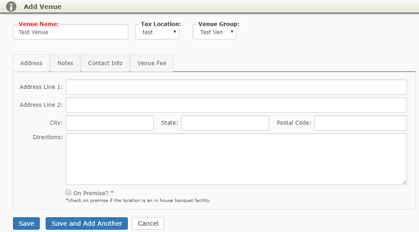
- Select the Venue | Add New Venue option on the main toolbar.
- Click either the “Off Premise‟ or “On Premise‟ options below, depending on your need.
Option #1 – Off Premise
- Enter the appropriate venue information (name, city, state, phone numbers, etc.) in the text boxes.
- Do not check the On Premise? checkbox.
- Optionally, assign a Tax Location (as setup in Step 1) to the venue.
- Then, when you add this venue to an event, the assigned Tax Location will default automatically.
- Click the Save button.
Option #2 – On Premise
- Enter the appropriate venue information (name, city, state, phone numbers, etc.) in the text boxes.
- Be sure to check the On Premise? checkbox.
- Optionally, assign a Tax Location (as setup in Step 1) to the venue.
- Then, when you add this venue to an event, the assigned Tax Location will default automatically.
- Click the Save button
To search for existing venues, use the Venue | Full Search option from the main toolbar.
Step 4: Add Event Menu Items
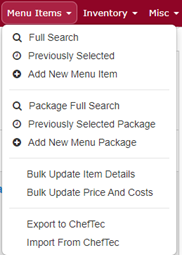
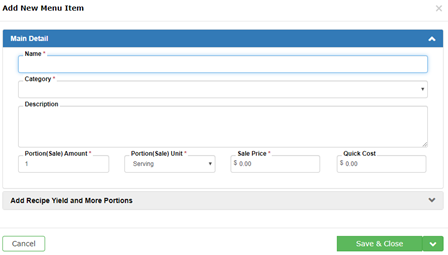
- Click the Menu Items | Add New menu Item option from the main toolbar.
- Enter the name of the menu item in the Name field.
- Select an appropriate category from the Item Category dropdown list.
- Use the Quick Add New Category button to add any new categories to the list.
- Note: This list is fully customizable later to match your business requirements.
- Optionally enter a Description of the menu item.
- Be as detailed as possible.
- This is what your Contact will see on the Proposal of Service report.
- If this menu item will ever be sold itemized/ala-carte then enter a Sale Price per unit, otherwise leave the value $0.00.
- Click the Save button.
- Repeat the above steps for all the menu items required for the event.
- Do not add any additional cost items such as rentals, delivery, staff, etc. in this section of the application.
- They will get added in a later step.
- Do not add any additional cost items such as rentals, delivery, staff, etc. in this section of the application.
To search for existing menu items, use the Menu Items | Full Search option on the main toolbar.
Step 5: Adding Inventory
If the event you are building involves itemized beverages or rentals, follow the steps below to add Inventory items to the database now.
Event beverages are added with a classification of Beverage and event rentals are added with a classification of Equipment.
Any other inventory that are not classified as beverages or equipment would be classified as Other.
Main Detail
- Select the Inventory | Add New Inventory Item option from the main toolbar.
- Enter the item name in the Item Name field.
- Select either Beverage or Equipment from the Classification dropdown list.
- Select a Category from the drop-down list. Use the Quick Add Item Category button to add any new items to the list.
- Note: This list is fully customizable later to match your business requirements.
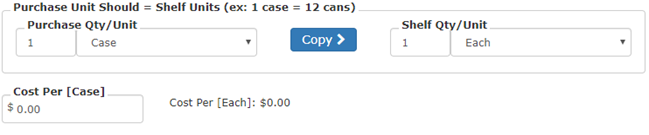
Purchase Qty/Unit
- Enter the purchase amount and unit in the Purchase Qty/Unit field.
- Ex: “1 Case”
- Enter the Purchase Cost for the item entered above.
Shelf Qty/Unit
- Enter the shelf amount and unit in the Shelf Qty/Unit field.
- How does the purchase detail break down?
- Ex: “24 Cans”.
- The total purchase unit amount and measurement MUST EQUAL the total shelving unit amount and measurement.
- How does the purchase detail break down?
Pricing Detail
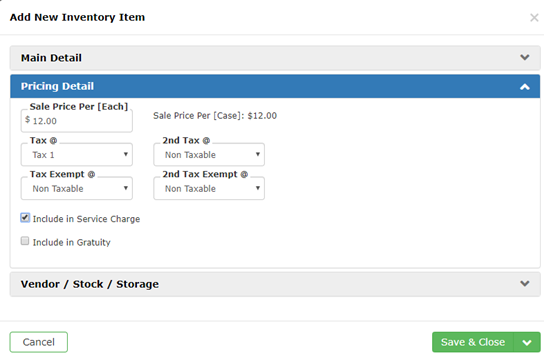
- If this item is to be sold as a beverage or rental, enter the Sale Price to the contact.
- Apply the appropriate tax, service charge, and gratuity rules for this item.
- Click the Save button.
- Repeat for all the beverages and/or rentals required for the event.
To search for existing inventory, use the Inventory | Full Search option from the main toolbar. Be sure to select the desired classification (Food, Beverage, Equipment, Other).
Vendor/Stock/Storage
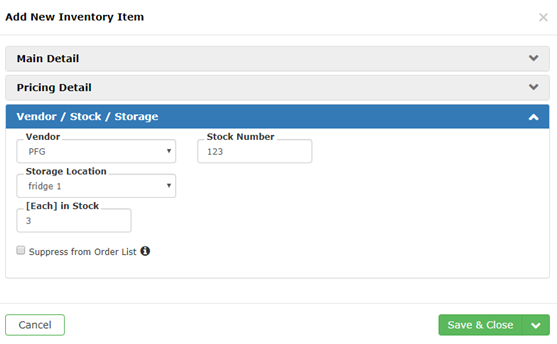
- Enter your vendor information; you can always add a new vendor by clicking “add new vendor”. You can also add a stock number for easy re-ordering.
- Select a storage location if you have multiple places where this item could be stored.
- Enter how many in stock you currently have.
Step 6: Adding Staff Titles
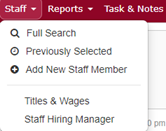
For purposes of the getting started guide, we will only look at managing staff titles themselves (waitstaff, bartender, etc). Ultimately you will also manage the personnel assigned to those titles.
- Select the Staff |Titles & Wages option from the main toolbar.
- Click the Add New Title button.
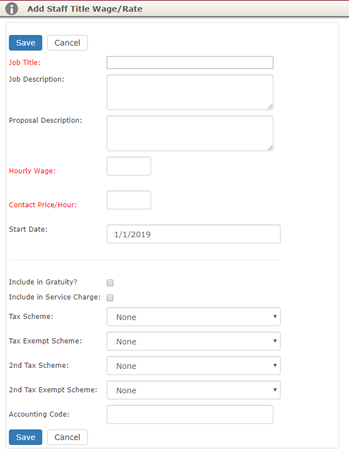
- Enter Job Title, Hourly Wage (what you pay per hour), Contact Price/Hour, (what you charge per hour), and Start Date for this particular wage.
- The start date should always be sometime in the PAST to accommodate any earlier event bookings you may want to enter.
- You may also check whether you would like to include Gratuity and Service Charge, as well as apply the Tax Schemes set up in Step #1.
- Click the Save button.
- Repeat for any other titles your event requires.
Step 7: Adding Misc Items
Miscellaneous Costs are charges to the Contact that do not fall under the listing of Menu Item, Beverage, Rental, or Staffing.
Example: Items such as delivery fees, DJ, florals, etc.
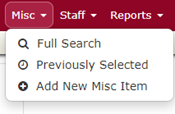
- Select the Misc. | Add New Misc. Item option from the main toolbar.
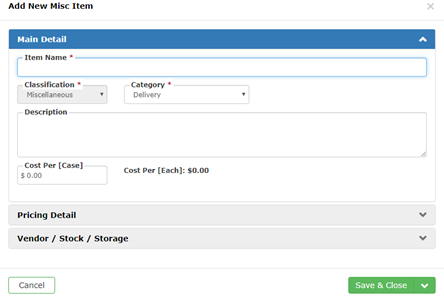
- Enter the Item Name
- Select a Classification from the drop-down list.
- Select a Category from the drop-down list.
- Note: This list is fully customizable later to match your business requirements.
- You may enter an optional Description for your Miscellaneous item.
- Enter the Cost Per [Each], which is your internal cost.
- Enter the Sale Price which is the price if you were to sell the item to your client.
- Select a Type from the dropdown list.
- Miscellaneous Costs are divided into four sale categories:
- Each
- Flat Rate
- Per Hour
- Per Person
- Miscellaneous Costs are divided into four sale categories:
- Apply the appropriate tax, service charge, and gratuity rules for this item.
- Leave the default Effective Date.
- Be sure this date is always sometime in the PAST to accommodate any earlier bookings you may want to enter.
- Optionally, you may enter Vendor and [Each] in Stock information, similar to the adding an inventory item in step 5.
- Click the Save button.
- Repeat to add any other Miscellaneous items required for the event.
To search for existing miscellaneous items, use the Misc. | Full Search option on the main toolbar.
Your account is now set up with your preferred company defaults and some items to start creating events in TPP.
Proceed to Part Two to start creating events!
Please feel free to call our offices at (804) 550-0505 x2 with any questions you may have regarding TPP.
We will be glad to assist you.