Adding an Inventory Item
Select the Inventory > Add New Inventory Item option from the Navigation Bar.
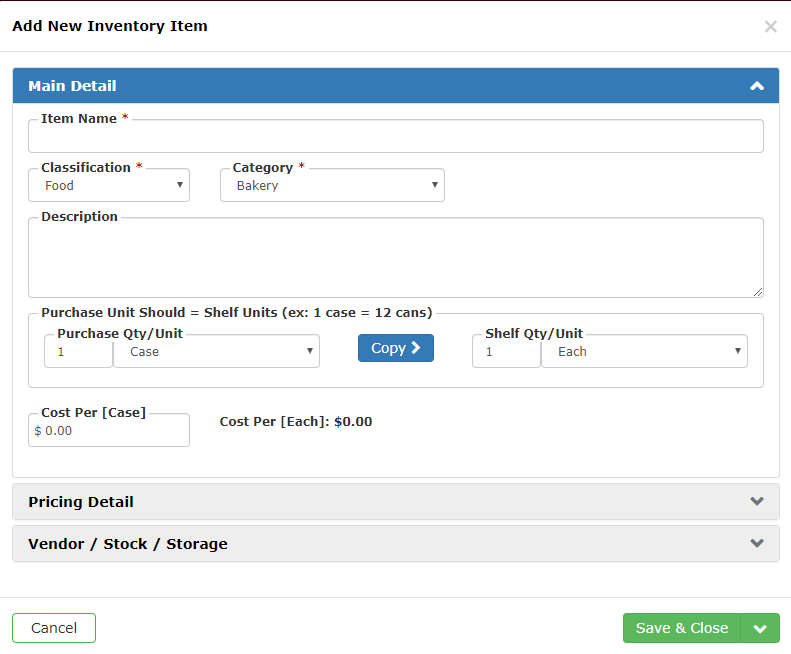
Main Detail
- Item Name: Enter the name for this item as you want it to appear internally and to clients (when sold as a line item on an event).
- Classification: Select whether this item is classified as:
- Food – Everything you use to create your menu items (example: sugar, butter, flour)
- Beverage – Anything you serve that someone can drink (example: beer, wine, soda)
- Equipment – Can be items you rent to your clients for a fee (example: chafer, chair, table) or items you use for service during an event (example: trash cans, sternos, frill picks)
- Other – Extra classification that can be used to separate equipment you own vs equipment rented from 3rd parties
- Category: Assign a category for the item from the drop-down list
- Categories are used to organize your items on reports (i.e. Pack lists, order lists)
- If a category you want does not appear, click the Quick Add New Category button to add a custom category
- Custom categories will be available to assign to future inventory items.
- NOTE: Custom created categories are able to be edited in the Custom Lists area
- Categories are used to organize your items on reports (i.e. Pack lists, order lists)
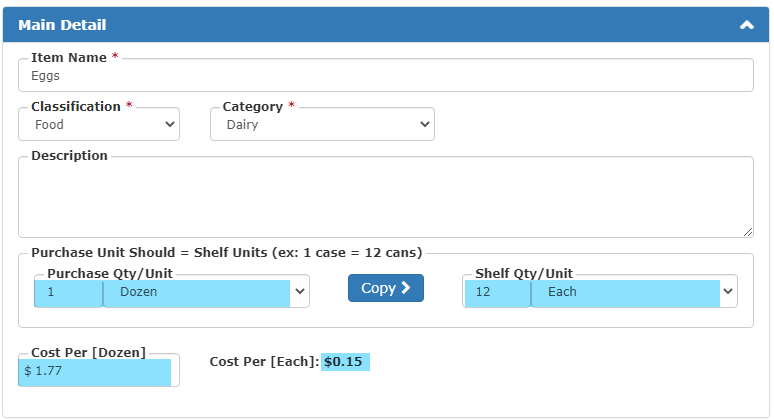
- Description: Enter an optional description to show on client facing reports when sold
- Purchase Information: Enter information about how you purchase the inventory item
- For example, you are probably not ordering eggs individually, so you would enter eggs in the way that you purchase them
-
- Purchase Qty/Unit:: Enter how you purchase the item(s)
- In this example, we are purchasing Eggs by the dozen
- Shelf Qty/Unit: This is how you would use/sell the item for events
- In this example we are saying that their are 12 individual eggs in a dozen
- Purchase Qty/Unit:: Enter how you purchase the item(s)
NOTE: If the Purchase and Shelving detail are identical (ie., the shelving detail does not break down into smaller units than the purchase detail) click the Copy Purchase Detail button. The Purchase Qty/Unit will copy to the Shelf Qty/Unit field.
-
- Cost Per (Purchase Unit): This will reflect the Purchase Unit you defined above and you would enter the cost for the Purchase Qty/Unit
- In the example we are saying that a dozen eggs costs $1.77
- Cost Per (Shelf Unit): This will reflect the Shelf Unit you defined above and TPP will automatically do the math to determine the cost for each Shelf Unit used based on the Purchase Unit price entered
-
- In the example we are saying that a dozen eggs costs $1.77, so each egg is approximately .15 each
-
- Cost Per (Purchase Unit): This will reflect the Purchase Unit you defined above and you would enter the cost for the Purchase Qty/Unit
By setting your inventory items up like this, you will eventually be able to see how much it costs to use these items in recipes and/or on events.
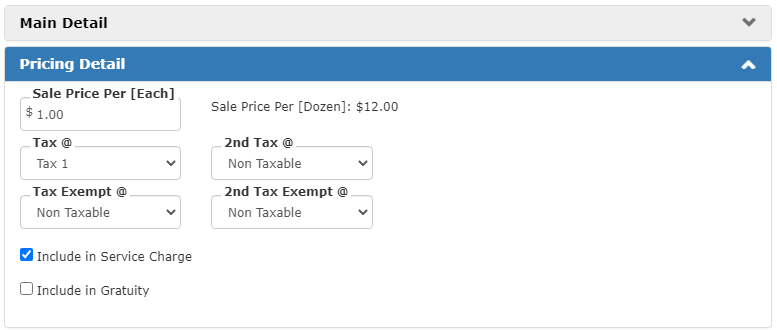
Pricing Detail
You would only need to fill out this section if you plan to charge for the item on events.
-
- Sale Price Per [Shelf Unit]: Enter the price you would charge your client if sold as a line item on an event
- Note: Sale Price Per [Purchase Unit] is automatically calculated by TPP based on the numbers you entered
- Tax @ and/or 2nd Tax @: Define any tax(es) from the Taxing Rules that will be applied if sold as a line item on an event
- Tax Exempt @ and/or 2nd Exempt Tax @: Define how any tax(es) from the Taxing Rules are handled if the event is marked as Tax Exempt
- Include in Service Charge: Define whether a percentage Service Charge assigned to an event will calculate against the price if sold as a line item on an event
- Example: If you charge an 18% Administrative Fee against the food and beverages sold on an event, you would want to check this box to have it considered when calculating
- NOTE: This default can be edited per event under Financials > What is Service Charged
- Example: If you charge an 18% Administrative Fee against the food and beverages sold on an event, you would want to check this box to have it considered when calculating
- Include in Gratuity: Define whether a percentage Gratuity assigned to an event will calculate against the price if sold as a line item on an event
- Example: If you automatically charge an 18% Gratuity against the food and beverages sold on an event, you would want to check this box to have it considered when calculating
- NOTE: This default can be edited per event under Financials > What has Gratuity Charged
- Example: If you automatically charge an 18% Gratuity against the food and beverages sold on an event, you would want to check this box to have it considered when calculating
- Sale Price Per [Shelf Unit]: Enter the price you would charge your client if sold as a line item on an event
-
Vendor / Stock / Storage
- Enter information about the who you purchase from and how you store the items.

-
- Vendor: Assign the name of the Vendor that you normally purchase from
- This can be changed at the event level for any item on the event as a line item
- Storage Location: Define where you keep this item in your kitchen/warehouse
- This can be used to organize your pack list by storage location to make finding items easier
- [Shelf Unit] in Stock: Enter the amount of the item you have on hand to use
- NOTE: This is not a dynamic inventory tracker as it will reset back to the original number each day
- With this in mind, it is more useful for items that are reusable (Cambros, chafers, tables, coolers) instead of consumable items (Food items, Sternos, Paper Products)
- Stock Number: Enter a unique stock number in order to be able to update cost and stock amount via spreadsheet upload in the future
- Suppress from Order List: Click this for items you do not need to appear on an order list when needed for events
- This is used mostly for items that are always in stock for your kitchen (Spices, butter, water for cooking)
- Vendor: Assign the name of the Vendor that you normally purchase from
Saving New Item to Database
- Click on the Save & Close button when you are finished
- You may also click the green arrow and choose:
- Save & Add Another – Resets all fields back to default to add more items
- Save & View Item – Closes Add New Inventory Item window and takes you to the Inventory View for the item you just created
