Each menu item has an area to build a recipe for your kitchen to follow when producing an event menu.
After entering all the info correctly into the recipe area of the Menu Item View, you will be able to:
- See costing for each portion
- Scale the recipe based on the guest count and amount sold
- Create a scaled recipe report that you can give anyone in the kitchen to follow while making the items
Getting Started
Pick a menu item to create a recipe. We’ll use Lasagna for this walkthrough.
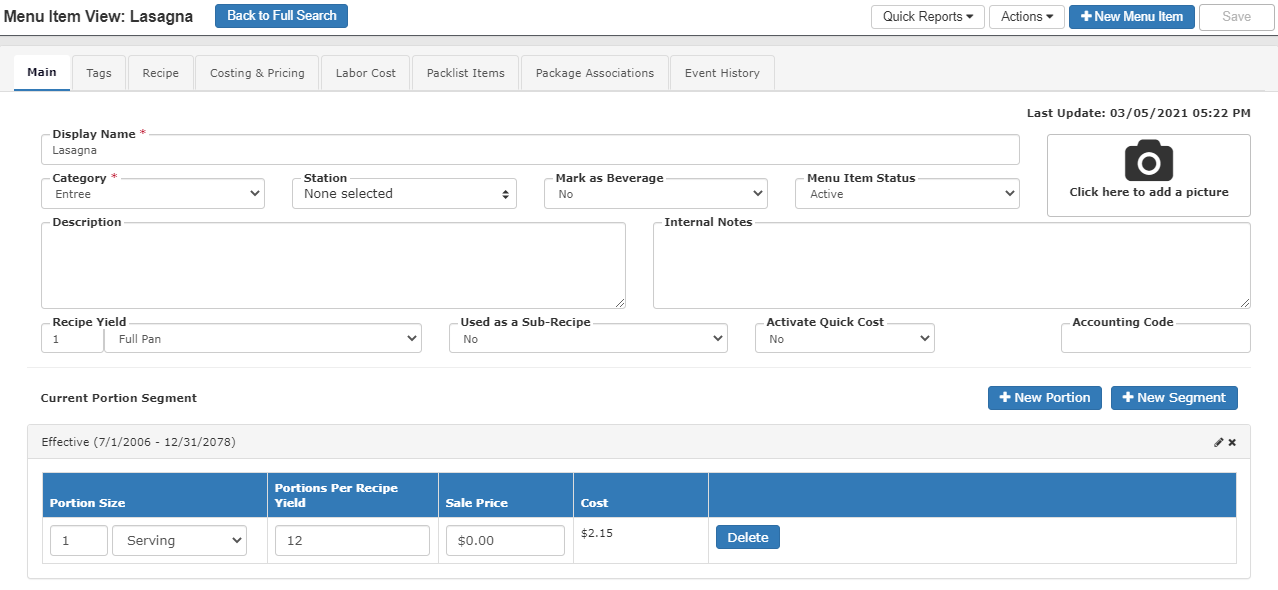
- Open the Menu Item View
Main Tab
Verifying Portions Per Recipe Yield
Before you begin, you will want to make sure that your Portions Per Recipe Yield is defined correctly for any portions on the item.
This will ensure that your recipe will ultimately calculate costs and scale recipes correctly.
In this example the portion is set as containing 12 servings in 1 Full Pan of Lasagna:
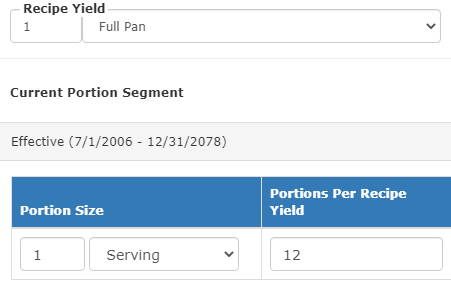
Tip: Set your portion unit in the Recipe Yield to reflect however your kitchen will produce the item (i.e Full Pan, Half Pan, Tray)
Recipe Tab
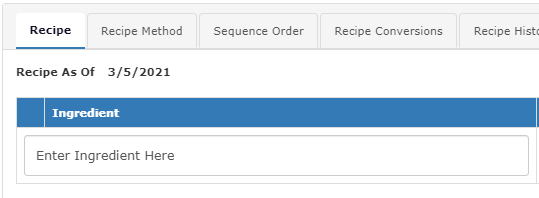
- Click the Recipe tab on the Menu Item View
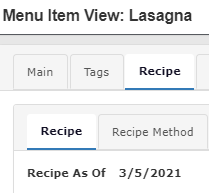
Recipe (Sub-tab)
-
- This will put you on the sub-recipe tab also called Recipe
Adding Ingredients
- Start by typing the name of the ingredient into the Enter Ingredient Here field

Note: Any inventory items in your inventory database are able to be added as Ingredients on a recipe. If the item is not in your inventory database, you will need to add it.
Quick Add Ingredients
Sometimes you find that ingredients needed are not already in your TPP database as Inventory Items.
You are able to quickly add them without leaving the Menu Item you are adding the recipe to.
- Start by typing the name of the ingredient (i.e. Inventory Item) into the Enter Ingredient Here field
- if the item is not in your Inventory database, you will be able to add it here by clicking Add as a new item
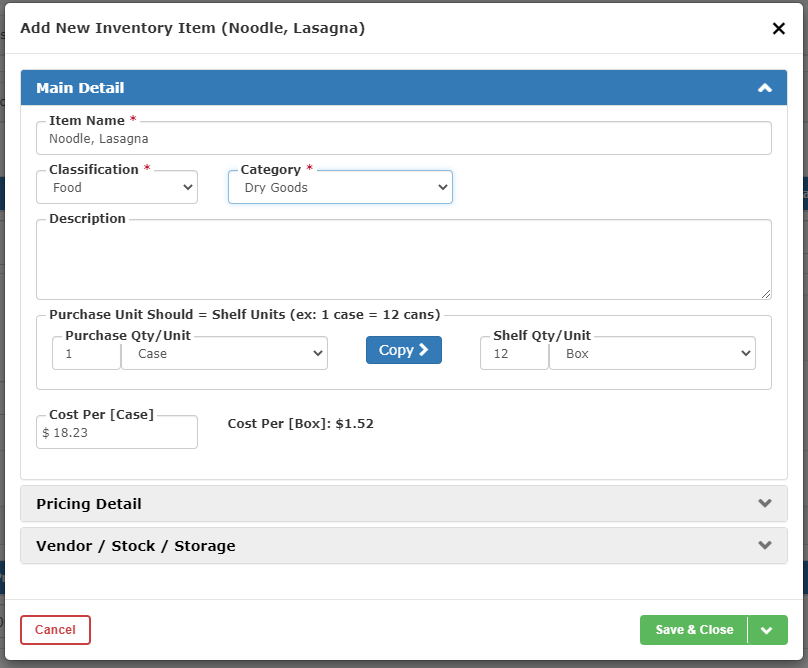
Main Detail
- Item Name: This is the name that will appear internally to all of your TPP users
- Classification: Choose between Food, Beverage, Equipment, or Other
- Category: Assign the item to a Category within the Classification that you assigned
- Description: Optional field that is usually only used if this is an item you will sell to your clients directly
- Purchase/Shelf Qty/Unit and Cost Per [Purchase Unit]: Enter the information about how you purchase the item from your supplier
- In this example Lasagna Noodles are purchased by the case for $18.23
- There are 12 boxes in the case, so the system does the math to calculate the cost per box
- $18.23/12 = $1.52 a box
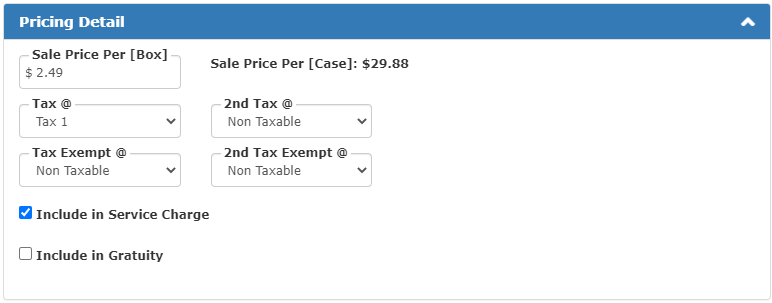
Pricing Detail
You may also enter sale price in the Pricing Detail area, if this is an item you would sell directly to your customers.
Note: This is more common with Equipment and Beverages
- Sale Price Per [Shelf Unit]: How much you will charge your clients per box for this item, if sold on an event
- Sale Price Per [Purchase Unit]: How much you would charge for an entire case, if sold on an event
- Taxes: Define how taxes are applied if this item is sold on an event
- Include in Service Charge: Define if a service charge applied to an event is calculated against the sale price of this item, if sold on an event
- Include in Gratuity: Define if a gratuity charge applied to an event is calculated against the sale price of this item, if sold on an event
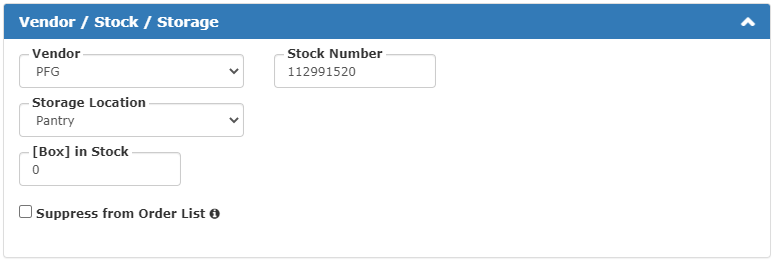
Vendor / Stock / Storage
Make notes for reference about your new item.
Note: All of these fields are optional
- Vendor: Assign the vendor that you normally purchase this from
- Stock Number: Enter the vendor’s stock number for easy reference when re-ordering
- Storage Location: Define where you keep the item in your kitchen
- [Shelf Unit] in Stock: Enter the amount you have on hand for use
- This field is mostly used for reusable items, instead of ingredients, as TPP doesn’t deplete the in stock numbers from this field automatically
- i.e. If you have 10 in stock today and use 7, tomorrow it will be back to 10 in stock
- Suppress from Order List: Use this for items that you don’t need to show on Order List reports
- Most users suppress kitchen staples like salt, eggs, etc.
Once you have complete all the desired fields, click Save & Close to return to the recipe
Your item is now in your Inventory database and can be selected to add to the recipe.

Adding Ingredients (Continued)
Once you have selected the item you want to add to the recipe, you will then need to define a few things:
- Amount (for this Recipe Yield): Define how much of the item is needed to create the recipe
- Unit (for this Recipe Yield): Define what shelf unit will be used to create the recipe
- Show Fraction/Decimal: This can be used when you are only using part of an item for a recipe
- if we only needed 1/2 of the box to make a full pan of Lasagna, then we would enter it as either:
Decimal:

OR
Fraction:

Note: Choose whatever way is best for your kitchen production.
- Continue adding items until you finish your recipe
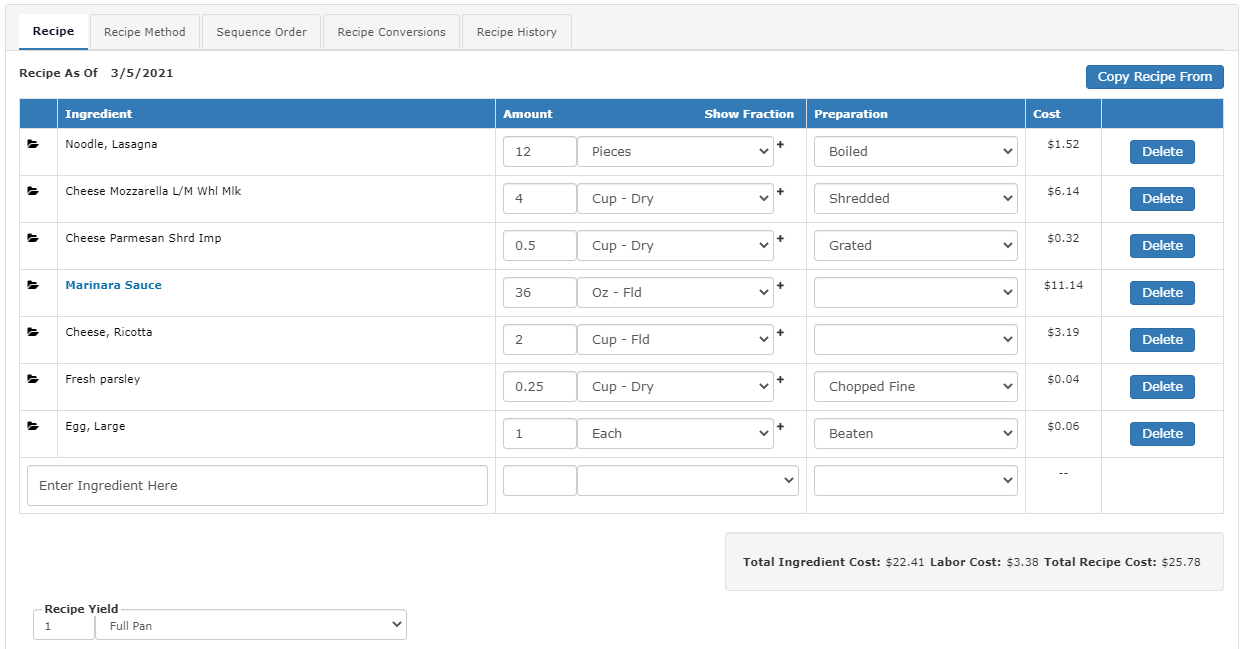
We now have a complete recipe for Lasagna with all the ingredients costed and scalable.
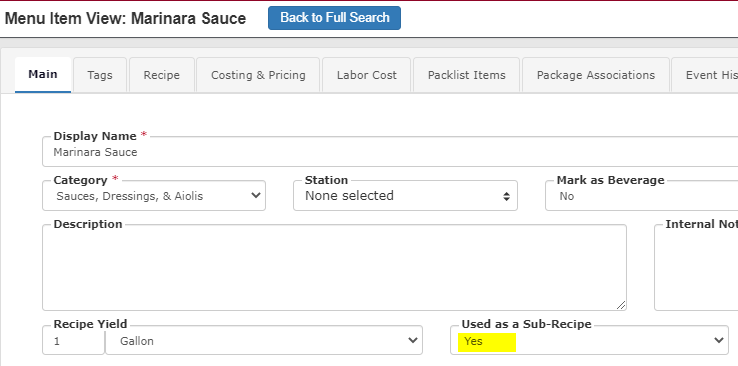
Sub-Recipes As Ingredients
Marinara Sauce is another menu item that we already built a recipe for.
You can create recipes for sauces or other ingredients that you use as sub-recipes on other menu item recipes instead of having to add the individual ingredients that it is made from on new items.
To use a menu item this way, you would want to mark it as Used as a Sub-Recipe on its Menu item View:
Recipe Method Tab
Enter directions for your chefs to make the item and for how it will be served at an event.

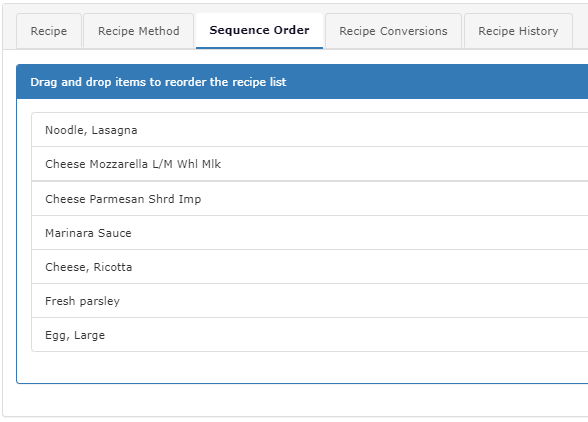
Sequence Order Tab
Change the order in which the ingredients appear on reports.
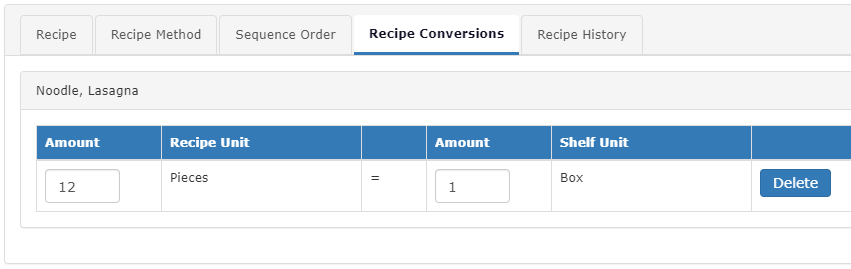
Recipe Conversions Tab
If you change the unit (Box in this example) to something different then you will have to tell the system how many of the new unit are in the default shelf unit.
Example: If you were to change the unit from Box to Pieces of Noodle, Lasagna then system would need to know how many Pieces are in a Box to be able to divide the cost and scale the recipe, as needed.
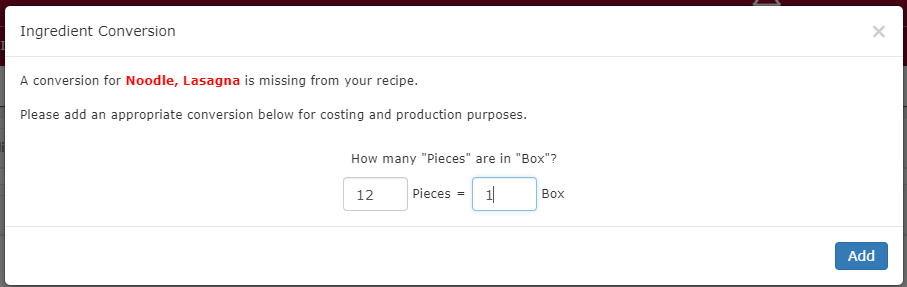

Any Recipe Conversion that you have defined for a specific item are located for reference under the Recipe Conversions tab.
Recipe History Tab
See the the history of the recipe and any changes that have been made.
Menu Item Recipes Report
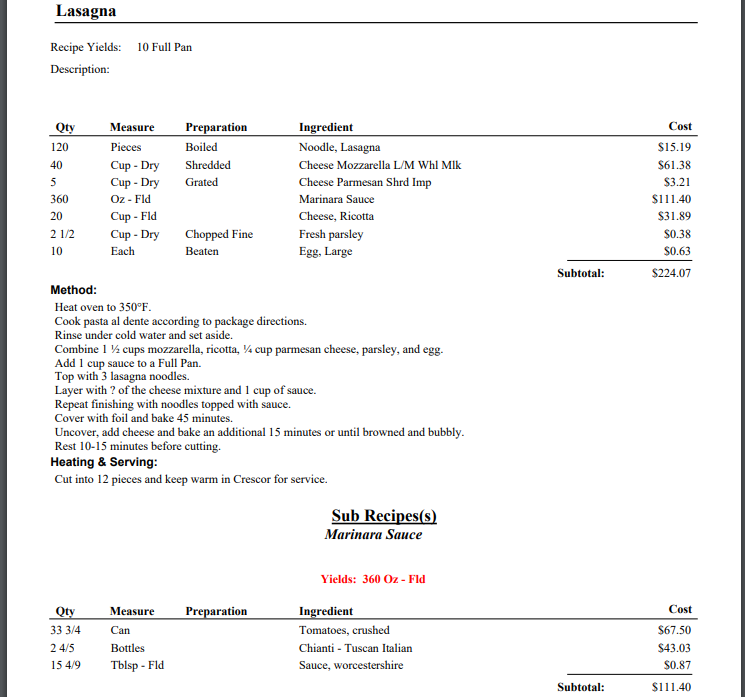
When you are in the item’s Menu Item View you are able to print the recipe for the Recipe Yield or a scaled recipe report.
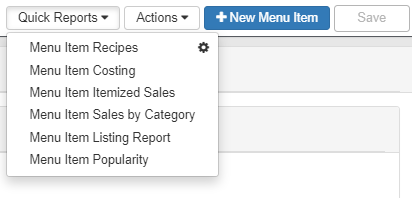
- Click Quick Reports in the upper right corner
- Choose Menu Item Recipes and a PDF of the recipe will generate:
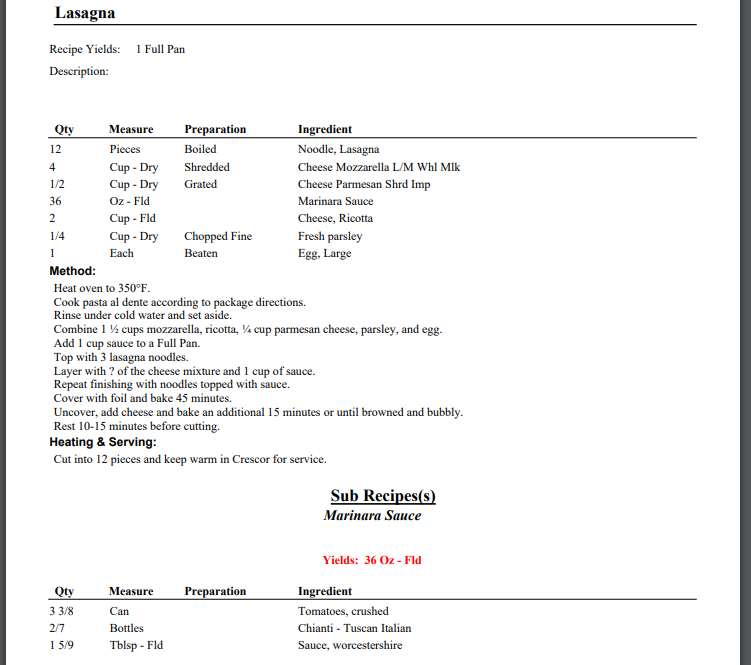
Notice that the sub-recipe for the Marinara Sauce is also included.
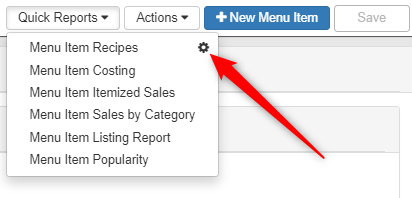
Recipe Report Parameters
In the Quick Reports drop down, you can choose the gear icon to change some of the settings of the report you are generating:

- Show Menu Item Pictures: Check this to have assigned picture on the Menu Item View appear on the recipe for reference
- Show Ingredient Cost: Check this to show the total ingredient cost for the scaled recipe
- Scale recipe yield to X Recipe Yield Unit: Enter how much of the yield you want to produce (decimals are allowed)
Click OK to view the report: