Events Pending Staff Confirmation

Displays any Events on the books for the next X number of days (where X is defined by you) that have unconfirmed hired staff.

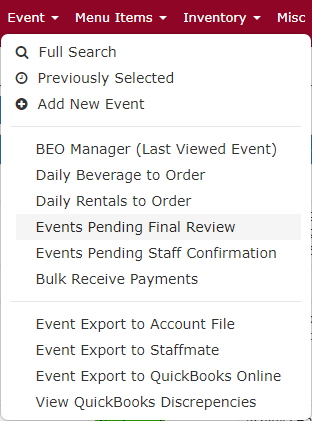
Helpful Hint: This screen can be displayed anytime by clicking the Event > Reviews > Events Pending Staff Confirmation from the Navigation Bar.
Total Party Planner initially defaults to a 7 day warning. This number may be incremented or decremented based on your business needs.
To change the warning days:
- Navigate to Event > Reviews > Events Pending Staff Confirmation from the Navigation Bar.
- Select a number from 1 to 365 from the ‘day warning for Events with staff that have NOT been marked with Confirmed Hire’ dropdown selection list in the upper left hand corner of the screen. Total Party Planner will remember this number for subsequent uses of the program.
Events Pending Final Review
The Events Pending Final Review displays any Events on the books for the next X number of days (where X is defined by you) that have not been marked as having had a final review. When checked, this flag tells the program that the menu, guest count, date, etc. have been reviewed internally and/or with the Contact, and the Event is ready for execution. Refer to the topic Main Tab for instructions on updating the Final Review flag.

The warning day number may be incremented or decremented based on your business needs.
To change the warning days:
- Select the Event > Review > Events Pending Final Review option from the Navigation Bar.
- Select a number from 1 to 365 from the drop-down list. Total Party Planner will remember this number for subsequent uses of the program.
Bulk Update

- Select the Event > Full Search option from the Navigation Bar.
- Click the Bulk Update Event Status button.
- Select the appropriate search criteria from From Date:, To Date:, and a Status of Confirmed, and click the Search button. Optionally, you may enter a search in the Search textbox.
- Click the check boxes next to the Events listed on the grid have been executed and are ready be put into a Closed status.
- Select Closed from the Update Event Status To: drop-down list.
- Click the Update button.
Individually Update
- Navigate to the event. For more information on how to do this reference Updating Event Data.
- Click on the Event Main or Totals & Payments tab.
- From the Event Status drop-down list select Closed.
- Confirm the Status change by clicking OK.
Suggestion: Before closing an Event you may want to wait until that Event is paid.
Bulk Receive Payments

The Bulk Receive Payments area allows you to receive payments for multiple events in one convenient location

- Navigate to Event>Manage>Receive Bulk Payments.
- Use the search box to search for the events you wish to accept payment for by Invoice #, Contact Name, Date, or Status. You can also filter by ‘Outstanding events within date range’ or ‘events with payments between dates’.
- Click Search to show the results below.
- Use the dropdown below the search box to view all of the events from one specific client.
- Enter payment type, payment date, amount, method, number, and payment notes for multiple events. Make sure the events you are applying the payments to are checked off to the left.
- Click Save Now to apply the payments to your events. Additionally, you can change the status of the events if receiving a payment moves the event to a new status.