Updating Misc. Data
Miscellaneous items are things you will charge a Contact for in addition to the menu, beverages, rentals, and staffing. Examples of miscellaneous items would be delivery, floral, DJ services, miscellaneous fees, etc.
Searching for a Miscellaneous Item
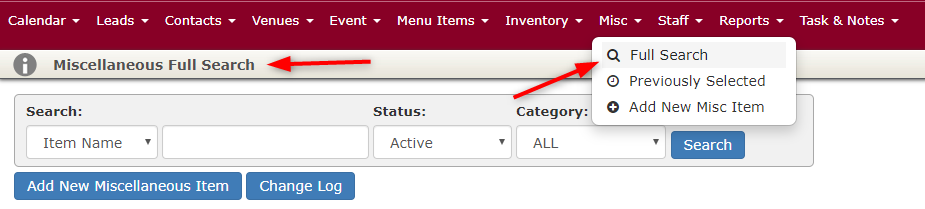
- Select the Misc. > Full Search option from the Navigation Bar.
- Select a search option from the Search dropdown.
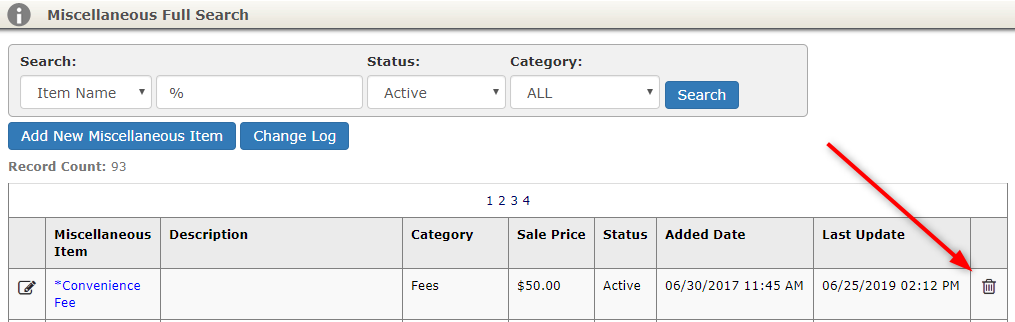
- The dropdown applies to the text box AND to how the results will sort. The Ascending/Descending selection dropdown specifies the sort direction of the search. For example, if you selected Item Name, enter any character combination of the menu item’s name in the textbox and it will display your results, automatically sorted.
- You can further refine your search list by filtering venues Status: by Active status, Inactive (will no longer require services in the future) status, or All.
- Select a Category.
- Click the Search button to apply filter criteria.
- Click the Misc. Item’s name to load the selected Misc. Item page.
Adding Miscellaneous Items
Contact Report Notes: You may add customized Contact Report Notes for the proposal. This is a great way to communicate generic notes regarding the miscellaneous items.
Internal Report Notes: You may add customized Internal Report Notes for internal reports. This is a great way to communicate generic notes regarding the miscellaneous items.

- Click the + Miscellaneous button. The Add Miscellaneous Item to Event page appears.
- Select an item from the grid. To narrow down the selection list select a category from the Category: drop-down list and Search: bars. If a miscellaneous item you want has not yet been added to the database, you can add it now by clicking on the Create New Miscellaneous Item button. Refer to the topic Updating Inventory Data for more detailed information on adding inventory.
Helpful Hint: To further aid in your selection, Total Party Planner allows you to type in the first few characters of the item name in the Search box. The list will automatically advance to items that begin with the entered characters.
- Use the checkbox next to the Miscellaneous item to select it.
- Amt., Hour: After selecting the desired item from the grid, you may be prompted to enter the total amount of the item or the hours associated with the item. If an items unit is Each, then a valid quantity must be entered for the item. If the item is priced as Per Hour then you must also enter the total hours for this item.
- Price: The price you will charge the client for the item.
- Cost: The price you paid for the item. If you own the item, it will most likely be $0.
- Vendor: Use the drop-down box to select the appropriate Vendor for the Miscellaneous Item. Refer to the topic Vendors for more information on adding a new Vendor.
- Description: Enter a brief description of the item.
- Contact Report Note: You may add customized Contact Report Notes for the proposal. This is a great way to communicate generic notes regarding the miscellaneous items.
- Internal Report Note: You may add customized Internal Report Notes for internal reports. This is a great way to communicate generic notes regarding the miscellaneous items.
- Invoiced?: If this box is checked, the contact is charged on the invoice. Otherwise it is only used internally for the Event. Helpful Hint: If a Menu Item that you need does not exist in the database yet, use the Quick Add Miscellaneous button. Refer to the topic Updating Miscellaneous Data for more information on adding a new Miscellaneous Item.
- Service Charge?: If this box is checked, this item will be added to the Service Charge if applicable.
- Gratuity?: If this box is checked, the item will be added to the Gratuity if applicable.
- Click the Add to Event button.
Helpful Hint: Any Inventory items associated to this Miscellaneous Item will automatically be added to the Packing List now. Refer to the topic Creating A Packing List (Menu Item & Miscellaneous) for more detailed information.
- Repeat the above steps for all Miscellaneous items required for the Event.
- To view items added to the Event, click the Currently Selected Misc. Items tab.
- When all applicable Miscellaneous items have been added, click the Back to Event button.
Helpful Hint: To update other modules without going back to the Event, hover over the Add To/Update Other Areas and select an option from the list.
Editing Event Miscellaneous Selections

- Select the Event > Full Search option on the Navigation Bar. Refer to the topic Event Selection for more detailed information on searching for an Event.
Helpful Hint: To quickly load the previously viewed Event, use the Event > Previously Selected option from the Navigation Bar.
- Select the appropriate Event by clicking the Invoice #.
- Click the Misc. tab.
- Select the Miscellaneous row to be edited from the grid by clicking the Edit link.
- The Event Amount, Hours, Sale Price, Unit Cost, Invoice?, Svc Chrg, Gratuity, Picture on Proposal, Vendor, BEO, Assign Area, Description, and Notes fields may be adjusted accordingly. The Tax At: drop-down list defaults to whatever you have setup as a tax rule. Change the value if required, but typically you will not change your rule. Refer to the topic Tax Rules for more information on setting up your business tax rules.
- Click the Save Button to save the data to the database or click Cancel to rollback any changes
Deleting Miscellaneous
- Follow the Misc. > Full Search option from the Navigation Bar.
- Select the Miscellaneous item to be removed by clicking the Delete link. Miscellaneous items that are currently associated to Events cannot be deleted.
- Confirm the deletion by clicking the Yes button
Maintaining Misc. Costs and Prices
- Select the Misc. > Full Search option on the Navigation Bar.
Helpful Hint: To quickly load the previously viewed Event, use the Misc. > Previously Selected option from the Navigation Bar.
- Select the appropriate Miscellaneous Item by clicking the item link.
Adding a Miscellaneous Item Price Segment

- Click the Cost & Pricing tab.
- Click the + New Cost/Price button.
- Enter the Actual Cost: and Contact Price: information.
- Enter the Effective Date: that this cost/price should go into effect.
Helpful Hint: The effective date should be sometime in the PAST to accommodate any Events you may want to enter from the past.
- Click on Save button.
Editing a Miscellaneous Item Price Segment
- Click on the Price History tab.
- Click the Edit hyperlink beside the appropriate price segment.
- Enter in the appropriate Actual Cost:, Contact Price:, and Effective Date:.
- Click the Save button.
Deleting a Miscellaneous Item Price Segment
- Click the Delete hyperlink beside the appropriate price segment.
- Confirm the deletion by clicking the Yes button.
Packing List Exceptions By Service Style
Once an inventory item is associated to a menu or miscellaneous item, that inventory item will be packed on an event – if the associated menu or miscellaneous item is being used for the event. There may, however, be times where it would not make sense to pack an item based on the event type, or service style. For example disposable serving utensils are required when serving lasagna take-out or pick-up style, but not sit-down style. In this case, an exception would be setup to NOT pack the disposable utensils for the sit down service style.
Step 1 – Load the Pack List Summary
1. Select the Inventory > PackList Associations > Pack List Service Style Association option from the Navigation Bar.
2. A list of your currently defined packing list associations is displayed.
Step 2 – Review and Modify
- Search for the specific item you wish to associate/unassociated from a service style by selecting a category from the Search: drop-down list and using the search text box.
- Select the service style you wish to edit from the Service Style:.
- Alternately, you may click the View By Inventory Item to see each individual item and the service style it is associated with.
- Check or un-check the Pack? checkbox for each service style accordingly for the chosen inventory item.
Helpful Hint: Use the Select All and Select None links to check or uncheck all the boxes.
- When finished with that inventory item, click Save.
- Repeat the 3 steps above as necessary.
- After all adjustments are made, click Done.
Misc. Event History

- Select the Misc. > Full Search option from the Navigation Bar.
- Select the appropriate Miscellaneous Item by clicking the item link.
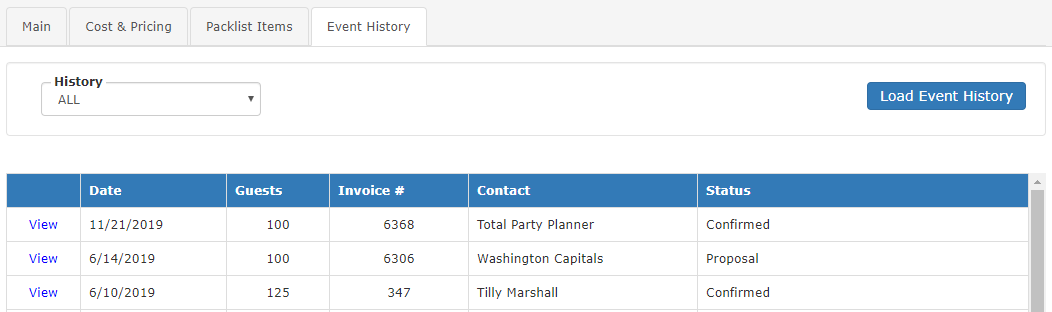
- Once a Miscellaneous Item has been selected, any events associated with that Item can be viewed by clicking the Event History tab.
- The default number of Events viewed is for a timeframe of 3 months. To see more Events, simply change the timeframe in the Display: selection list. Then, click Load Event History.
- To view that Event, click the appropriate Invoice #.