![]()
This integration connects your TPP Calendar and your Google Calendar. You are able to set up a hands free connection, manually export multiple events at once, or manually export them one at a time. Keep in mind you have the option to share your Google Calendar with the employee’s email addresses of your choice, this way those on your team who may not have access to your Total Party Planner account can still see the events taking place on your shared Google Calendar!
Setting Up Your Google Sync Profile
1- Go to the User Menu in the upper right corner of TPP > Google Sync Profile

2- From the Google Sync Profile screen, click the blue Configure Account button.

Note: Be sure to use an Gmail address that has a calendar that is shared with the required employees on your team.
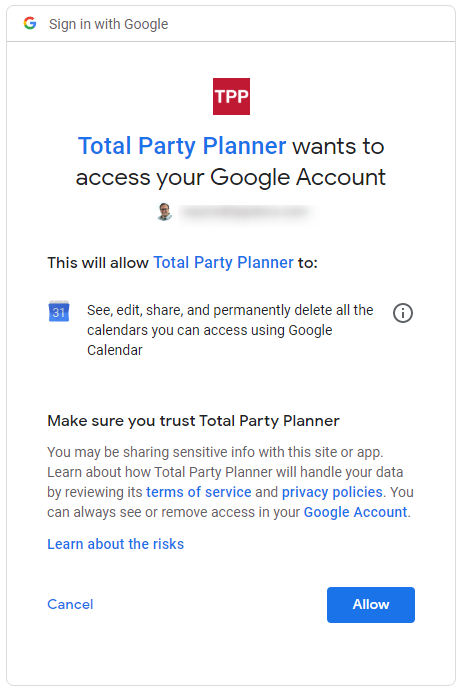
3- Next, log in to your Google account and then click the blue Allow button to give TPP permission to connect with Google.
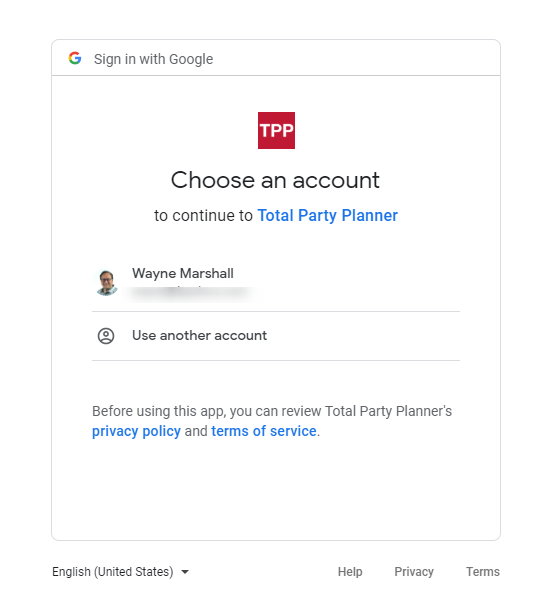
You will now see your email address listed under Current Account.
4- Next, in the Export To Calendar drop-down, choose which Google Calendars you’d like events to export to and the Status(es) you want to export.
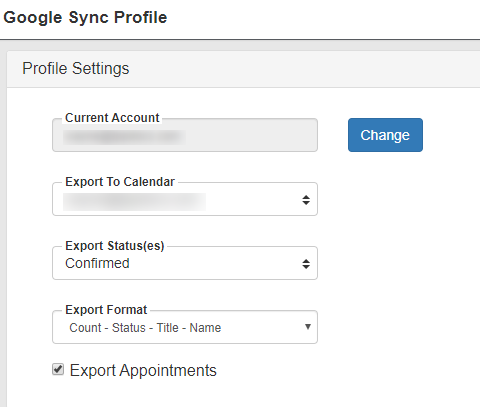
5- Choose the Export Format of your preference from the drop-down options. This is the order certain pieces of info exported to your Google Calendar will display in.
6- Choose Export Appointments to send over any appointments you may add to your TPP Calendar.
7- In the upper right corner click the Save button if it is green. If it is not green then everything should be ready to use.
Note: It may take 1-2 hours to see your synced events on the Google Calendar(s)!
Note: Changing Event Information in TPP does update the existing Event on your calendar (may be subject to the 1-2 hour sync for update).
Export Events to Google Calendar
How to manually export multiple events from one screen
1- Hover over Calendar and select the Event Export to Google Calendar option from the Navigation Bar.

2- Search for the Events you wish to export to your Google Calendar.
Note: Narrow your search by selecting specific statuses to export and the Exported? option from the drop-down list.
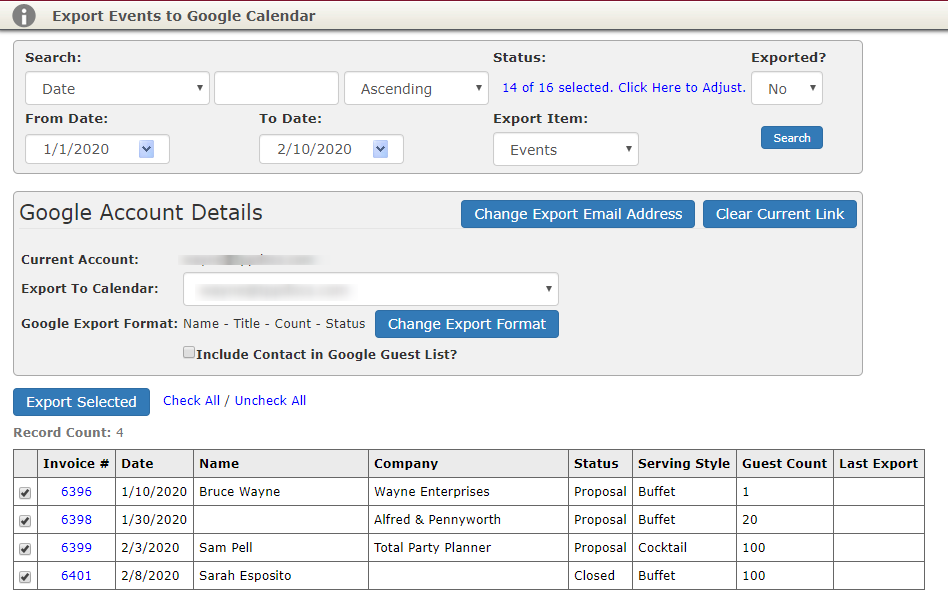
Note: All Events are checked by default. Remove the check from any Events you do not wish to export.
3- Click the Export Selected button.
Note: If it is your first time exporting, you will be prompted to login to your Gmail account, otherwise Events will be exported to the account you used the first time you exported.
4- All checked Events will be exported, and you will receive a confirmation message.
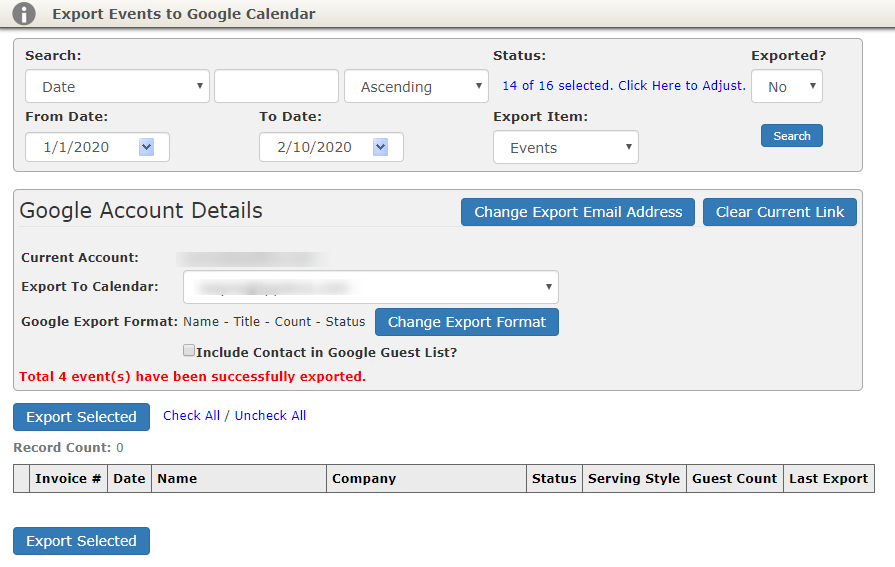
Changing Export Email Address
1- Hover over Calendar and select the Event Export to Google Calendar option from the Navigation Bar.
2- Click the Change Export Email Address button.
3- Choose or Log in to Google with the email address you would like to export the Events to.
4- Click the Allow button.
All checked Events will be exported, and you will be returned to the Export Events to Google Calendar page.
Export A Single Event to Google Calendar
1- Open the Event you’d like to export.
2- Choose the Actions menu and then Google Calendar.
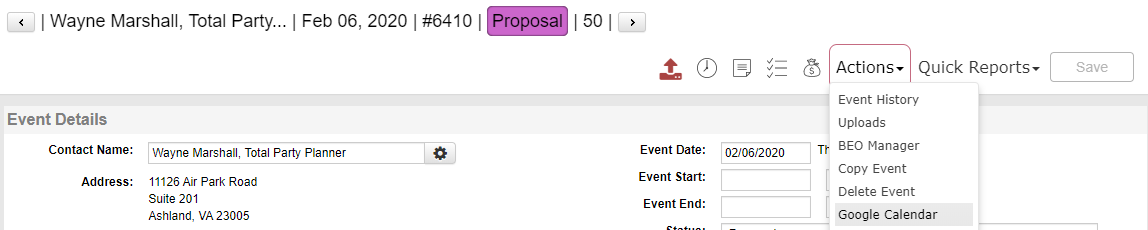
3- It will send the event to your Google calendar and give you a confirmation.