
Getting Started Guide
Taxing Rules
- From the upper right-hand corner menu bar, select the Profile Menu | Administration | Taxing Rules.
- The Tax Value & Names tab is active.
- Click the New Tax Location button.
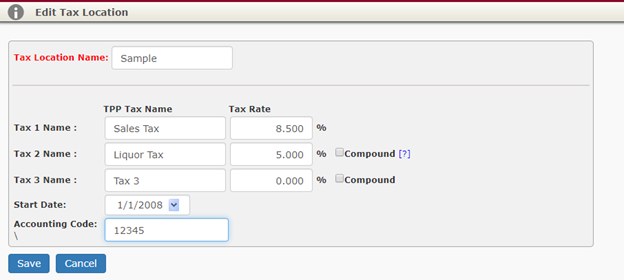
- Type in a Tax Location Name you would like to identify your tax with (typically this would be a county or locality name).
- Type in the appropriate tax rate for Tax 1.
- If you have more than 1 tax rate to charge items to, enter those values for Tax 2 and Tax 3.
- Leave the default Start Date.
- This date should always be sometime in the PAST to accommodate any earlier event bookings you may want to enter.
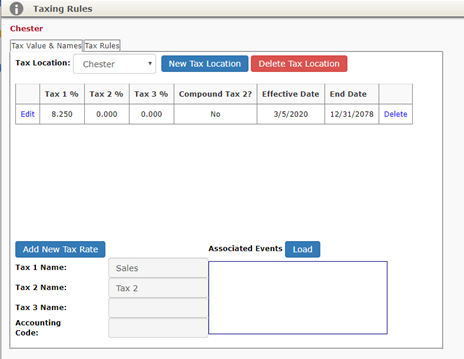
- Click the Save button. The entered data is displayed.
- Click the Tax Rules tab.
- Simply stated, your events will follow the taxation rules listed in the grid.
- For example, by default your food (menu) will tax at the rate setup under Tax 1.
- Other tax rules apply to beverages, rentals, staff, and service charges.
- Click the Edit hyperlink.
- Leave the default Effective Date.
- This date should always be sometime in the PAST to accommodate any earlier event bookings you may want to enter.
- Update the appropriate tax rates from each drop-down list for menu, beverage, rentals, staff, and service charge.
- You may also define SECOND tax options.
- Click the Save button.
- You may setup multiple Tax Locations to use if your tax changes depending on where your events are taking place.