Event Timeline Tab
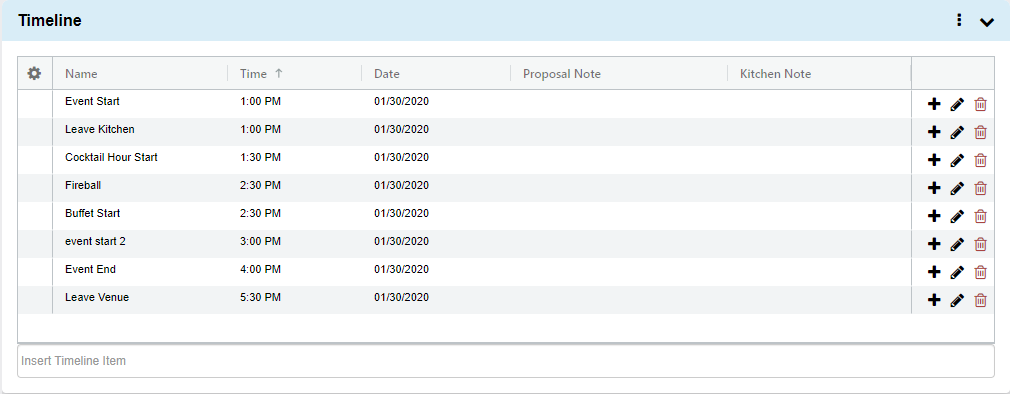
The Timeline allows you to fully customize and plan out times for your Events.
Although times are optional, it is a good idea to always record the Event Start and Event End times for viewing purposes on the Calendar and Room Manager.
- Follow the Event > Full Search option from the Navigation Bar
-
- Helpful Hint: To quickly load the previously viewed Event, use the Event > Previously Selected option from the Navigation Bar
-
- Select an Event by clicking the Invoice # link
- Click the Times tab
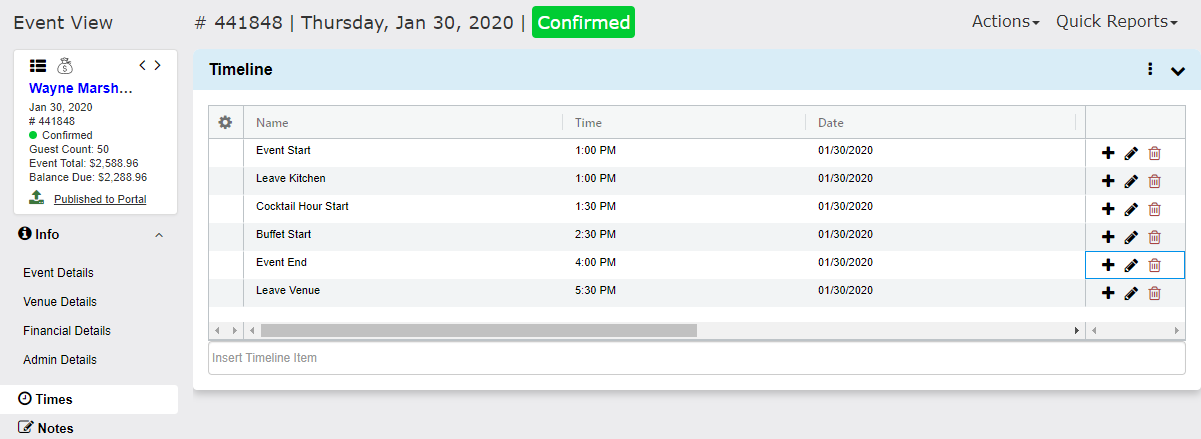
Adding Times
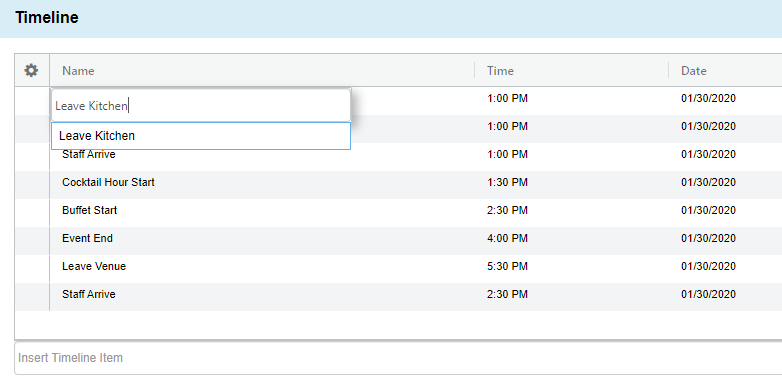
- Start by typing the Timeline Name you want to enter into the Insert Timeline Item field
- In this example we are adding Staff Arrive time
- If the time is already in your database, then it will show below the field for you to select
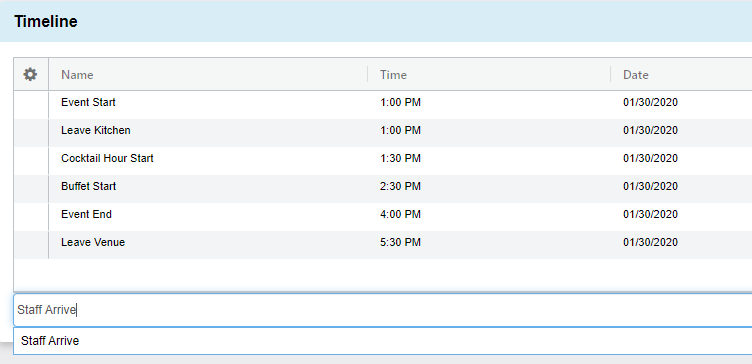
- Simply click the Name and then you will be able to enter the Time desired
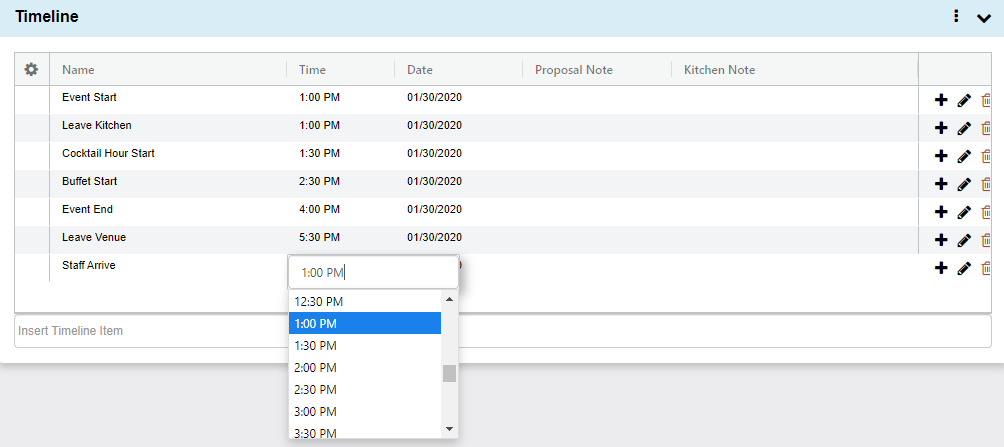
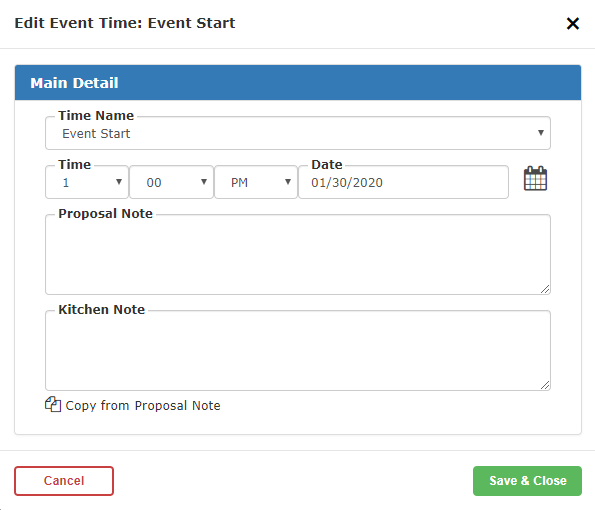
- Once you select a Time then click the tab button on your keyboard to go to Date, Proposal Note, or Kitchen Note to add/edit
- Entered times will appear in the correct sequential order once the web page is refreshed or if you go to another tab (i.e. Info, Notes, etc.) and return to Times
- Note: By default, the date associated to the time will be updated to the Event date
- If the date is not the same (perhaps the setup date is the night before), enter the appropriate date now
- Repeat these steps to build the needed Timeline
Editing Times
To the right of each Timeline Name there are three options:
 Add New – Inserts a new time entry at the same time of the line clicked
 Edit the existing Time, Date, Proposal Notes, or Internal Notes in a pop-up window
 Delete the time selected
Adding New Times
If the time is not in your database, then you will be given the opportunity to add it as a new Time.
- Type the Name of the desired entry
- If the entry is not in your database, then the Quick Add option will allow you to add it
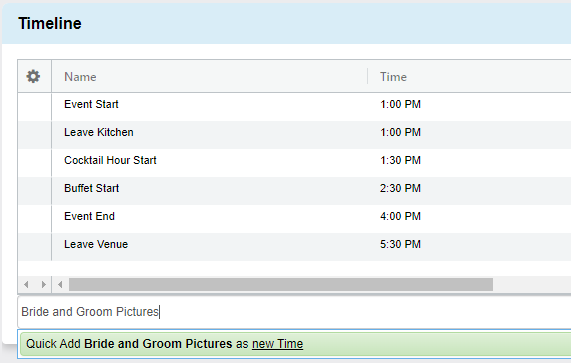
If you click Quick Add Bride and Groom Pictures as new Time as seen above, then a pop-up window will appear:
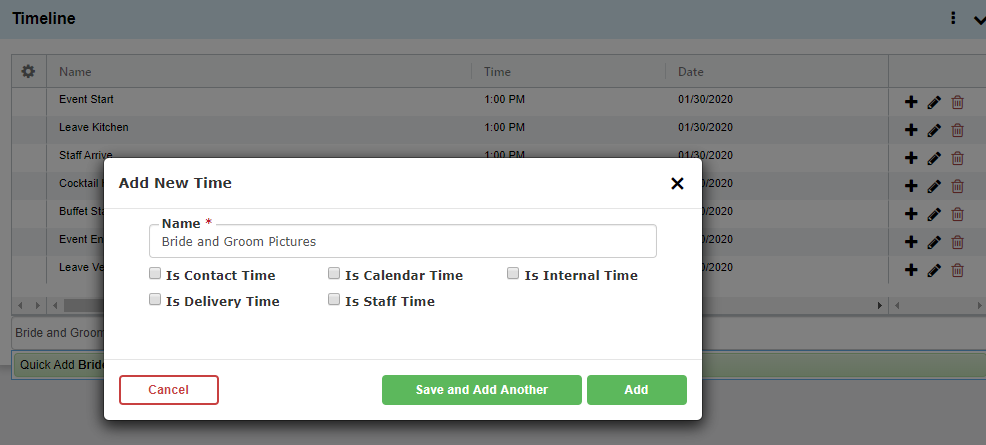
- Confirm the Name to add to your database and define where the time appears in TPP:
- Is Contact Time – Shows on client facing documents
- Is Calendar Time – Show on the timeline that pops up when you hover over the event on the Calendar
- Is Internal Time – Shows on the Event Menu Item Production Worksheet report for the kitchen
- Is Delivery Time – Shows on the Event Delivery Addresses report
- Is Staff Time – Shows on the Staff Schedule report
- Click Save and Add Another or Add to complete the addition.
Now the time is part of your database and can be used by your team on future events.
Times Tab Drop-Down Menu
The drop-down menu in the upper right corner allows you to add times like you did in the previous version of the software.
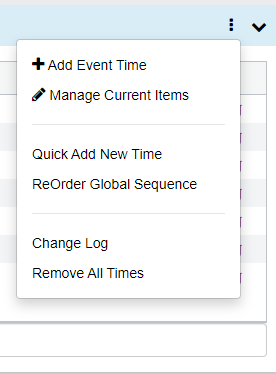
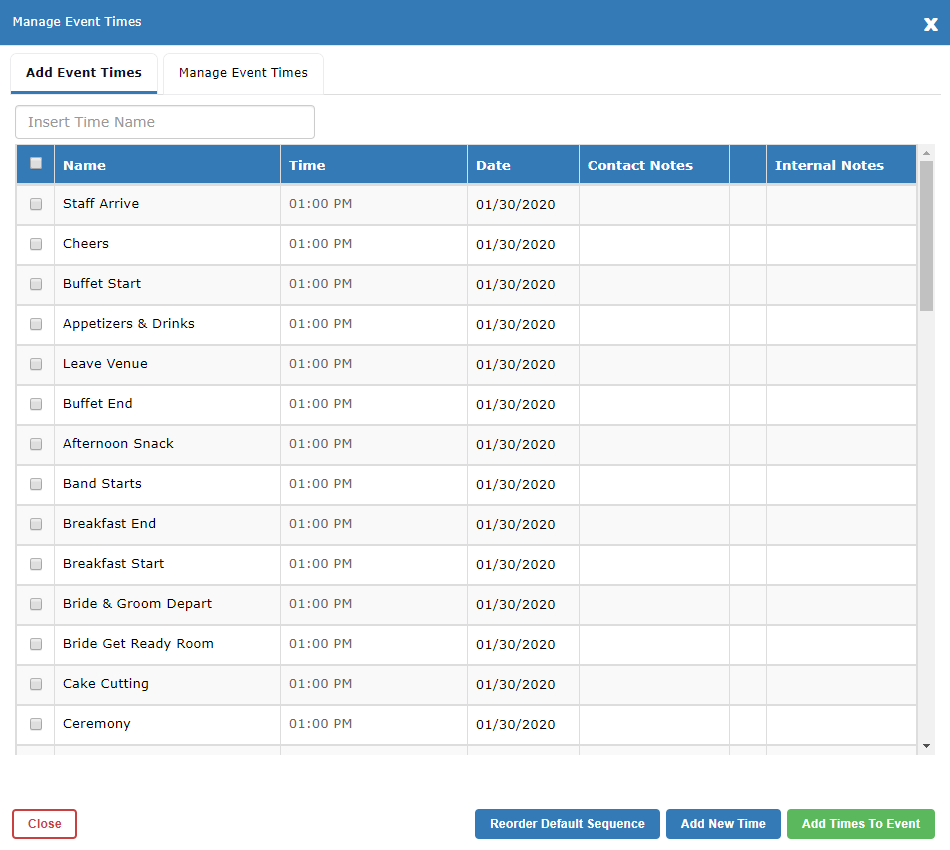
Add Event Time
Shows you a complete list of your active Event Times.
Manage Current Times
Bulk updates your existing event times.
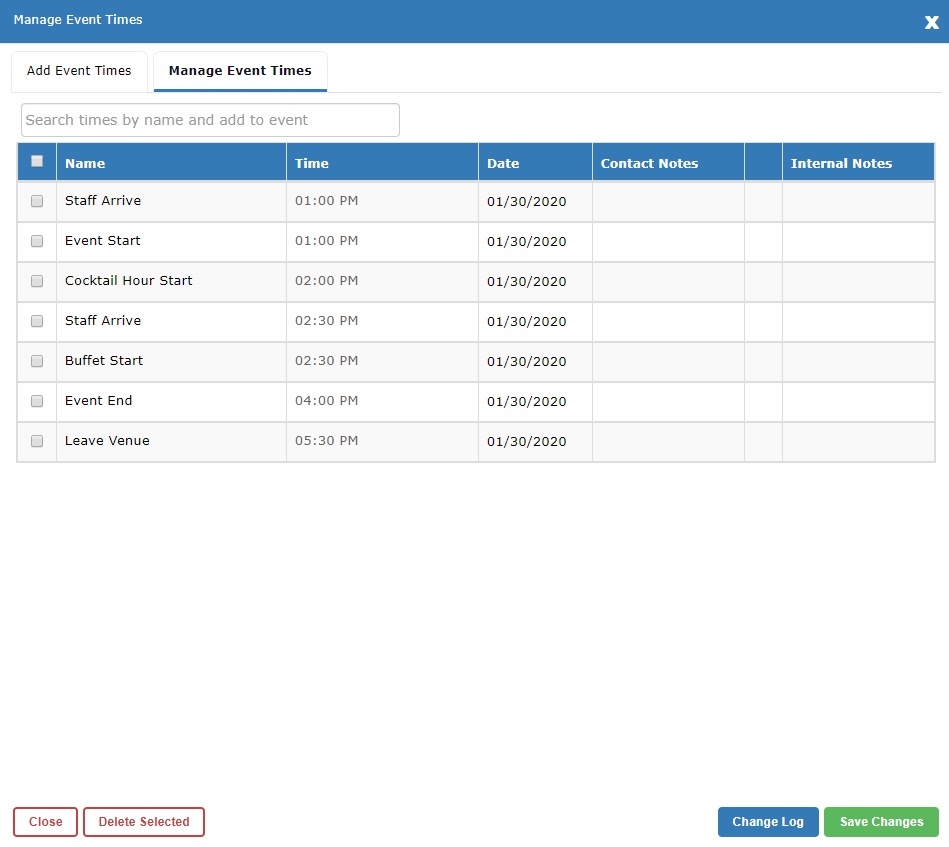
- Click the Manage Current Times from the menu.
- Select the time you wish to edit by checking the box.
- Edit the Time, Date, Contact and/or Internal Notes as needed.
- To delete a time simply check the box next to the Name you wish to delete and then select the Delete Selected button in the bottom left of the window.
- Click the Save Changes button to complete.
Quick Add New Time
Add a new time to your database as seen above.
ReOrder Global Sequence
Allows you to re-sequence the order that times appear when you are adding them to events.
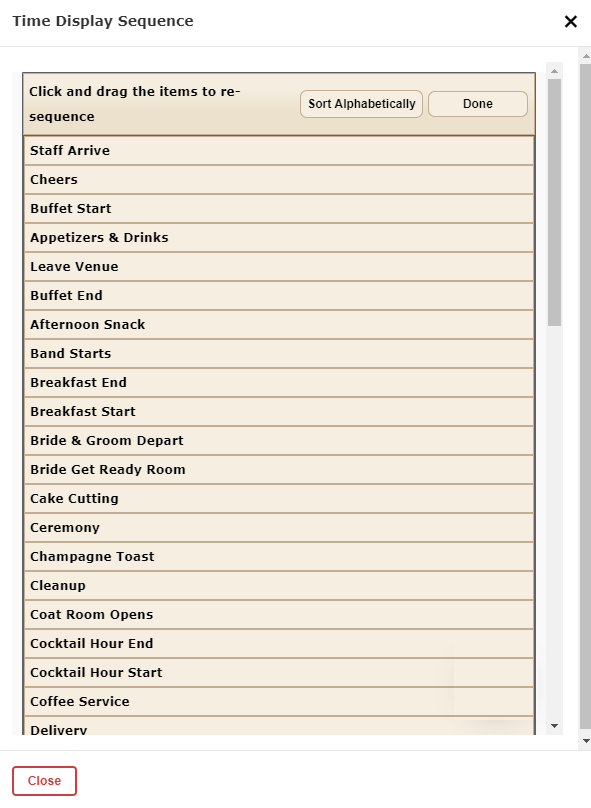
Many clients edit their most used times to the top of the list.
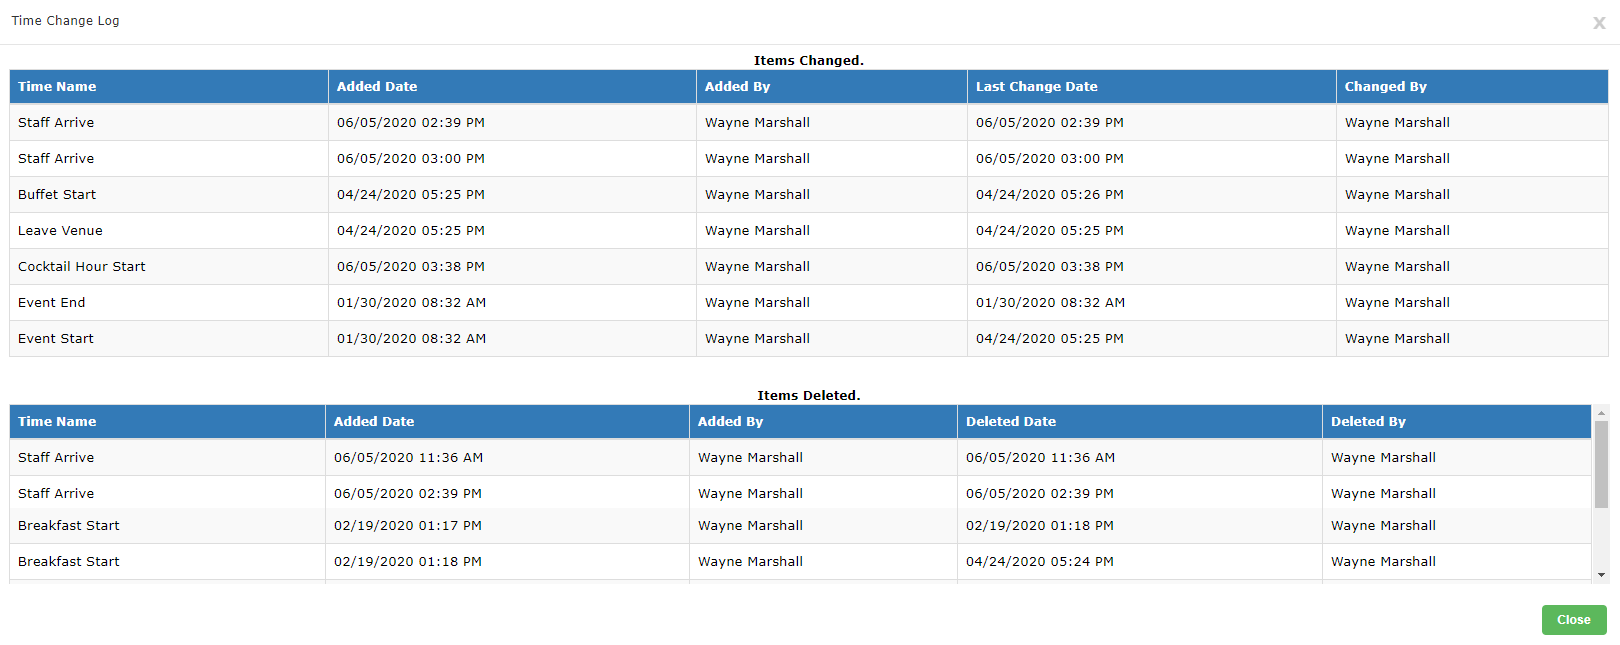
Change Log
Shows you all the times added
Remove All Times
Remove all times from the event and start over.
