
Your Profile & Preferences section under the Administration menu is where you define the defaults for your business.
Note: Items marked with * can be changed at the event level after the default options have been applied for that specific event only.
The Profile & Preferences section is broken down into eight tabs:
Event Main Defaults
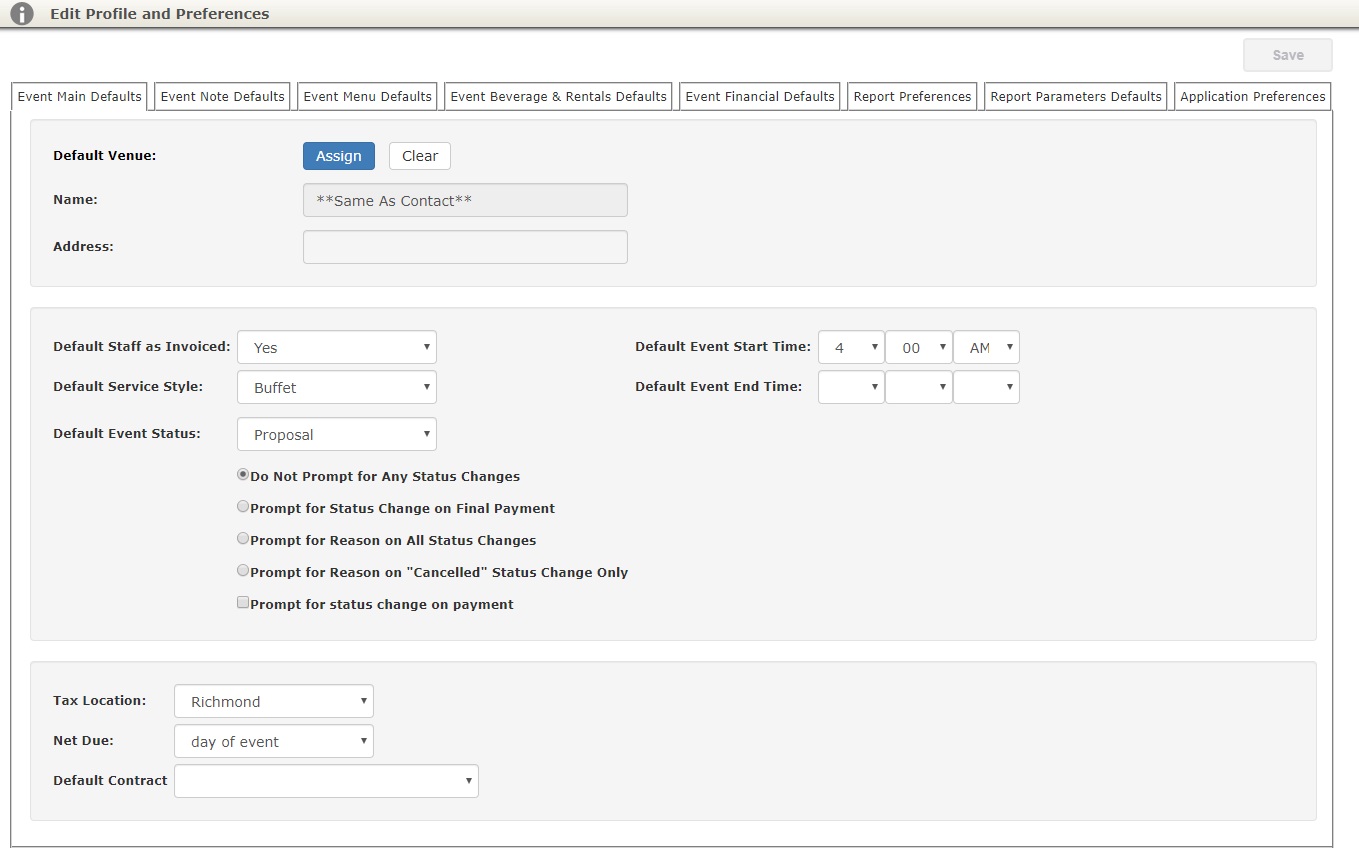
*Default Venue: You may designate a default venue to automatically populate when a new event is booked in Total Party Planner.
Off-site caterer’s will probably leave this blank.
*Default Service Style: A default service style can be assigned to any new events.
Ex. This is perfect if the majority of your business is take-out or cocktail parties.
*Default Event Status: You can choose what status all new events entered into Total Party Planner will be assigned.
Do Not Prompt for Any Status Changes or Prompt for Reason on All Status Changes or Prompt for Reason on “Cancelled” Status Change Only:
You can also require that a reason is entered for All Status Changes or only Cancelled Status Changes.
Prompt for status change on payment: When someone enters a payment in Total Party Planner, you can have the system prompt for a status change.
This is useful to remind the person entering a deposit to change from Proposal to Confirmed or someone applying a final payment to mark the event as Closed.
*Tax Location: This can be set up to reflect your local and state tax requirements.
*Default Staff as Invoiced: You can choose to separately charge for staff or include them in the total cost.
*Net Due: Designate default payment terms.
*Event Note Defaults
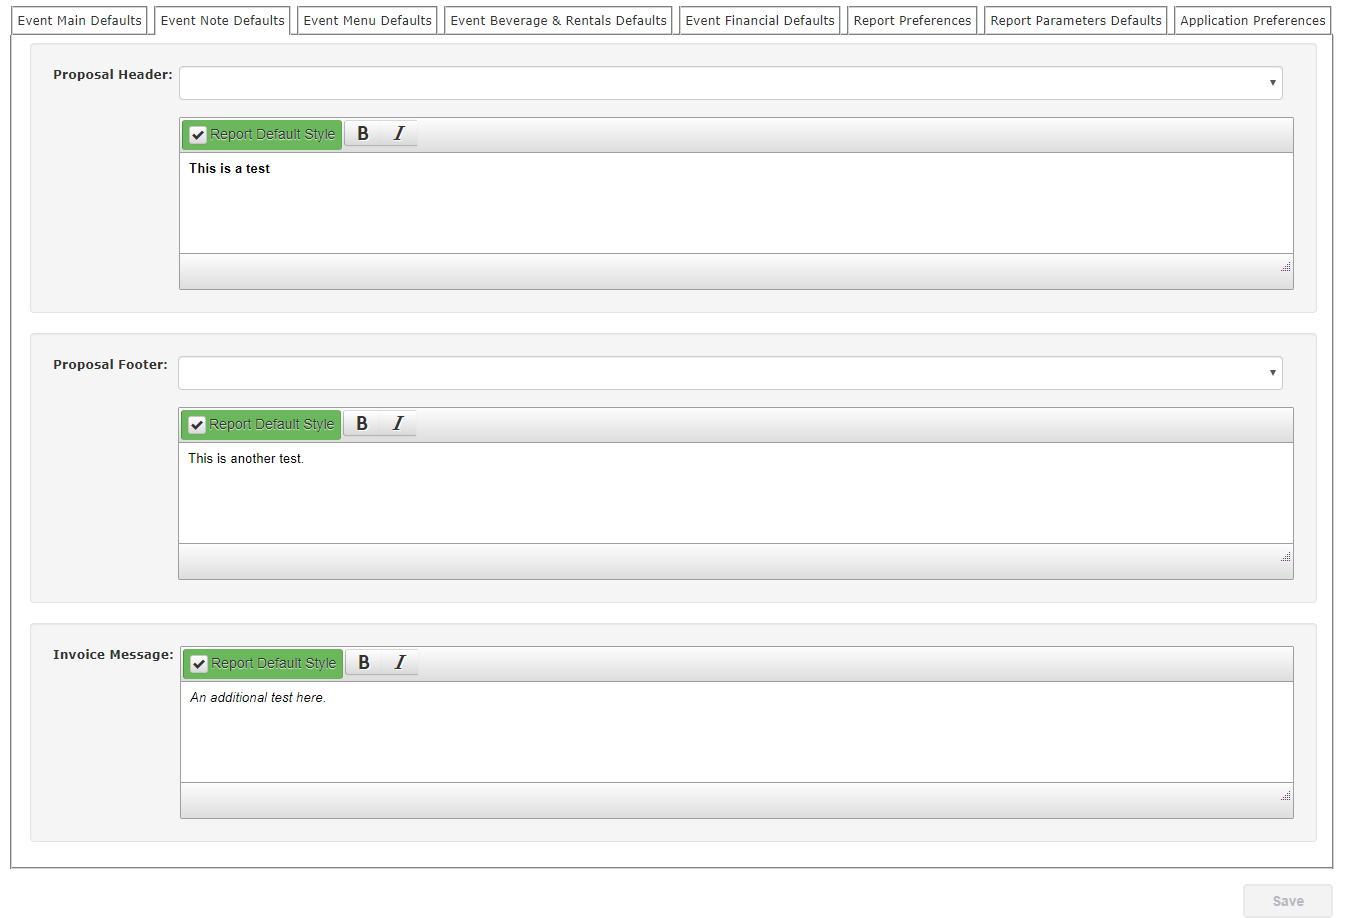
This is where you can designate default notes to be printed on every Proposal and Event.
Event Menu Defaults
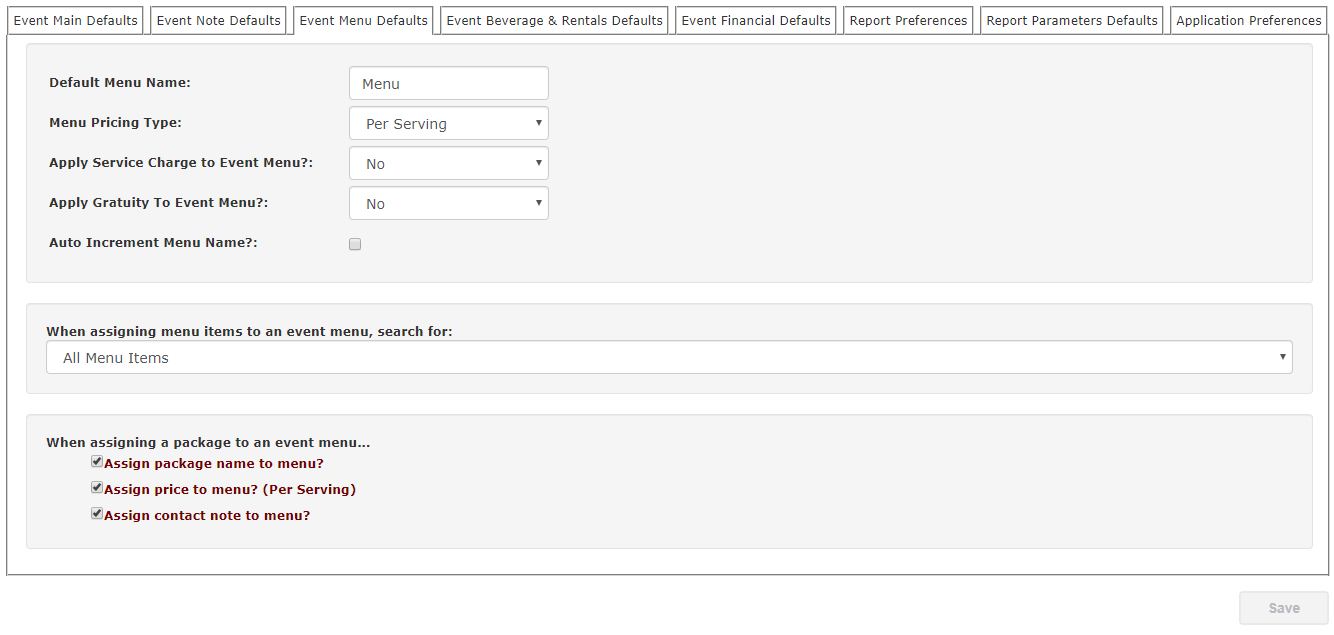
*Default Menu Name: Change what a new menu tab is called by default.
Auto Increment Menu Name: Designate if the system should add “#1”, “#2” and so on to the additional menus added on an event.
*Menu Pricing Type: Choose to default to Per Serving or Per Person
*Apply Service Charge to Event Menu: If you have a service charge that should always apply to the food portion of the event, designate this here.
*Apply Gratuity to Event Menu: If you have a standard gratuity that applies to the food portion of the menu, designate this here.
When assigning menu items to an event menu, search for:
Define what results will show during menu item searches. Choices are All Menu Items (will search main menu items and sub menus, No Sub Menu Items (will only search for main menu items) or Sub Menu Items (will only search for sub menu items).
When assigning a package to an event menu…
*Assign package name to menu?: Override the Default Menu Name with the name of the package you are choosing.
*Assign price to menu (Per Serving): Override the default Menu Pricing Type with the package price.
*Assign contact note to menu?: Check to enter any default notes from the package you chose to populate on the current menu.
Event Beverage & Rental Defaults

Show warning message when event amounts exceed in stock amounts for:
Beverages
Rentals
Ex. If you have 4 tables that you rent to clients and you add 5 to an event, a warning will pop-up to advise you of overbooked items.
In order to know to warn you, you will have to initially enter the in-stock amounts for beverages and rentals and update the on-hand quantities on a regular basis.
You will also need to designate…Event Statuses that are confirmed ordering amounts.
If the event you are adding the items to are marked as one of the designated event statuses, then you will receive the pop-up warning when you try to add more than the in -stock amount.
Event Financial Defaults
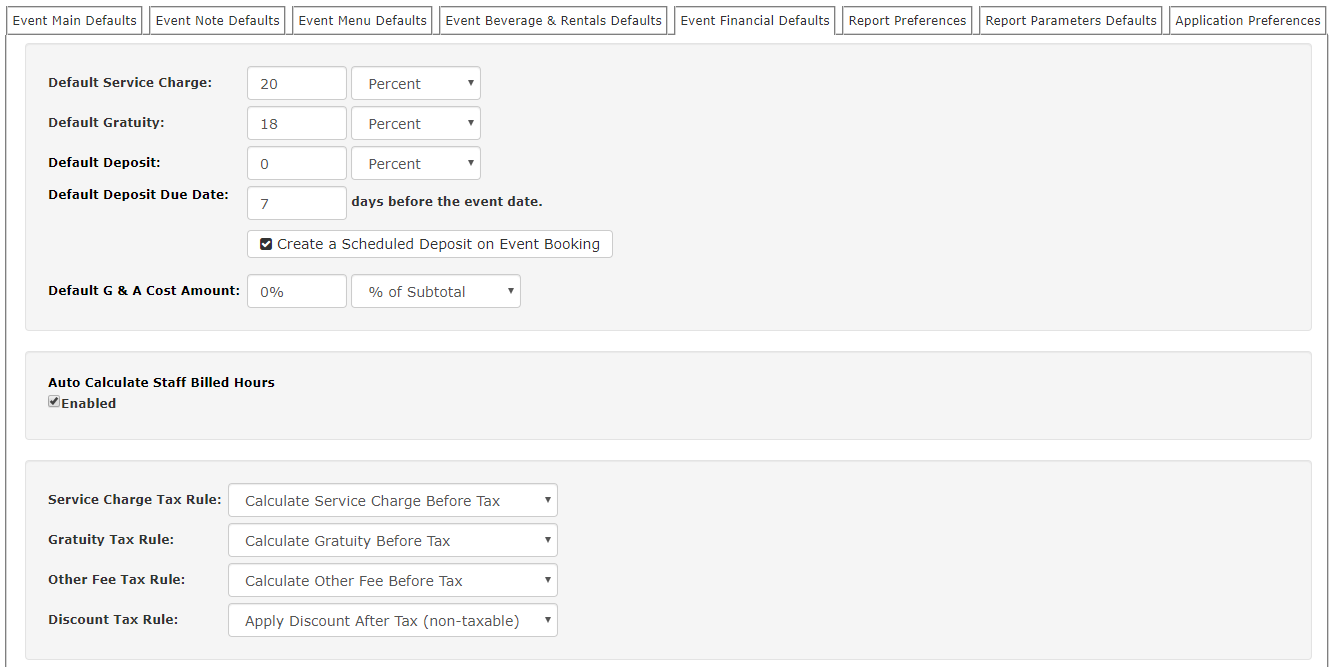
You are able to set a default amount by Flat Rate or Percent to be applied to all new invoices for the following:
* Default Service Charge
* Default Gratuity
* Default Deposit
* Default G & A Cost Amount: You can choose Flat Rate, Per Guest or % of Subtotal for this option.
Auto Calculate Staff Billed Hours: If you would like TPP to automatically calculate your Staff Billed Hours, you can enable it here.
You are able to apply whether you would like the Tax Rules to apply before or after for the following:
*Service Charge Tax Rule
*Gratuity Tax Rule
*Other Fee Tax Rule
*Discount Tax Rule
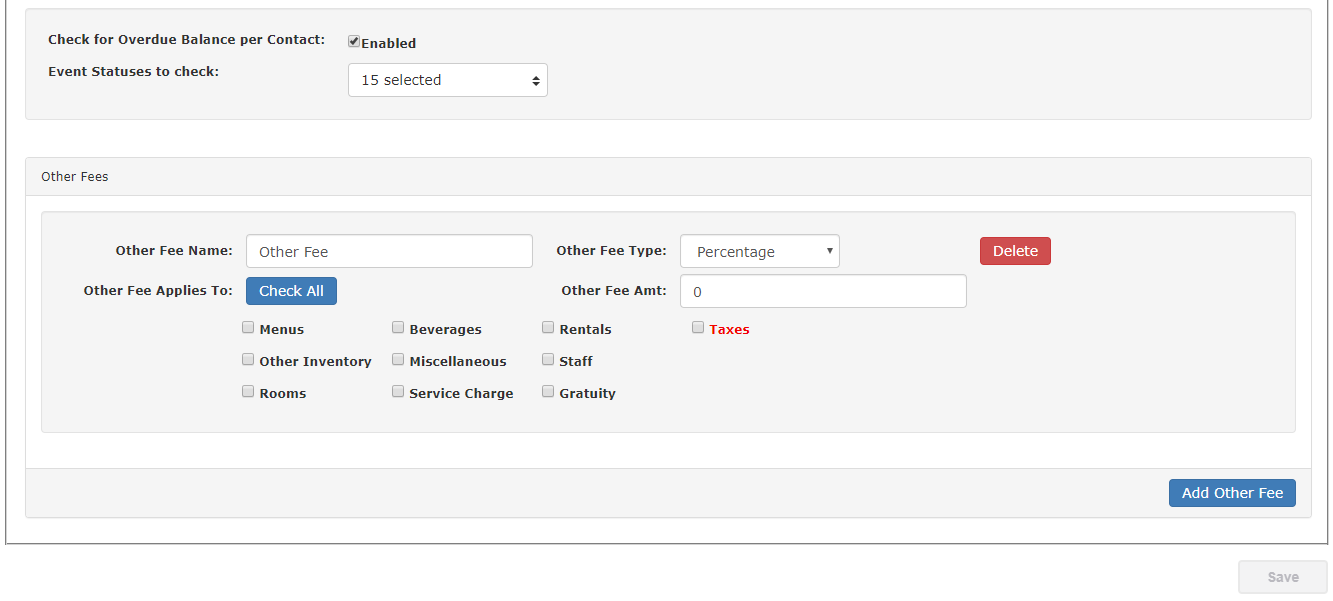
Check for Overdue Balance per Contact
This option allows you to internally show all outstanding balances for a specific contact.
You choose which statuses the system will pull outstanding balances from and it will show on the info tab of their events:

When you click the “Add Other Fee” button you will have the option to add other fees by default to all new invoices.
*Other Fee Name: Enter a custom name for the fee.
*Other Fee Applies To: Define what sections the fee is calculated against.
*Other Fee Type: Choose between Percentage, Flat Rate or Per Guest.
*Other Fee Amt: Define amount of fee.
Report Preferences
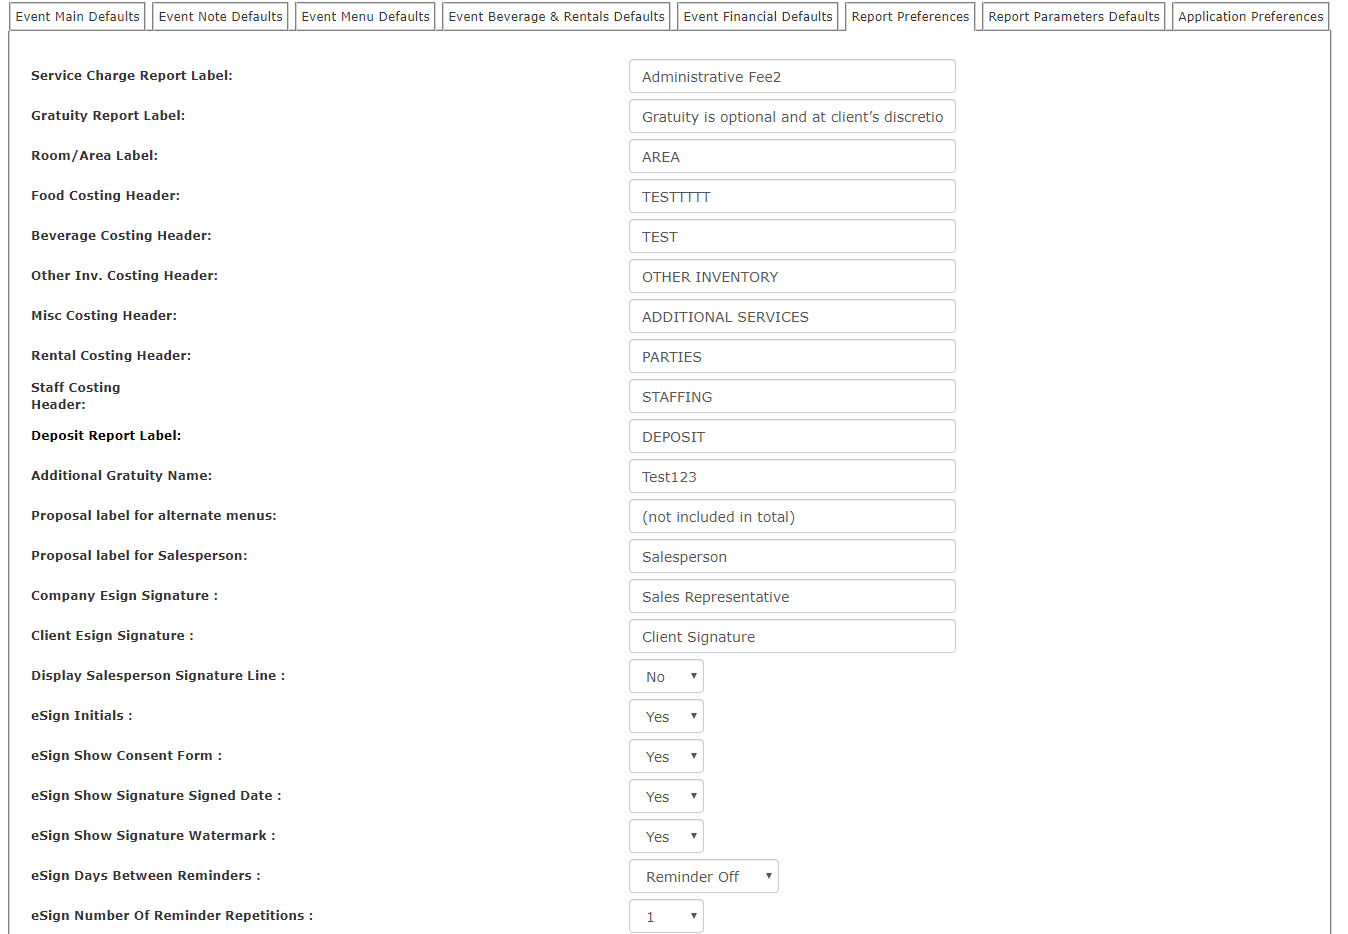
You can set the defaults for how different things are named on your proposals/invoices.
Report Parameter Defaults

Set the default page breaks on your Proposals.
Application Preferences
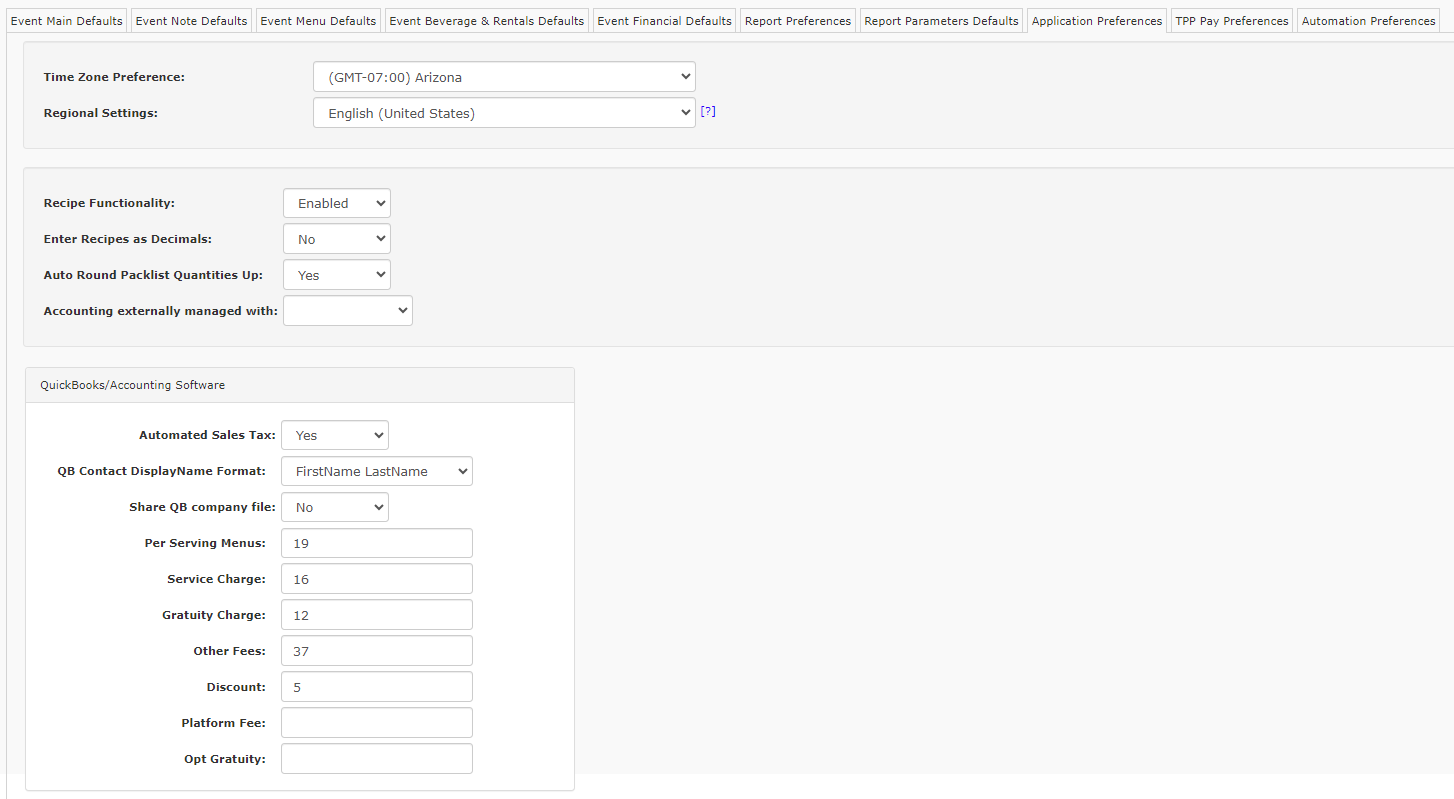
Time Zone Preference: Set your default time zone
Regional Settings: The regional information determines your currency and date formats.
Recipe Functionality: Ignore (TPP Internal Use)
Enter Recipes As Decimals: Allows for more precise recipe measurements.
Auto Round Packlist Quantities Up: Rounds up auto-calculated packlist item quantities.
Accounting externally managed with: Connect your Quickbooks account.
Automated Sales Tax: Allow Quickbooks to automatically assign Sales Tax upon export.
QB Contact DisplayName Format: Set up how your Quickbooks info should format.
Per Serving Menus: Ignore (TPP Internal Use)
Service Charge: Ignore (TPP Internal Use)
Gratuity Charge: Ignore (TPP Internal Use)
Other Fees: Ignore (TPP Internal Use)
Discount: Ignore (TPP Internal Use)
Platform Fee: Ignore (TPP Internal Use)
Opt Gratuity: Ignore (TPP Internal Use)
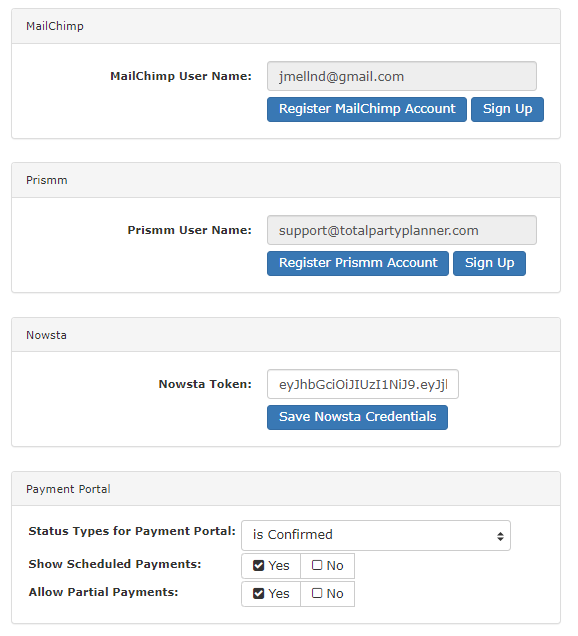
MailChimp User Name: Connect with MailChimp.
Prismm User Name: Connect with Prismm.
Nowsta Token: Connect with Nowsta.
Statuses for Payment Portal: When you send a client a payment link, choose what invoices will show for them as due. (Available with EVO and Authorize.net only)
Allow Scheduled Payments: Allow clients to see/pay scheduled payments through the Payment Portal.
Allow Partial Payments: Allow your client to make a partial payment or restrict it to total balance due.
