A recipe is a group of inventory items that have been entered in the database and ‘bundled together’ to make up the ‘ingredients’ of a menu item.
The Recipe database not only provides reporting functions for your Recipes, but also serves to track the precise cost of preparing each of your Menu Items. Menu Items that have been entered in the database can be associated with recipes for Total Party Planner to calculate Event costs, or simply use ‘Quick Costing’ to get the costs.
Data entry of your recipes only needs to be done ONCE, as changes can be made in the future. Previous entry of a Menu Item and Inventory (ingredients) is required before building the recipe.
Step 1 (Pre-requisite) – Creating your Menu Item
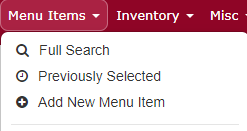
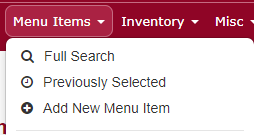
1. Select the ‘Menu Items > Add New Menu Item’ option from the Navigation Bar.


Enter the following information for the Menu Item:

-
- Name: Enter the name of the Menu Item as you want to appear on any worksheets or the Proposal. Be descriptive in your product name to help you build appropriate menus.Helpful Hint: Menu Item names must be unique by category. That is, within a category you cannot have the same menu item listed more than once. However, it is OK to have the same name assigned to different categories. For example, crab cakes can be entered as an appetizers, and then again as an entrée.

- Item Category: Select a category for the Menu Item from the drop-down list. Refer to the topic Custom Lists for more detailed information on updating this list.
- Options:
- Menu Item is a Beverage: Check this box if this Menu Item should accumulate on the ledger report as a beverage sale.
- List as a Sub-Recipe: If this Menu Item can be used as a sub recipe, check this box. Refer to the Sub Recipe topic for an example of the sub recipe feature.
- Description: Enter a description for this Menu Item. This description will appear on Contact menus and proposals, so be creative! This field is automatically spell checked. A red line will appear under any misspelled word. Right click the word to see spelling suggestions.
- Sale Price: A Menu Item may also be sold ‘itemized’ on an Event menu. Menu Items with a sale price are assumed to be a unit like sandwich, tray etc. If there is no Sale Price (ie., this item will never be sold as an individual unit), enter 0.
- Quick Costed? An estimated cost of a serving of the menu item.
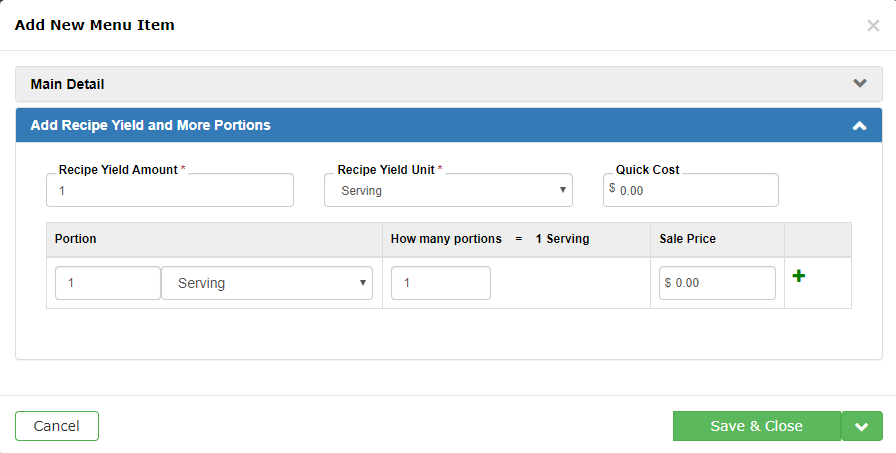
- Define Yield and Portions: Set the portion size and yield amount for the recipe
- Name: Enter the name of the Menu Item as you want to appear on any worksheets or the Proposal. Be descriptive in your product name to help you build appropriate menus.Helpful Hint: Menu Item names must be unique by category. That is, within a category you cannot have the same menu item listed more than once. However, it is OK to have the same name assigned to different categories. For example, crab cakes can be entered as an appetizers, and then again as an entrée.
2. Once you have entered all the information concerning this Menu Item, click the ‘Save’ button.
Step 2 (Pre-requisite) – Creating your Inventory (recipe ingredients)
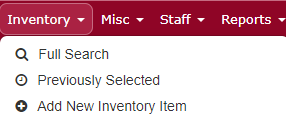
- Select the ‘Inventory > Add New Inventory Item’ option from the Navigation Bar.
- Enter the following information for this item:
- Item Name: Enter the name for this item that you would refer to internally (not vendor name).
- Classification: Select whether this item is classified as a ‘Food’, ‘Beverage’, ‘Equipment’, or ‘Other’.
- Category: Select a Category for the item from the pull-down list. If a category you need does not appear, click the ‘Quick Add New Category’ button to add a category on the fly. For more information on editing the category list see the topic Inventory Categories.
- Description: Enter a description for the inventory item. This is particularly useful for beverages and rentals. Descriptions will appear on the Proposal of Service report similar to menu item descriptions.
- Purchase Qty/Unit: Enter the numeric portio
 n of the item’s unit of measure in which you purchase the inventory item (ex:1). Enter the measurement portion of the item’s unit of measure in which you purchase the inventory item (ex: Case(s)).
 - Shelf Qty/Unit: Enter the numeric portion of the item’s unit of measure in which you would shelf the inventory item (ex: 12). Enter the measurement portion of the item’s unit of measure in which you would shelf the inventory item (ex: Can(s))
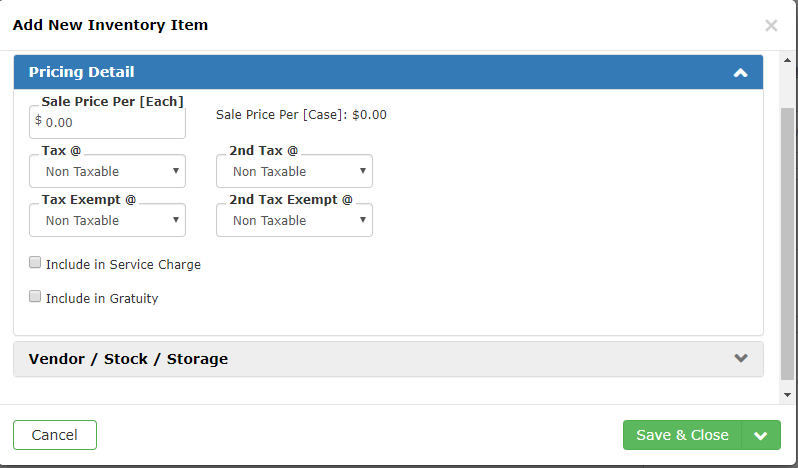
- Cost Per: Enter the Cost for the item in the units that you purchase.

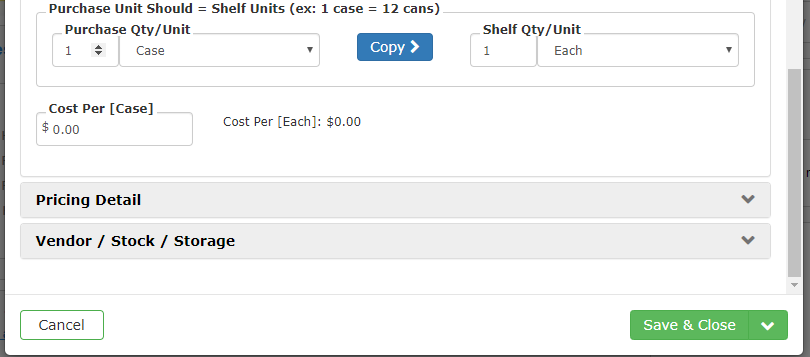
Helpful Hint: The total purchase unit amount and measurement MUST EQUAL the total shelving unit amount and measurement (Ex: 1 Case(s) = 12 Can(s)).
-
- Sale Price: For beverage, equipment and other inventory items only. Enter the actual charge to the contact for the unit amount and measurement selected.
- Tax Scheme, Tax Exempt Scheme: Select the appropriate tax for this item. Selecting Non Taxable will cause the item not to be taxed on the invoice. Selecting Tax 1, 2, or 3 applies the actual Taxes setup from the ‘Administration > Business> Taxing Rules’ option from the Navigation Bar. In addition, select the appropriate default tax rule for tax exempt events.
- Second Tax Scheme, 2nd Tax Exempt Scheme: Second tax if applicable for this item. In most cases you will leave this as nontaxable for non Canadian business. An addition, select the appropriate default tax rule for tax exempt events.
- Include in Gratuity?: Check the box to include the item’s cost in the Gratuity calculation, otherwise leave blank.
- Include in Service Charge? (when sold as Beverage or Rental): Applicable to inventory classifications of ‘Equipment’ and ‘Other’. Check the box if the item should be included in the calculation of Event service charges, otherwise select leave blank.
Helpful Hint: If the Purchase and Shelving detail are identical (ie., the shelving detail does not break down into smaller units than the purchase detail, click the ‘Copy Purchase Detail’ button. The shelving detail fields will auto populate from the purchase detail.
-
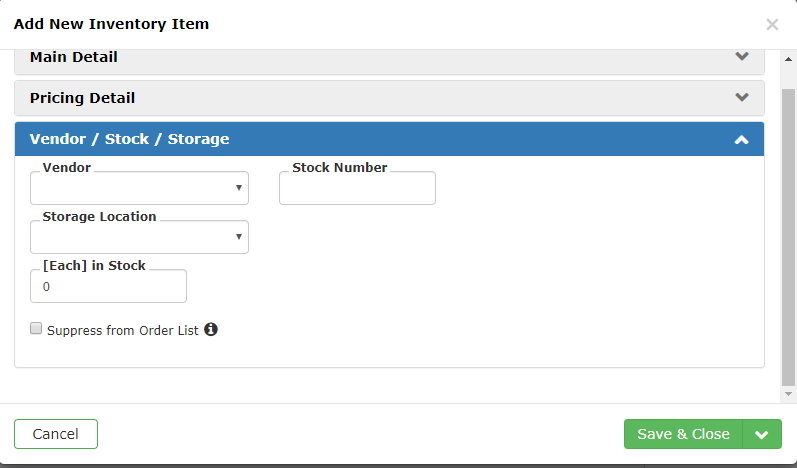
- Vendor: Select the Vendor for this item from the drop-down list. If the Vendor for this product does not appear, click the ‘Add New Vendor’ from the drop-down menu to quick add the Vendor name (the rest of the Vendor information such as address, phone number, hours, etc. can be edited at a later time through the ‘Vendors’ tab).
- Storage Location: Select where this item is stored. If the location is not listed, select ‘Add New Location’ from the drop-down menu.
- Stock #: Unique stock number.
- In Stock: Enter in the amount you currently have in stock.
- Click on the ‘Save’ button when you are finished.
Step 3 – Building the Recipe
- Select the ‘Menu Items > Full Search’ option from the Navigation Bar.
- Using the search function, find the menu item just added to the database. Be sure to click the ‘Search’ button to apply your criteria. Refer to the topic Updating Menu Item Data for more detailed information on searching.
- Select the Menu Item by clicking the item link.
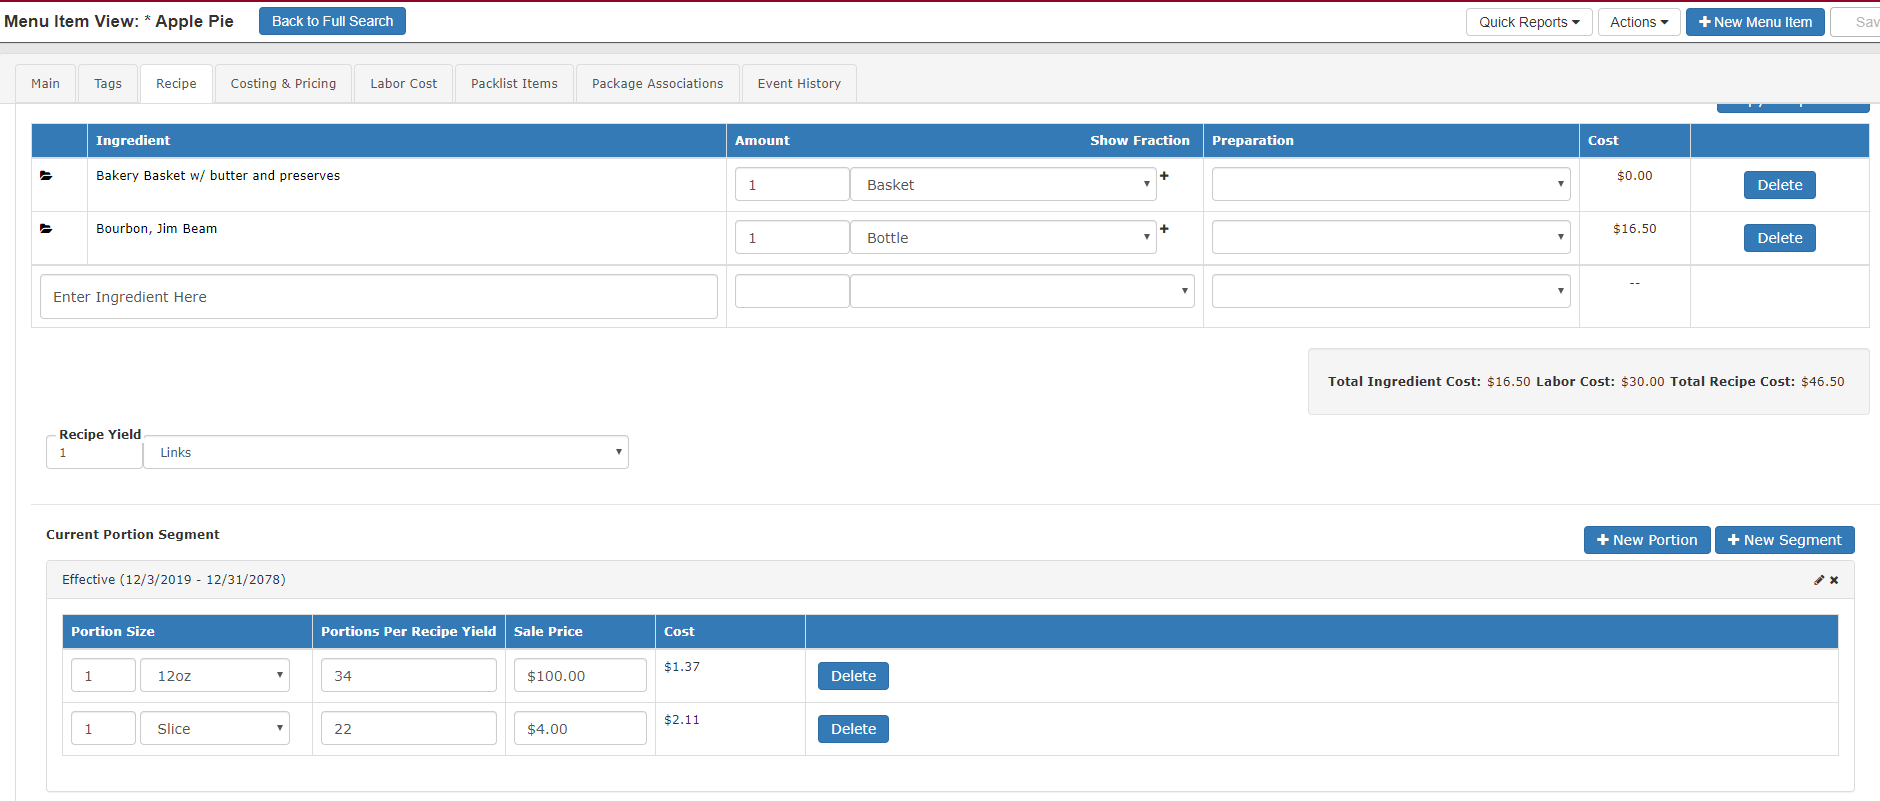
- To Begin Adding ingredients to the recipe click on the ‘Recipe’ tab.
Specifying Number of Servings & Yield
-
- Enter the ‘Recipe Yield’ or how many people the recipe will serve.
- To edit the portion, click the current portion to make the field editable.
- Enter the ‘Portion Size’, the ‘Portions Per Recipe Yield’ (how many of this portion is equivalent to the yield), and ‘Sale Price’.
- Click the ‘Save’ button in the top right hand corner.
Adding Ingredients
- Begin typing your food inventory item in the textbox labeled ‘Enter Item’. The system will automatically search for the item for you to select in the list below.
- Once you have selected your item, enter the amount needed (numeric value) in the ‘Amount’ grid column.
Note: This is the amount required to prepare for the number of servings you specified your yield
- Select a ‘Measure’ (cups, ounces, pounds, etc) from the drop-down list.
- Choose a ‘Preparation’, if required, from the drop-down list. Preparation items are things such as chopped, diced, cleaned, cut, etc.
- Click the ‘Add’ button to add the ingredient to the recipe.
- If the selected ‘Measure’ is incompatible with both the purchase unit and shelving unit (ie., there is no logical conversion), Total Party Planner will prompt you to enter a manual conversion. Enter the values to make the prompted values “equal”. You can view the ingredient’s current purchase and shelf units in the grid to see if a further conversion is going to be necessary.
Deleting an Ingredient
-
- Select the ingredient you wish to remove from the recipe by clicking the ‘Delete’ button.
- Click ‘OK’ to confirm the deletion.
Re-sequencing Ingredient Order

-
- Ingredients are added to the recipe in the sequential order they were picked. As an option, you may choose to reorder an ingredient to a specific position without rebuilding the whole recipe grid.
- Click the ‘Sequence Order’ tab.
- Select the ingredient row to be moved.
- Drag and drop the ingredients until they are in the order you wish.
- ‘Save’ in the top right corner.
Step 5 – Adding the Method (Recipe Instructional Text)

- Click the ‘Recipe Method’ tab
- Enter the step-by-step instructional text of how you would prepare this recipe.
- Optionally enter the ‘Heating & Serving’ instructions.
- Click the ‘Save’ button in the toolbar to the left.
Step 6 (Optional) – Adding Labor Cost
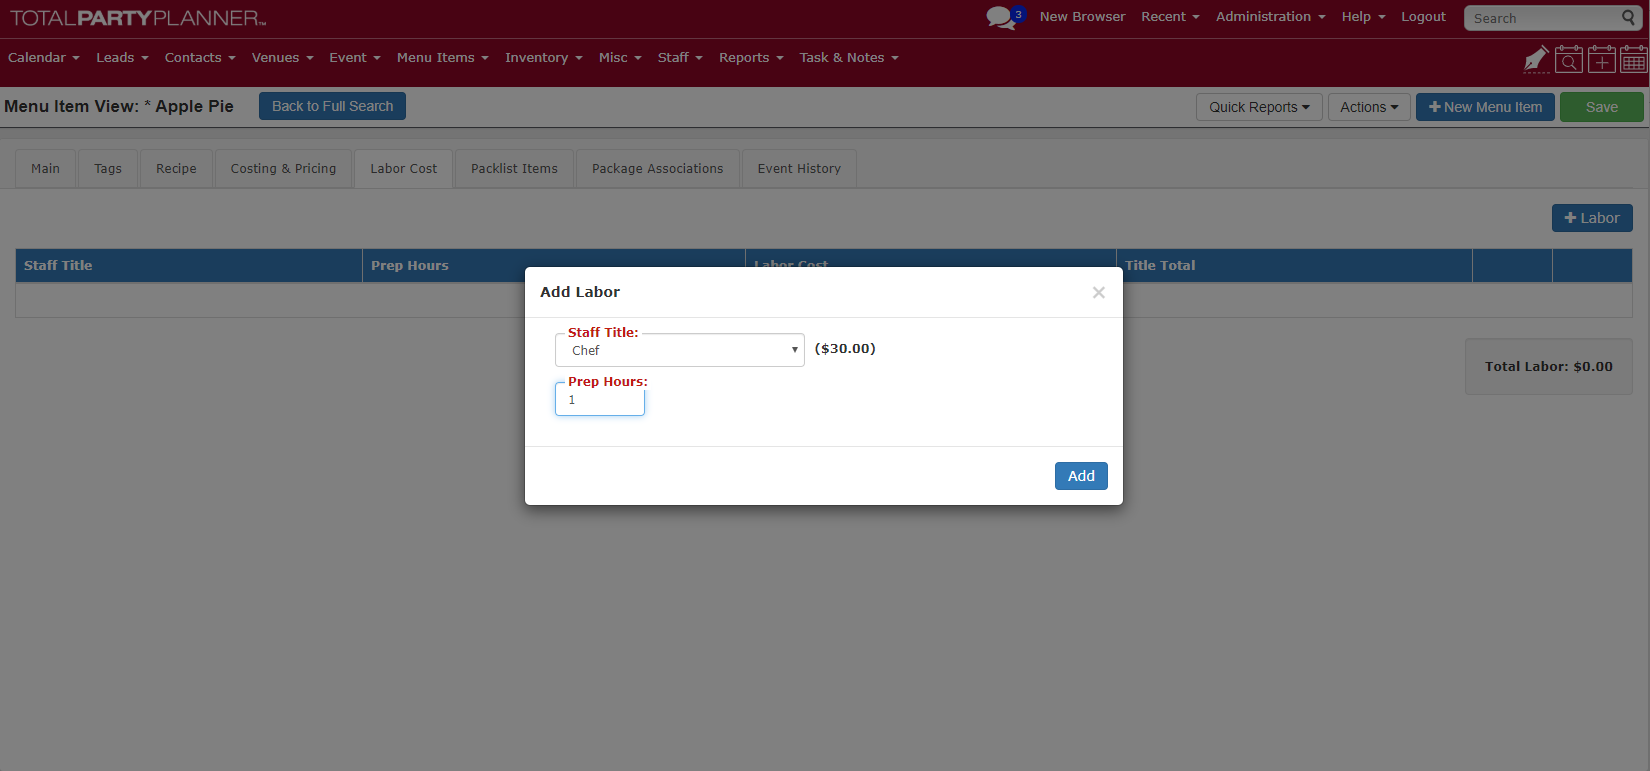
- Click ‘Labor Cost’ tab.
- Click the ‘+ Labor Title’ button.
- Select a ‘Staff Title’ from the drop-down list. This title will have a general wage dollar amount associated to it. This is where the costing comes from when adding to the recipe
- Enter the total number of ‘Prep Hours’ that this title will have to spend to prepare for the serving count defined for the recipe. The total wage cost is a multiplication of the number of hours times the wage.
- Click ‘Add’
- Click the ‘Save’ button.