Linked areas are beneficial in organizing your events in both off and on premise venues with multiple rooms available for events.
The goal is to have a single venue for an address even if various areas exist in the venue.
Associated to that physical address are different areas.
Example: St Mary’s Hospital has one address but multiple rooms within that address that may be used for events or deliveries:
- East Wing
- 3rd floor: Conference Room B
- Orthopedic Ward
The third tab of the Venue View is labeled Linked Areas.
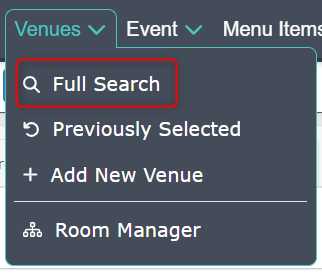
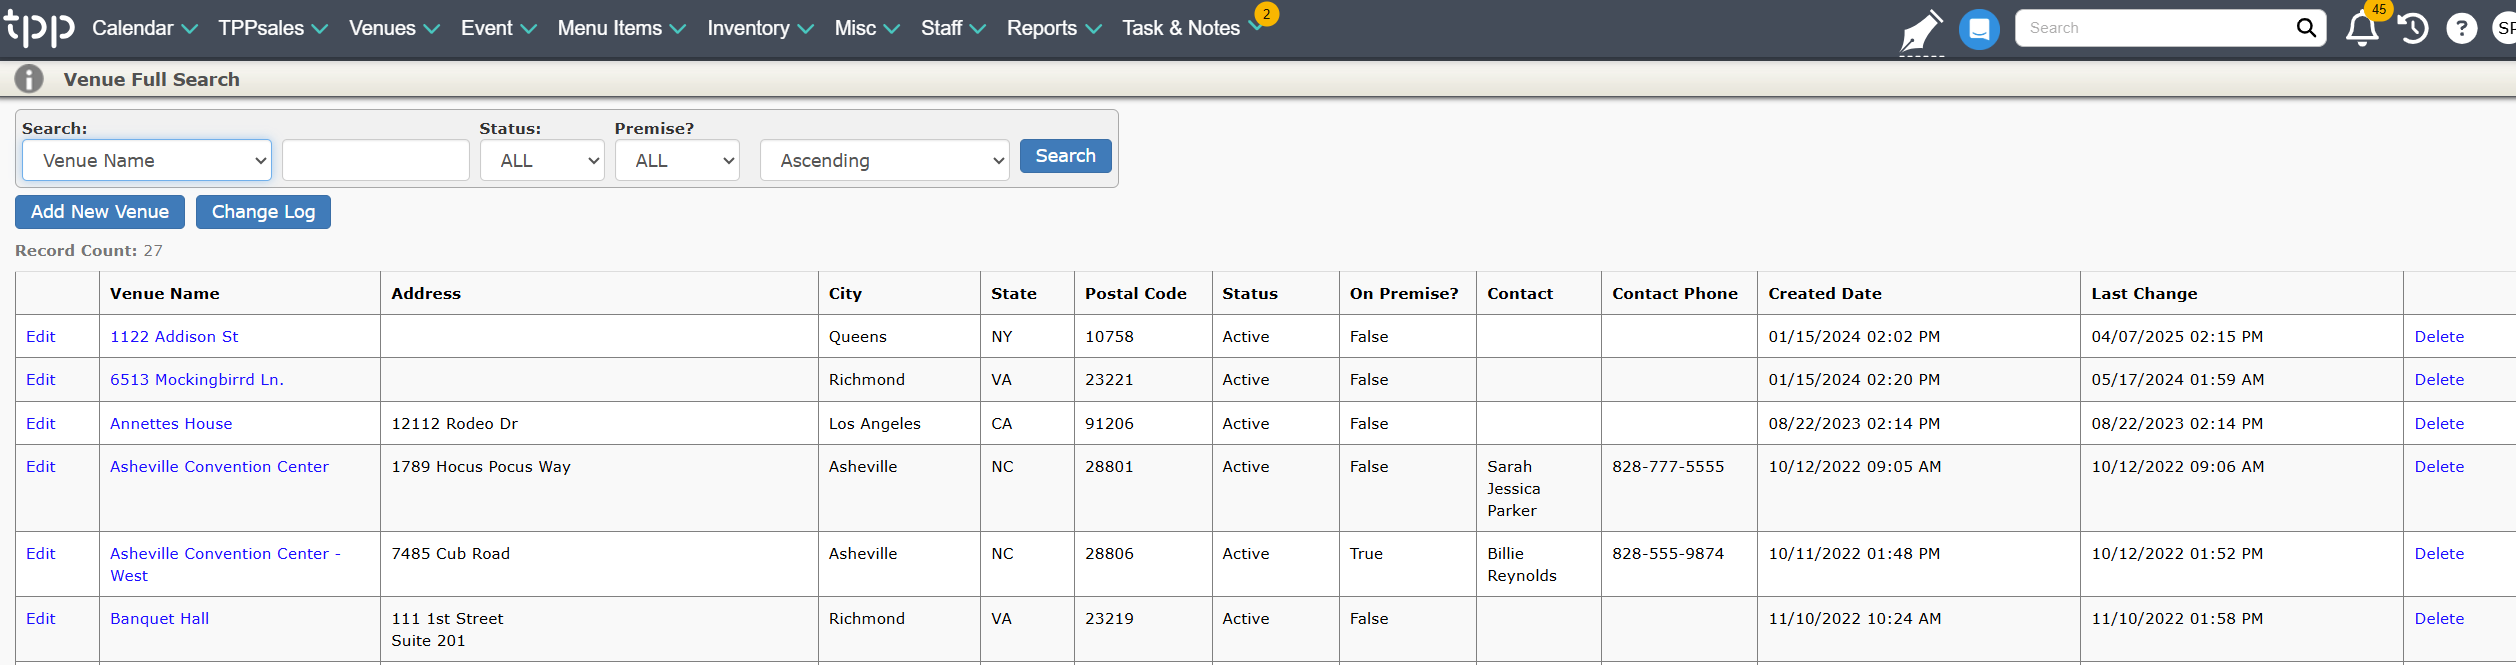
- Select the Venue > Full Search option from the Navigation Bar.
- Select the Venue to edit by clicking Edit or by clicking the Venue Name.
Adding an Area

While you are in the Venue View click the Linked Areas tab.
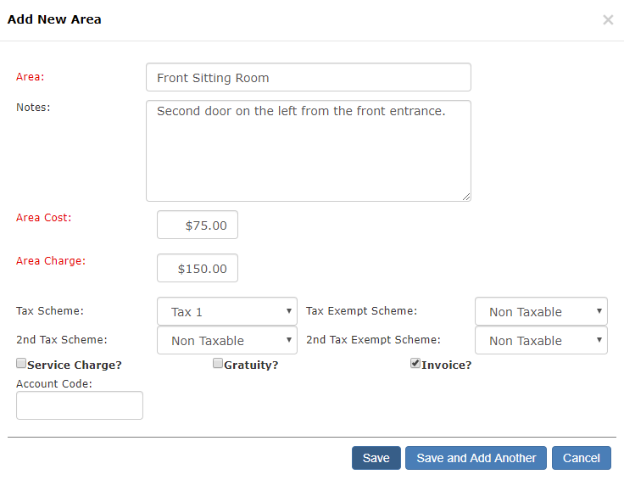
- Click the blue + New Areas button
- Area: The name of the area at the address
- Examples: James River Conference Room, Suite 301, etc.
- Notes: Specific notes for your staff about the area
- Examples: No open flames allowed. Do not enter through side door. etc.
- Area Cost: If your company has to pay the venue to use that area, enter the cost here
- Area Charge: If you need to charge your client for using that area, enter the charge here and it will show on their proposal/invoice
- Tax Scheme: Designate how taxes are applied to any charges for using the area
- Service Charge: If you charge your client any type of service charge percentage, does it count towards the Area Charge?
- Gratuity: If you charge your client any type of standard gratuity percentage, does it count towards the Area Charge?
- Invoice: Set up whether the Area Charge is invoiced by default and visible to the client
- Account Code: Field that is used by Quickbooks
- Area: The name of the area at the address
- Click the ‘Save’ button.
Note: Duplicate Areas may not be input for the same Venue.
Editing an Area
- Click the pencil icon all the way to the right of the Area name.

- Make your desired changes.
- Click the Save button when finished.
Deleting an Area
- Click the Delete icon (X) to the right appropriate Area.

- Click Yes to confirm the deletion.
Note: You cannot delete an area that has been assigned to an event.
Sub Areas
Each Area can be further divided into Sub Areas. This would allow you to further define a location in a building:
Example:
- Venue: James Center
- Area: 3rd Floor
- Sub Area: Conference Room J
They are added and updated the same way as the main Areas.
- Click the Update Sub Area link next to the appropriate Area.
- Click the blue + New Sub Area button.
- Sub Area: Name of the sub area
- Notes: Any specific notes related to the area.
- Area Cost: If your company has to pay the venue to use that area, enter the cost here
- Area Charge: If you need to charge your client for using that area, enter the charge here and it will show on their proposal/invoice
- Tax Scheme: Designate how taxes are applied to any charges for using the area
- Service Charge: If you charge your client any type of service charge percentage, does it count towards the Area Charge?
- Gratuity: If you charge your client any type of standard gratuity percentage, does it count towards the Area Charge?
- Invoice: Set up whether the Area Charge is invoiced by default and visible to the client
- Account Code: Field that is used by Quickbooks
- Click the ‘Save’ button.
Note: Duplicate Sub Areas may not be input for the same Venue.